Video Transcript
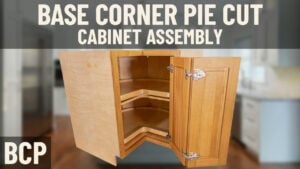
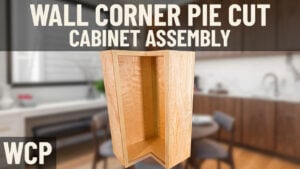
[Music] If you've bought cabinets from us before, you might have heard the term "sauce hinges". It's the hinge that was used historically to join two doors together on the spine, two doors together for our lazy Susans, pie cut wall cabinets, any door, any cabinet where you had two doors you'd have to fold out of the way. We don't like the sauce hinge anymore, so we're beginning to use a new hinge from Bloom. We want to show you how that installs. It's pretty straightforward. Let me walk you through the parts first, then we'll go into the installation of it itself. And it's not, in my mind, it's not near as difficult as a sauce hinge, and it gets you a much more adjustable operation. Now, the reason we don't like the sauce hinge is because there is no adjustability when you install inset cabinets, particularly when you install two doors inside of one opening. If you can picture a pie cut wall cabinet, you've got a pie cut and two doors are filling that one angular opening. The problem is there's a lot of weight with those two doors hanging on those sauce hinges that are joining the two doors together, and you can't adjust it up. So we have a real hard time getting the gaps consistent. If you're insistent upon using a lazy Susan cabinet in your inset installation, these hinges are about the only way I'd go. But we're beginning to use them for all of our Lazy Susan and wall pie cut applications. So alright, let's get started.
So what I've got here, your each Lazy Susan cabinet is going to come with two packs of hinges. Here's the unopened one, and what is in there are two hinge plates. Let me show you how to use all these in a moment. Two inch plates, two hinge bodies, and then eight screws. I believe it's eight, a bunch of screws, all the screws you'll need. So I'm going to show you how to put these on now, but there's a couple of other things you're going to need. One is a drill. We like to use, you can buy them at Lowe's or Home Depot, as a self-centering drill bit. So when you put it into a hole such as in your hinge, it'll force the drill bit to the center of that hole. But if all you have is a normal drill, that's fine, you can use a pencil, and then just take the hinge off and pre-drill it. I'll show you that operation in a minute. And then of course you need a Phillips head drill bit, and you can use the same drill. We tend to use the impact driver to drive the screws in, and the drill is a separate device. The other thing I use to square the doors up is just a square of some sort, can be anything square, and I'll show you that in a moment. Doors themselves, you're going to have one door that's going to have this kind of half circle cut off the edge of the door, and then your normal hinge. This hinge hole is the one that is used to mount the two doors to the one side of the cabinet. So we're not talking about that, we're going to be working on this hinge hole. The other cabinet door has no hinge boring at all, just a clean door. Okay, so what we do is I like to have a piece of plywood three-quarter thick, you can use another door as long as you pad it, just got to be something that's three-quarter thick. The reason that's important, you'll see it in a second, is this door needs to start off three-quarters of an inch higher than this one to make this operation work. So just pad that surface because you've got this door face down, pad that surface with some of your white foam. Alright, so I'm going to get ready to go here, let's take a quick break and I'll come back in a second and show you what we're doing.
Okay, so you've opened up your hinge pack, you've got the plate and the arm. What you're going to do is there's a bar, a little bar in here, you're going to nest that bar into the hook right here, nest it in, and just press it till it snaps, and now that's an assembly. What you're going to do is set each of these assemblies in just the way I have them here. This c-shaped one, you can see that flat edge goes along the edge of the door. Let me drop that in, and that sits there. Now, what's very critical here is these two doors have to be squared to each other. So just grab any kind of straight edge, doesn't matter what, and just kind of, as a buy eye, just make sure the two door tops are in the same location. You don't want one higher than another. Beautiful thing about these hinges is they're six-way adjustable, so we can make the two doors line up about a quarter of an inch, maybe 3/16 of an inch of adjustability. So it's a really nice feature of these hinges that the sauce does not have. Now, what I've got to do is mount all this to the door. So if you don't have one of these centering bits, which are about eight or ten bucks at Lowe's, I would suggest getting one. If you don't have one, just take your pencil and mark your holes. There's four holes, you can do that. Take the assembly back off, run your pre-drill with your normal drill bit, put the assembly back on, and run your screws in. I've got the screws laid out here. I'm going to use my centering bit because I like that better, and you can see how that works. And the way that does work is you have a collar that retracts as you press it in to expose the drill bit, and the collar is tapered, and it forces itself into that screw hole. So it's going to make sure my screw holes are centered, or my pre-drills are centered. So I'm going to hold this firmly, put my collar in there, and press the controls how deep I run it as well. And just so I don't get any drift, I'm going to mount that hinge to that door now with my supplied screws.
So that's now an assembly. Now what I do is just make sure this edge is like a little hook, top and bottom, just make it sure it's pressed right up tight to the door edge, and I'm going to grab my pre-drill again, grab my two screws, and now that assembly is done. I'm going to do the same thing on the bottom end of the door, and then I'll pick it up and show you how it works, how the doors fold, and talk about some of the adjustability. Be right back.
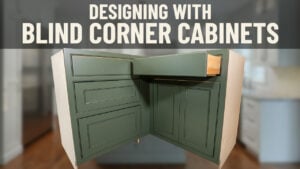
Okay, so here's my assembled doors with this new Bloom hinge. You're looking at this door set as if it's on the lazy Susan cabinet. So I kind of put these hinges on here, they're not screwed, I just place them in. These are the hinges that go on your 170-degree hinge pack that allows this door, when you open it, to fold all the way out of the way. These doors now become flat and you have full exposure to the inside of your lazy Susan cabinet. When you close it again, these hinges actually have a snap to close, like there's a spring action and it'll actually pull the door shut. So you'll have bumpers on both sides of the L and it will pull that door nice and tight. The old sauce hinge did not have that, and sometimes your door would kind of creep open on the non-hinge side. Just a really nice setup and you can see it's a nice tight gap going down here, you can barely see those hinge arms inside. It's just a super slick hand if you really like it. So let me pull these off so I don't bump them. Now I'm going to turn the door as if you're sitting inside the cabinet and this is the side that had the funny c-shape cut out. There's no adjustability here, all your adjustment is on the arm. There's three screws, one here, one deep inside that well, there's like a little hole there, and then one here. This first hinge makes the door slide this way, I'm sorry, just go this way. So the arm will push the door away. What that would control is if you had your bumper in here and you're like, "Hey, my front frame on the inside isn't lining up at the front of the door," I can push the door in and out this way. Okay, the second hole in is going up and down. So if my two doors were out of alignment or I have to close the gap between my front frame top and the top of the door, I can do that and I will throw this door up or down. And again, you've got about 3/16 of an inch of throw, total throw. This rear screw is in-out, so if I have to close my gap down against my left front frame edge, I have a two bigger gap or too small a gap, I can throw the door this way. Alright, remember this door is controlled by my other hand, this door is controlled by this. They're two independent operations, so you can really get some adjustment there that will help you offset. Let's say you screwed your lazy Susan to the wall and your installer or you, if you're the installer, kind of torque the cabinet a little bit and then knocked it out of square, you can help offset some of that just through the adjustment of the doors. Okay, if you're having a hard time getting your adjustments right, you might want to check if you did in fact twist the cabinet when you installed it. Back off on one of the screws, check your openings. I really strongly suggest putting these doors on, whether it's the old sauce hinge or this style, mount these doors on your installed lazy Susan cabinet before you put the countertop on. And that way you can get to the back screws to adjust how you have it installed to get the doors to line up. And then once you've done that, continue with your installation of your adjacent cabinets, put your tops on, and you're good to go. So anyway, I'm going to put a last plug in and say, as a cabinet guy, I don't really like lazy Susans with inset. I think you're always going to fight the doors not squaring up on the openings, it's just the nature of the beast. We talk about that in a different video. If you're forced to use lady Susans, go ahead and use this hinge, but I'm really a fan of blind corner cabinets. I know nobody likes them for inset, it's a better call, or a diagonal cabinet with one door. But that should help you very much with inset, we're using this hinge inset or overlay, but it's really a gem when it comes to inset. So if you have any questions, contact your cabinet coach. If you're not sure which hinge you're getting on a job you're about to release, it should be this hinge, this is our new standard, but you might want to ask the sales rep, "Hey, can you just make sure I'm getting the Bloom hinge and not the sauce hinge?" and just give them a call at 888-211-6482. As always, thanks for watching. [Music]


