Reasons to Consider Refacing
The existing cabinets are of high quality and not worth replacing
Many kitchens built in the 50’s and 60’s were ‘site built’ cabinets and were quite well made. Heavy duty materials and quality craftsmanship were not uncommon. Even many modular, factory built cabinets are of a very high quality and may not need to be replaced. Re-facing is a great way to take the quality ‘skeleton’ and cover it with new, quality materials in today’s styles.
You just replaced your countertop with granite or quartz:
If so, you have a problem… Most granite shops will not remove an existing stone top because it will surely crack in the removal process. Even if they have you sign a waiver to cover them, there is a good chance that the tops will still crack during removal, leaving you with a costly replacement bill. Re-facing allows the existing tops to stay where they are.
You are planning on selling soon:
If you are planning on selling in the next 2-4 years, a reface may make sense for you because you will recoup more of the investment (probably more than 100% if you do it yourself) than if you did brand new cabinets. Plus, re-facing the kitchen will add the same curb appeal as a new kitchen and the buyer will never know the difference.
You do not want a long, invasive kitchen remodel process:
Unfortunately, a full kitchen remodel is a long and sometimes frustrating process, leaving you without a usable kitchen for weeks or even months. Re-facing allows you to remain functional in your kitchen (you never remove the sink or counters, etc.) and complete the reface in a matter of days.
But regardless of how much it makes sense in your case, you may hear re-facing has a bad reputation. Let’s address these concerns…
Re-facing uses inferior materials:
Not true. The doors and drawer fronts used in a reface (when purchased from us, at least) are the same doors and same quality as the ones used on our legendary Conestoga RTA cabinets, the best in the industry. The veneers are real wood and finished using the same materials and topcoats as the RTA cabinets and doors. Solid wood re-facing molding (described later) and trim moldings are all solid wood and again, feature the same finishing materials. Drawer boxes are solid wood dovetailed and drawer glide are Blum’s full extension soft close glide.
Re-facing leaves an inferior result
Again, not true. The quality of today’s veneers (with wood backers, etc.), adhesives (which are readily available at Lowes) and other products and materials ensures that the kitchen will look just like a brand new one. The only way people can tell a kitchen has been refaced is if they open the doors and see the original cabinet interiors. And even those can be painted or skinned with veneer if they are not presentable.
Re-facing costs as much as a new kitchen:
Actually, there is some truth to this. We routinely see bids for re-facing for a small 10 x 10 kitchen from major re-facing companies and are shocked at what they charge. $10-12K is not uncommon. However, the purpose of this page is to describe why do-it-yourself re-facing is so much more reasonable. The materials to reface this same kitchen might be $2-4K, saving you thousands of dollars!
So how does a DIY reface work?
While what follows is not meant to be an exhaustive documentary on how to do complete a reface, its intent is to give you an overview of the process so that you can determine if this is something you would want to consider. We are happy to answer any questions you may have. Just give us a call or shoot us an email!
First, here is a list of tools and materials you will need, not including the new doors, veneer, etc.:

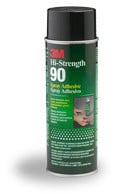
 Spray applied contact adhesive: Available at Lowes or Home Depot. Made by 3M and comes in a spray can. This is basically counter top adhesive.
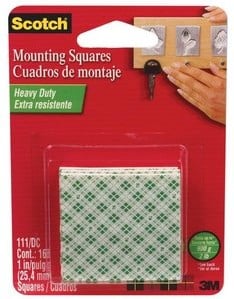
- Adhesive squares or tape for mounting drawer fronts.
- J-roller: Used for rolling air bubbles out of veneer as you apply it to your cabinet sides or faces.
- Pneumatic finishing nailer that shoots the smallest possible brad or pin. We like 23 gauge, but these are hard to find.
- Chop saw for cutting crown, refacer’s molding, etc.
- Table saw for making rip or cross cuts on plywoods.
- Orbital hand sander (preferred) or other hand sanding equipment.
- Cordless/corded drill/screw driver
- Various hand tools such as hammer, chisel, scrapers, screw drivers, tape measure, etc.
 Spray applied contact adhesive: Available at Lowes or Home Depot. Made by 3M and comes in a spray can. This is basically counter top adhesive.
The Process…
- Measure for your new doors & drawer fronts: We suggest you visit our page on measuring for your cabinet doors to get a better understanding of how to do this as it is more than we want to get in to here. Suffice it to say, it is not difficult to do, but care must be taken and some decisions must be made as to what door ‘overlay’ you want to use as you do not need to use the same overlay you currently have. Perhaps a more ‘full overlay’ euro look is what you are after.
- Measure for your veneer and cabinet facing trim: There are two ways to reface a cabinet box. One uses thin solid wood facing on the cabinet front frames and veneer on the cabinet sides. The other uses veneer on the whole cabinet. We prefer using the first method: veneer on the sides and solid wood facing molding on the cabinet fronts. This article will assume this.To measure for your veneer: Keep in mind that veneer comes in 4 x 8 sheets (rolls) and can easily be cut with a utility knife. As you measure your cabinet sides, try and factor in the best yield on a 4 x 8 sheet. Allow for a little extra for unforeseen issues or mis-cuts. As an alternative, you can order your cabinet sides as 1/8” or ¼” precut plywood. This is a little more expensive to do, but makes the install quicker.
 To measure for your re-facing trim: Our trim comes in ¼” thick, 96” long strips. The widths can be anything from 1” to 6” in 1/16” increments. The face and two long edges are pre-finished. You should try to order the molding in the proper widths so that no ripping needs to be done – only cutting to length. Measure the width of all your face frames and order enough material to cover them, factoring in the yield loss from cutting to length. On exposed cabinet sides, you will want to allow for the edge of the re-facer trim to hang past the cabinet side so that whatever material you are using to cover the cabinet sides can tuck up behind it.
  Measure for you crown and trim: We suggest you order crown and light rail moldings for your cabinets. The light rail molding allows you to finish off the cabinet bottoms with ¼” plywood and then cover the leading edge of that plywood with light rail molding.
- Optional: You can also replace your drawer boxes and drawer glides. Assuming you are using our Blum Tandem soft close glide, you will order your drawer boxes 3/8” less than the width of the opening they are going in. The height will be at least 1” less than the opening height. The depth is at least 1.5” less than the cabinet box interior depth in the nearest 3” increment. For instance, if the inside of your cabinet measures 22.5”, you would order 21” deep drawer boxes. If the inside of the cabinet measures 20”, order your drawers 18” deep. The reason for this is because the slides only come in the 3” increments for drawer box depths of 15”, 18” or 21”. When ordering your drawer glides, use the part numbers from the product page or just tell us the drawer box depth the glide is for.
 To measure for your re-facing trim: Our trim comes in ¼” thick, 96” long strips. The widths can be anything from 1” to 6” in 1/16” increments. The face and two long edges are pre-finished. You should try to order the molding in the proper widths so that no ripping needs to be done – only cutting to length. Measure the width of all your face frames and order enough material to cover them, factoring in the yield loss from cutting to length. On exposed cabinet sides, you will want to allow for the edge of the re-facer trim to hang past the cabinet side so that whatever material you are using to cover the cabinet sides can tuck up behind it.
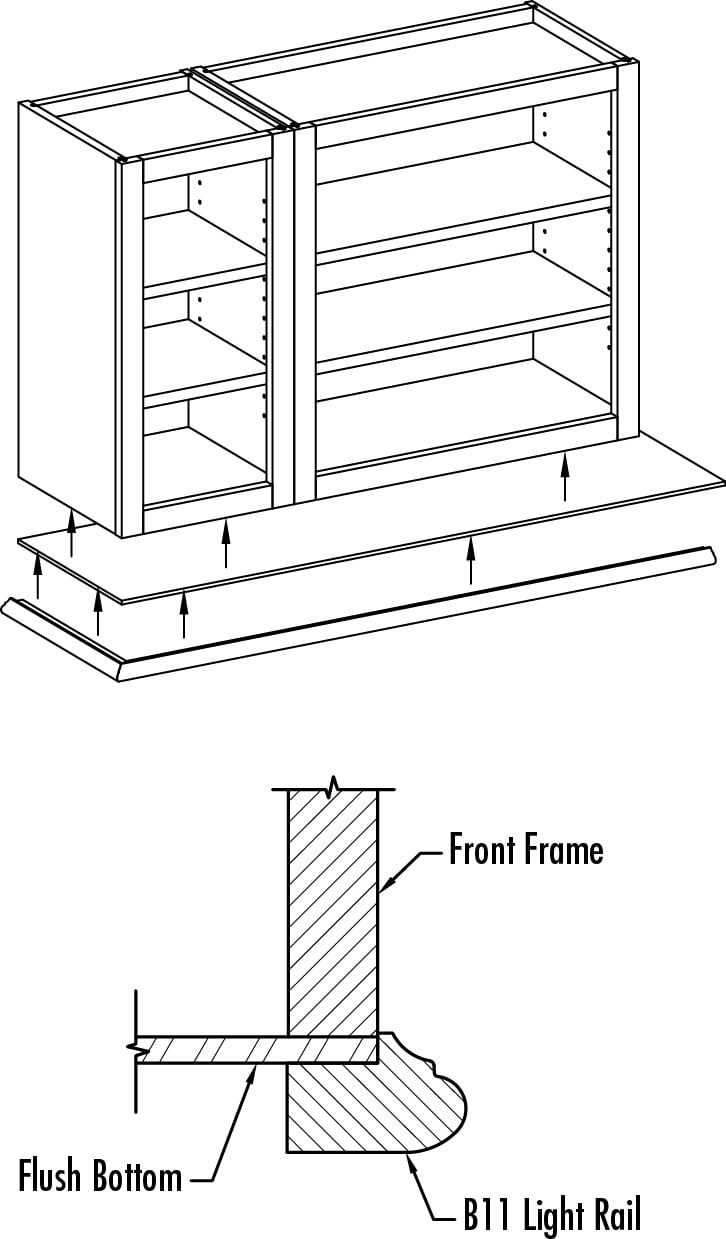 Measure for you crown and trim: We suggest you order crown and light rail moldings for your cabinets. The light rail molding allows you to finish off the cabinet bottoms with ¼” plywood and then cover the leading edge of that plywood with light rail molding.
Completing your kitchen reface
- Remove all the doors, drawer fronts, moldings, hinges or anything else that will interfere with the reface. If you are replacing your drawer boxes, remove them and the drawer glides as well.
- Sand the cabinets with a 120-150 grit paper. An orbital sander is ideal. While it is not mandatory to sand through to the raw wood, it may be advisable as the contact cement may not bond well with your cabinet’s old topcoat material. If your old topcoat is powdering up well during sanding, you can just scuff sand. If your topcoat is sticky or gooey, you may need to consider fully removing the top coat. We do not advise stripping as this is messy and involves materials that are highly toxic for indoor use.
- Wipe the cabinets down with acetone or another solvent suitable for removing residues from glue, sandpaper, or topcoat.
- Start with applying the re-facing trim. Apply your vertical pieces first and be sure to use material that is the same width as the stile you are facing so that you do not have to rip it. Again, on exposed sides, use the piece you purchased that would allow you to hang the edge of the re-facer trim past the edge of your side veneer or plywood. Once the vertical pieces for a cabinet are complete, cut the horizontal pieces that fit between. These pieces are held to the cabinet with the 3M spray adhesive. Spray the cabinet face and then the back of the piece being installed. Wait 4 minutes and apply it. Then, install a few pins in the face to keep it secure to the cabinet while the glue sets.
- Once all the cabinet faces are trimmed, begin installing your cabinet side panels/veneers. This is a simple process of cutting the veneer to fit the exposed side of the cabinet exactly. Once you have cut a piece, apply the glue to the back of the piece and the cabinet side and apply it to the cabinet side, starting behind the face frame and gently pressing it on as you move to the back of the cabinet. Use the J roller to roll it on tightly and remove any air bubbles. Stubborn bubbles can be removed by piercing the veneer with the top of your utility knife and then rolling the bubble out with the J roller.
- Now you install your drawer glides and drawer boxes (if applicable). Follow the directions that come with the drawer glides. They are quite simple to install. The drawer boxes simply roll in to the cabinet and click into place.
- Unpack your doors and install the hinges per the instructions that come with them.
 Hang the doors first, then install the drawer fronts. We suggest that you use double backed foam tape (also available at Lowes in the tape and glue isle, and also made by 3M) as a way of affixing the drawer fronts to the drawer box. Once you have achieved your desired alignment, you can easily open the drawer and install your screws through the back of the drawer box front into the back of the drawer front itself.
- Install your crown molding
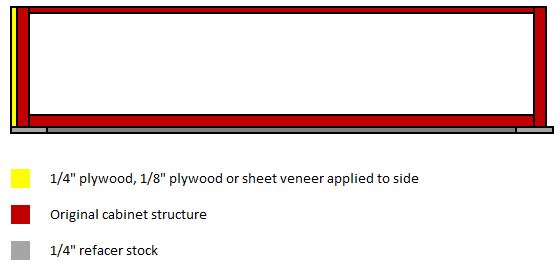
- Install your finished cabinet bottoms. This is ¼” thick plywood, cut to size to exactly cover the cabinet bottom. Pin it to the bottom edges of the cabinet face frame, sides, and back. Then install your light rail B11 with the notched edge wrapping around the edge of the finished plywood. The result will look like this:
 Hang the doors first, then install the drawer fronts. We suggest that you use double backed foam tape (also available at Lowes in the tape and glue isle, and also made by 3M) as a way of affixing the drawer fronts to the drawer box. Once you have achieved your desired alignment, you can easily open the drawer and install your screws through the back of the drawer box front into the back of the drawer front itself.
And you are done! In just a matter of days, you have transformed your kitchen from old and tired to fresh and new. And best of all, you did it for a fraction of what new cabinets would cost!