Video Transcript
[Music] Hey everybody, welcome to another video from the Cabinet Joint. Today's focus is going to be this guy here. It's a wall microwave wall shelf, not a very common cabinet anymore. Um, we still offer it because some people may need to make use of it, but what it's meant for is folks who have a microwave that sits on the counter and they're trying to clear out counter space. They want to pick it up and put it in a cabinet, meaning it doesn't have duct work underneath it. It's not a built-in microwave. It's just meant to sit on a counter. This replaces that and gets the counter up, the microwave up off the counter and into a cabinet.
So some things to know about this cabinet: it's available, um, 24 to 36 wide and it's available 30 in to 72 in high as the height goes up and down because, again, you can get it in 16th inch increments anywhere in that range of 30 to 72. This opening always stays fixed at 16 and A2 High. You cannot dictate the opening height. What changes is the upper opening height. That's your variable. So be mindful. A lot of countertop microwaves are just little guys. If you're in a smaller apartment or an efficiency or you just have a tight space, oftentimes people have very small microwaves that are like 17 wide by 12 or 13 high. That cabinet or that microwave is going to swim inside that opening, so be aware of your microwave size.
The second thing that draws attention to is this interior is going to come as you see it with the Birch maple kind of blonde clear coat finish. Doesn't matter what the exterior is. If this is painted white or black or whatever, that's what you're going to get on the inside. You must specify matching interior, and where we can, if it's a standard species and a standard paint or stain, we will match the interior for you. You do not have to worry about that blondish look, but if you don't specify matching interior, what you see there is what you're going to get. And you can see this is red Birch. That's not red Birch. So just a point to be aware of. A design thing I want you to be aware of is Corners. A lot of folks have gotten themselves in trouble with this cabinet because they have a 45° angled cabinet in the corner, and they run this right up against it for whatever design reason just the way their kitchen worked out.
Let's pretend this is an actual cabinet, not a filler, which is what I'm holding an actual cabinet. If I position this at a 45° the way a diagonal corner cabinet might look if I had a door on here, the door is not going to be able to open. It's going to hit this or close. If I have the door swinging this way and hinged on this side, it's going to open until it hits the front of the Shelf, which is not even 45°. So you have a major door collision issue. And once that problem manifested yourself and you've already ordered your cabinets, they showed up at the job site and you put this cabinet in, there's no other option except remove the Shelf which deletes the whole purpose of having a wall microwave wall shelf cabinet. Now the microwave won't sit on anything. So be aware, keep this cabinet out of Corners. All right. All right, so now when we're talking about the interior, I want to draw your attention to this shelf.
It's a plywood shelf only available plywood. You cannot get the solid wood shelf upgrade option on this. It's I got a banded front edge and it's going to be either Birch or Maple. Um, if you do specify the matching interior, it will come in whatever specie or color you asked for. So, um, the Shelf needs to be anchored down; otherwise, your microwave will tip it. So be aware of that. So I think that covers the basics of this cabinet. Let's get started on the assembly to show you how it goes together. Okay, so let's get started on our wall microwave wall shelf assembly video. Before I get started, as we normally do, we just want to quickly reference the tools and things you're going to need to build the cabinets.
We use a Bostitch nailer, any kind of nail gun or that you can find will work fine at Lowe's or Home Depot bottles of glue that kind of thing. I'm not going to get into detail on that. If you look at the description below, we have a video that will tell you all the things you'll need to build one of our cabinets. So go ahead and reference that. But for Basics, I got my glue and my wet rag and those kinds of things. You also want to inventory the cabinet that came, so with a wall microwave wall shelf, you're going to have typical of our cabinets a left and right side a cabinet back there's going to be three mid-part partitions I'll call it you have your top and bottom and they're going to have no finish on the back.
So you're going to have finish on one side, no finish on the other, and then you have one that has finish on both sides. That's going to be the middle partition. So you want to make sure you keep that straight when you're assembling. Unfinished on one side is going to be top and bottom. Both sides is going to be your middle. So try to keep them a little separated. And then what makes the wall microwave wall shelf such a weird cabinet is the microwave shelf itself. This is an 18-inch deep Shelf with this kind of edge banded rounded shelf. This is what sticks out beyond the cabinet box itself to hold your microwave. So this just sets in place at the end of the assembly, which I'll show you.
Other than that, it's going to assemble a lot like a standard wall cabinet would. So, um, you'll notice on this you're probably saying why does it have these metal pieces hanging off the front frame? Uh, most of the cabinets we do are inset these days, but we do a lot of overlay as well. So if you're doing inset cabinets, I want you to go right to the description below and look at the link that talks about it's going to take you to a video that talks about how to put these brackets on for your inset doors and drawer fronts before you assemble the Box. Okay, so if you're doing inset any kind of prep work for hinges for
doors or support brackets for drawer boxes has to be done before you build the cabinet.
If you're overlay just stick with us and you can jump right into the assembly with us. So I've already gone through and put the brackets on so we're ready to start building it always starts with a bottle of glue we like TI Bond 2 it's a piece of cake to buy at Lowe's or Home, um, it's kind of a premium glue, but you can use any kind of non-foaming wood glue. Don't use like Gorilla Glue where it's got that foaming thing it'll smear all over your cabinet faces you want a white wood glue and lots of people make them. So what we're going to do is you have two shoulders with a Groove in the middle for your splines.
You're going to put glue on both those shoulders on both sides of the cabinet and then anywhere a partition contacts the cabinet face. So I'm going to put glue here so any glue squeezes out it's going to go out this way. I don't want to glue that little Edge I'm going to glue here on the mid partition again so any glue will squeeze this way and not into my finished surface and then here on this bottom. So we're just going to take our glue bottle and get busy these hinge brackets get in the way sometimes so you don't have to put glue with a hinge brackets are you might fight that a little bit.
Okay, so you can see I've got glue on both shoulders top middle bottom. So now it starts with our cabinet sides you want to make sure you have this oriented correctly this middle Groove here is going to obviously line up with my middle Groove there so I want to make sure I don't get that backwards and I'm just going to use my finger to line the panel up with the top of the frame and then just kind of tap it into place. Now I'm going to put the other one in here in a second, but I want to make a comment every now and then I mean, Koga is a manufacturer like anybody else um, what we find is sometimes you have a little bit of fuzz inside these grooves if you see they're a little fuzzy you can just take a file and kind of clean those out every now and then we find it makes a cleaner assembly if you do that.
These are machined very very nicely. We're not going to have a problem on this box so I'm going to do the same thing here line up my splines and press my panels should stay up just fine on their own. Um, and now because this is a sliding dovetail assembly all these dovetails here have to be glued halfway so I start half halfway down the dovetail and just run a bead of glue up and the reason we do halfway is if you run the bead of glue all the way to the bottom and then slide these panels in it's going to push the glue to the bottom of the groove and make a real mess.
So the dovetail will actually smear this out for you. So I'm going to grab my top and bottom and making sure I've got finished side in I don't want to do the unfinished side or it's going to be wrong we don't like wrong we're going to line our Dove tails up and then you just kind of press and you'll feel those Dov Tails or those splines lock in at the bottom. What we're aiming for here is no gap between the front frame and the front of that panel and now I'm going to do the same thing here and from your end you should be able to see there's no Gap there everything's down nice and tight and then put in my middle partition again finished both sides splines down and we're in so you can use a rubber mauet show you what that looks like we actually use a dead blow but uh we got pretty strong hands from doing this but often times you'll have to use a a hammer to tap that down you want to make sure it's a rubber melon and not metal cuz you don't want to bash up your Plywood.
And just make sure everything’s locked into that front frame really well. Okay, now we’re going to grab our glue again, and we’re going to prepare to put the back on. So, we start with our glue on the edge. I want to put it on the unfinished surface here, not the bottom of the rabbit, because the cabinet back is finished, and it won’t stick real well. We want the glue here so that the unfinished edge of the plywood back is touching that unfinished surface there, and unfinished materials bond a lot better. So, I’m going to try to keep that glue surface vertical. I’m going to do it on all of my leading edges of the plywood—top, bottom, and middle.
Okay, going to take our cabinet back again. You want to make sure it’s oriented, so I’ve got my middle dateline lining up with that panel. I can’t put it in backward, and we’re just going to lay it on there. And I want to show you—if you look at this, hopefully, the camera picks it out—you have a series of pre-drilled holes. Those are not for screws. I’ll show you that in a minute, but those are just marker holes. So, when I put this panel down, it acts as an area where I can pin or staple on either side of those holes, and I know I’m right on that centerline of that panel. Let me just lay this on, and I’ll show you what I mean. This is where I do like the dead blow. You can actually hear it—it’ll make a thud when that panel’s all the way down in.
Okay, so everything’s locked down real nice. And now I have my Bostitch stapler with ⅛-inch staples in it, just like that. And what I’m going to do is those pins or those holes I showed you—I’m going to go on either side all the way across on all three of those mid panels. And what I often do is use my finger as a guide, and that way, the gun never changes because my finger is acting like a fence. Okay, get the middle one here. This one’s very critical. You need to get right on either side. If you get a little flaky with your positioning, you could blow a brad right through the inside of the cabinet or a staple, rather.
Now we have our back fastened this way, but we need to anchor it to the actual cabinet sides. This is where a pencil comes in handy. I’m going to use my finger as a guide again. I’ll line the pencil tip up with the edge of the dead center of this panel right here. Then I’ll just run a line down the edge. If you’re not comfortable doing that, you can always use something like a framing square (not a framing square, but something similar) and just use the notch to run it down. Whatever is comfortable for you, but what you want to have is some kind of guide that tells you where you’re going to put those nails.
Let me turn the box to you. Come around this side. We just want to make sure we’re right on that line. Now, astute viewers may ask, “What’s going on? He’s got unfinished sides here, and my cabinet has finished sides—like maybe this is a matching painted or stained side—and you can’t blow pins or staples through the side of the cabinet.” Well, we have a solution with your nailer. Take the air off—we don’t want to put holes in fingers. Take the rubber tip off. That little marking tip is only there to protect finished surfaces. This allows you to get the head of the gun way up into the corner. And I want to stress: You want to put the heel of the gun down. You don’t want to have it like this. Our goal is to toenail that staple into the cabinet side. If we have it vertical, there’s a chance it’s going to shank out.
So, you’re going to take the gun, push it right up into the corner, and just work your way down that cabinet side. And that’s the only place you’re going to put pins or staples. You will not do it here because it’s a finished surface. Disconnect my air, put my protective tip back on, reconnect my air. So, that is the basic assembly, and I’ll face it to you. The way this works, as we described in our opening session of this video: This is your door area; this is your microwave area.
One step I do want to stress is the wet rag. You just want to wipe out any glue that squishes out during our assembly. Now, remember, wood glue dries clear. So, if you can’t get every little last bit because it’s in a corner, you’re not going to see it anyway once it dries clear. But we want to try to get what we can. Sometimes taking a carpenter shim with the tip of a screwdriver and putting that into your rag can get you into those corners.
Okay, so now that I’m wiped out, here’s what happens with this: This microwave shelf just goes in and it lays in place. Now, your microwave sits on here. If you want to brad that down with a pin gun or a couple of nondescript screws in the corner, you’re more than welcome to. Because if you get the microwave too close to the edge, it will tip up. So, you want to fasten that shelf down. But this allows the microwave to sit deeper because remember, you’re going to have a cutout for a cord in the back and all that. Your microwave is going to sit out a little bit, and this allows it to sit out beyond the front of the cabinet and still be protected or supported.
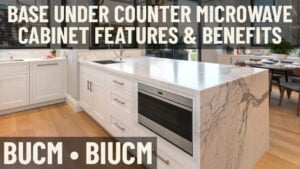
So, that is your assembly of a wall microwave wall shelf. I hope that’s helpful for you. If you have any questions, you can always call your cabinet coach, and they’ll be happy to walk you through it. It’s a great little cabinet. We are seeing more built-ins now. This is really only desirable if you have a countertop setting microwave and you just want to get it up off the counter. It’s a great cabinet for that. But really, we’re seeing people put them in base microwave cabinets instead or the more built-in style where the cabinet is deeper and it sits without this funny shelf, so we don’t see a lot of this cabinet, but it might fit for your purposes. And there you have it—that’ll hopefully get you through. Thanks for watching, everybody!