Video Transcript
[Music] Hey everybody Brian from Cabinet Joint here.
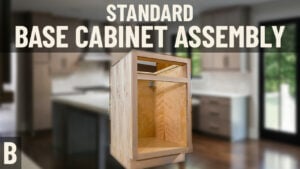
I am in our new shop here at Gettysburg, The Shop at Rock Creek, where we do cabinet assemblies, and we're going to be talking in this video about some steps that have to be taken if you're doing inset cabinetry.
Before you actually build an inset box, you need to do some fit up. That's much more easy to do when your cabinet's unassembled than if you try to do it after the box is built. Primarily what I'm referring to is, we have the front frame and building a base 18. I have a base 18 frame, and here you can see the cabinet grooving on the back. What we're going to be doing is putting some inset brackets to carry our inset drawer glides on the back of the front frame. And we're also going to be putting the drawer glide - I'm sorry the door brackets - for mounting our door hinges on the back of the front frame. So we want to show you that operation. The other thing we're going to be showing is on your cabinet back, this is the back for the same cabinet. We have these angle brackets that are going to mount to the pre-drilled pilot holes that come from Conestoga already done for you. We're going to show you how these brackets go on, and you'll really thank us later because when you build the cabinet now, all you have to do is slide the drawer track in and mount it the way our door glide installation video shows. So make sure you do this. You'll hate yourself if you build all your blockers and then have to come back and put your hinge brackets and your drawer glide brackets on. So let's get to it!
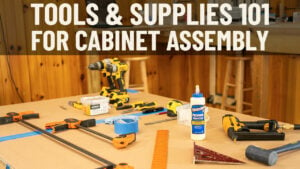
Okay so let's get started. First thing I'm going to do is walk you through the tools and supplies you're going to need. I've got a couple of drills you can use. One, we have two set up for each individual operation. You’ll need a Phillips head bit and you need a three, thirty seconds drill bit. Okay and I'm going to talk a little bit more about that amount sticking out in a moment. It's pretty critical with some of these things so you don't drill through the front of the front frame. I've got a couple of different ways we can show you how to put these inset mounting brackets for the doors on. I'll get to that in a minute. But I've got a jig, here, and I've got one we just made. And you can also just use a tape measure. I'll walk you through all of that in a moment. The main supplies you need out of your larger Conestoga order that came in is some hardware pieces. You're going to have packs of drawer glides, and in these door glide packs, you have the glides themselves. You have two angle brackets, which is what you'll want to take out. You have a whole bunch of screws, and you have orange brackets. What I want you to grab out of that pack for this operation is just the two angle brackets. And there's I believe six small smaller flat headed screws look like look like this. Let me get a close-up of that for you. But these screws, you need six of those, three for each bracket.
Okay I have mine already sorted in a cup. Here you're also going to have in your hardware pack, these beige mounting brackets. They're called 10 text brackets from Bloom, and inside those you have two of the brackets themselves. You want those. You have two little machine screws that actually are used to hold the drawer glide to that bracket, so you'll want your two machine screws. And there's four kind of bronze-colored Phillips head screws: you want those four screws. You're also going to find four silver screws - we do not use those. You can throw those away or save them for something else. We do not use those.
Once you've got your hardware ready, what we're going to do first is the mounting brackets for the hinges. So that's what these are. Okay, so your hinge brackets come inside your hinge pack. Your hinge pack has the the hinge themselves that go on the door. We're not going to use those yet. And you're going to have the two brackets I just showed you, and a bunch of screws. What I want for this operation is these brackets, and I want the four larger kind of a round headed Phillips screw. This is the four biggest screws in this bag. You want those four screws, If you've watched our startup videos, you should have by now, when we talk about how to organize your hardware we typically go through and open all of our hardware up, glides and hinges and these tentex brackets, and we sort all of our hardware into cups so I know what I'm grabbing. Feel free to do that you don't have to do bag at a time. You can open up all your hardware and get everything ready.
So I'm going to set my bag of hardware off to the side, and now all I've got is my hinge operation and my door glide operation and my back bracket operation. I'll put those screws over there. The other thing I've got here is my quote. So you've worked through your quote with your cabinet coach, and on that quote I'm working on a certain cabinet. I've identified it as a base 18, and what I'm looking for on this is a single door cabinet. So it's very critical I understand what side are the hinges going to be on. This document tells me it's a hinge right. So as I face the cabinet, I'm going to hold this up real quick - you're facing the cabinet. I want the hinges on this side, so I'm going to lay this down, and that's the side I want to I want a hinge.
Okay there's three ways to do this. There's an expensive way there is a less expensive way, and there's the freeway. The most expensive way is to go online. You can get them on Amazon - order a bloom platemate jig. They're about 100 bucks. They come to you with screws that you cannot use. You have to go to the hardware store and replace these with a longer machine screw because the factory screw isn't long enough to give you the centering that you need for these particular cabinets. It's not a Bloom issue; it's not a Conestoga issue; they just didn't give you a long enough screw. So we replaced our screws, and we use this jig. This is what we use in the shop. We love it. If you're building one kitchen it may not be worth it to you, in which case you can take a piece of angled molding, just an L-shaped molding and buy it at Lowe's. Make it six and a quarter inches long, end to end, and then drill two holes. And the holes are two and three quarters in to the first hole, two and a quarter inches into the - I'm sorry two and a half inches - into the first hole. So two and a half two and three quarter, and it's about three thirty seconds from the edge. Drill two holes -boom boom - and now that acts as your locator. You can use it for top or bottom -it doesn't matter. That acts as your locator. The third option, which costs you nothing in no time, is just measure. Put the tape measure right at the bottom of the opening, measure three and an eighth, and strike a line, and you can use that as your center point for the jig.
Okay, or for the bracket I'm going to use this because most of our customers who are doing full kitchens tend to want to order these. It's got a little arm on it that will actually crimp the front frame in that aperture. So what I'm going to do is slide it on. I slide my screw all the way down and clamp it. And what I want to make sure is I have both these screws screwed to the point where when I measure from the front frame to the dead center there's a little groove right here to the dead center of that platemate jig, should be three and an eighth. It's the same three and eight I just measured with my tape measure. So now all I have to do is take my drill, and this is where this depth comes in critical. You either have to set this drill depth to the point where when I run this all the way through and bottom out the drill, it doesn't come through the front of the frame. If you just leave a lot of drill sticking out, you can accidentally go all the way through. You'll want to back this thing off and it will not let me go too deep.
Okay, if you don't have the ability to do that, run a piece of masking tape or duct tape around it to act as a visual. You're like okay I don't want to go past the edge of the tape. I've got my collar set. So what we're going to do, this is the reason I like this Bloom bracke or tthis jig, because these little holes have a ferrule in them that are metal so it won't hollow out as I use it over and over again, and it's at the proper angle. This hole does not go straight in. It's got a slight taper to it. So this holds my drill bit at the proper angle. This is why I like this jig so much. So I just set my drill in there. Two holes. I uncrimp my bracket, slide it to the end, make sure I'm bottomed out same thing [Applause]
Now had I used this jig that lines up with the same two holes, same exact thing. I'm just using this, and if you do the six and a quarter inches long it will work for either end of the front frame. And if I'm doing it the measuring way, there is a little hole in the dead center of this bracket, and I just line that up so that that hole I can now see my pencil line in that hole. And I can see these two holes perfectly. So all I'm going to do now is grab my four screws, take my Phillips head bit. You're going to hear a lot of ratcheting. That's not the screw stripping - that's the impact driver. It's a great drill for this. Put both of those in until it's tight. And my bracket's on good. I'm going to go ahead and do the second bracket and come back on screen.
Okay, so now you can see I've got my two hinge brackets on, ready to receive the door. When the time comes and you can see why if this is a shallow cabinet, and you had to put these on after the cabinets built, You can't even get a screw gun back there, so it's so critical to put these on before you start sliding your cabinet panels in. We're working on because this is a base cabinet. I have a drawer opening and a door opening. These brackets mount to the back side of the front frame and carry the drawer glide because on inset, the drawer glide no longer sits on the front framee. It’'s back inside the cabinet. If you don't have these brackets you're forced to, like, flush out the cabinet side with the front frame to carry the glide. So Bloom did us all a very big favor by offering these these brackets. So there's two of them. There's a little shoulder right here and we'll get a close-up of that for you in a separate screen. That shoulder runs right down to the bottom of the the opening. You can't make it be wrong. Just run it down until it stops. Now I take my two of my bronze screws, and there's two deep holes and there's two holes way down inside of here. That's where those silver screws would have gone - we don't use those. We use these big screws. We drop them in the hole. Make sure I'm run all the way down into the corner, and I grab my Phillips bit. Snd these use these screws use like a little, um, if you can see it's like a little groove or a slot in the tip. It's a self-drilling screw. You do not need to pre-drill these holes. You won't split the frame. You're fine. So I'm just going to do the same thing on this side, run my two screws in there. Make sure they're on nice and tight.
So now I've prepped this cabinet frame for both door glides and doors. I can set the frame off to the side I'm just going to push that out of my way, and now I want to move to the cabinet back. I'm going to stand this up right real quick. Not sure if the camera will show it, but you'll see it on your cabinet back Conestoga if it's a standard cabinet box and wasn't like a custom front frame with an odd configuration. This is just a normal base 18. Conestoga pre-locates the brackets that carry the back of the glide. We just took care of the front of the glide in the frame. The back of the glide lands on these two brackets, and they've given you the locator holes for that on the cabinet back. Very easy.
So I'm going to lay this back down. I'm going to grab four, five, six of these smaller screws that came inside that glide pack I told you about. I get my two brackets and you can see there's a series of holes, and then you have the longer leg of this L has the two slides or the two slots where the slide will go on. That's a separate video you can watch to see how the glide actually goes in. All I care about is making sure those holes go down and there's two elongated slots each of those two holes center on those two elongated slots. So I just locate it directly on those two holes. I put a screw in each of the slots. And then there's 10 other holes you can use. Just pick any one you prefer. It doesn't really matter. And put the third screw in one of those. Those two first holes will do it but because they're elongated. The bracket can go up and down if they get loose. So the third one just anchors it. Okay do the same thing on that bracket, which I'll do off screen, and then we'll come back and show you all this all finished up.
Okay everybody, there's your operation. So now when I go to build this cabinet, left and right side go in, top and bottom go in, cabinet back goes on, and when my cabinet back goes on, I now have a complete box built and ready to receive my drawer glides. Very, very fast way to do inset. And then when you get to the door part, literally they just clip right on to these hinges - snap snap snap. You can go through the whole kitchen and fit it up very quickly, so don't forget to put these brackets on. If you have a problem where you did forget to put the brackets on and you're like “I can't get my drill gun in there!” call your cabinet coach they can often give you some workarounds. But you're going to have to either get a short, like a 90 degree drill or something, so you really want to remember to do this. It'll save you so much time down the road!
We'd love to hear from you. If you have any questions give us a call 888-211-6482 As always thanks for watching!

Hello,
Do you happen to know the size of the larger screw/bolt needed on the Bloom Jig that are mentioned.
Thanks
Chris
Chris – thank you for asking! 1-3/4″ pan head screws are needed.
For the homemade plate jig, the video says to place the holes at 2 1/2″ and 2 3/4″, while the inset graphic shows 2 1/2″ and 3 3/4″ spacing. Which one is correct?
Thanks!
Miles – 2-1/2 and 3-3/4, but EASILY verifiable by customer by measuring 3-1/8” in from the end of the frame opening, mark it, center the hinge bracket on that mark and then mark the two screw holes. Then measure to those holes from the inside edge of the frame.
Why don’t you have a separate video that shows how to install the drawer hardware for an overlay cabinet front? I realize the back brackets are the same but not the front.
Andy – we do! You can find it here: https://www.cabinetjoint.com/video-library/blum-tandem-installation-overlay-inset-features-new-pilot-holes/
Is there any way to adjust the inset hinge in the vertical position? my reveals on a double door set are off by 1/16″ and want to lift one side slightly to align them.
Jay – yes, please see our video here with helpful information: https://www.cabinetjoint.com/video-library/how-to-install-adjust-an-inset-door/