Video Transcript
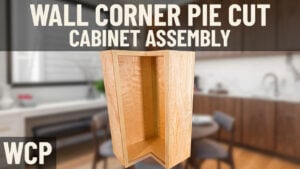
[Music] Hey everybody, Brian here from the Cabinet Joint. Today, we're going to be talking about our standard, the most common cabinet we sell: a standard wall cabinet assembly. I'm not going to get into the sizes and specs on this cabinet like we often do with our assemblies because this video is going to cover not just a single door wall cabinet, but also our double door, triple door, pretty much any of our Standard wall cabinets. They're all variations on a theme with two sides, top, bottom, and a back, so this assembly will cover all of that. So, we'll just get right to it, but suffice it to say, check our catalog because we can go all the way out to like 72 inches wide, I think, 72 inches high for wall cabinets, so these can become quite monstrous.
This is a nice easy one, just a single door, but again, the assembly is all variations on a theme, so let's get into the actual assembly and show you how this goes together. All right, before we get started building this standard wall cabinet, couple things I want to stress. First of all, you'll notice that we have some hinge brackets on the front frame. If you're an inset customer, your cabinets are inset either beaded or flush, you're going to want to proceed to the video noted in the description below that will guide you on how to put these brackets on. If you have drawer boxes, you're going to want to put the drawer box carrier brackets on. All that has to be done before you actually assemble the box. It's very difficult to get those brackets on working inside and behind the front frame, so get those brackets on like we have here. This is an inset job. If you're overlay, just stick with us, we're going to get right into the assembly.
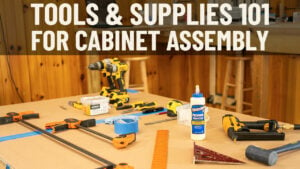
Second thing I want to talk to you really quick about is a complete video that talks about tools and supplies you're going to need to build our cabinets. It's pretty complete. I'm just going to quickly run through the basics for this box. I've got my stapler with inch and eighth inch and a quarter inch staples. I got a pencil for marking scribe lines, a wet rag to wipe my glue out, a bottle of our favorite Typon 2. Any white wood glue will work; we like Tyon 2. And then you're going to see I got this little file here. I want to show something really quick because this cabinet happened to have it before I get started on the actual assembly. You might see in the video, I got some fuzz here, just some machining fuzz. This is a 1/2-inch dovetail bit that goes through, and sometimes the plywood fuzzes a little bit, and you can just take that file and run it through there to clean that out. You can use sandpaper, whatever, but I just keep a file on hand for that.
So now, let's proceed with the assembly. Just a quick inventory of parts. Standard wall cabinets are about the easiest cabinet to build. You've got your front frame, two cabinet sides, two cabinet tops and bottoms, and a back. So, it really is that simple. Wall cabinets are a variation of a theme, so if you got directed to this video because you're building a three-opening wall cabinet, a real big monstrosity, the assembly is the exact same; you just have more front frame opening, so this video can work for a plethora of our wall cabinets.
So, as always, we start off with glue. Open the bottle, and we're going to run glue on these two shoulders. You have a deep groove for the splines to dive into, you have these two shoulders on both sides, and then this top area, you don't want to glue on this side, it'll squeeze into the cabinet. We're going to put glue here and then on the bottom right along there. So, a nice bead of glue. Of course, my glue bottle is not cooperating. A nice bead of glue on both shoulders, and you don't want too much, it's just going to squeeze out and make a mess, so try to keep your glue bead fairly tidy, top and bottom.
All right, so I got my front frame glued up, left and right side, top and bottom. Now, we grab a cabinet side, and this is a good point to make with this particular cabinet because it has a flush end. You want to make sure your flush end is oriented on the correct side of the cabinet based on where your hinges are. So, on this one, we want the flush end to be opposite the hinges, so I'm going to put my non-flush end on this side. One of the handy tools I didn't mention is a rubber mallet. If you don't want to beat your hand up, you can make sure your panels are seated with the rubber mallet.
Now, we have our flush, which means finished side, and to put that side in the proper, proper side of the cabinet. And now, we have our tops and bottoms, and these dovetail in using a sliding dovetail, very unique to Koga. So, we get our glue again, and we're going to run a glue bead halfway up these female dado or dovetails on the cabinet side, again not too much, if you can help it, it just kind of makes a mess at the bottom when the panel spreads it out. So, we want to make sure we're finished side into the cabinet with the spline down. We line our dovetails up, and then it's a matter of pressing the cabinet panel down. You can usually do this with your hand until it seats. I'm not sure if the camera's picking that up, but you want this panel to be tight to the front frame, so you can just make sure everything's nice and tight.
Same thing with this panel. Finish side in, spline down. We line our dovetails up, then we just press that panel down. It'd be easier if I was on the other side. I'm going to spin the box real quick and just press that down in. Sometimes the dovetails are tight, like that one, sometimes they go in really buttery. I don't mind tight because it just means a tighter box. What I don't like is too tight where you're really pounding on it. If you get that, you might want to question whether that panel should be replaced, but that one was nice and firm but able to be pushed into place. So, now my box structure is built.
Now, we're going to do the cabinet back. I have to run glue on my cabinet sides and my cabinet top and bottom all the way around. So, we run a bead of glue there, down the cabinet sides, and we want to try to keep the glue on the vertical surface, not that little shoulder because that's where the finished back is going to go, and you won't get a great glue bond. So, you want to keep your glue bottle oriented so that the glue goes on that vertical part and then on that top and bottom there.
Grab our cabinet back. You can see you have a dado for the top and bottom. There's also, probably can't see them that way, there's a series of holes drilled straight through the cabinet back by the CNC router. Those are your pin locations, your stapling locations
, and I'll show you that in a minute, but you just line the top or top and bottom up with the back and tap it into place. You want to make sure you're fully seated, and now you can begin pinning. So, what we normally do is pin on either side of those shoulders or those holes, rather, same thing on the other end. So now, we've got our top and bottom stapled; we're going to do our sides.
And you'll notice, this is a good one to illustrate with. We have a flush finished end. We don't want to be stapling through the side of the cabinet the way we will on this side. So, what we're going to do is disconnect our air. Most of the time, the staplers have a little protective tip to protect your finished surfaces. It's just like a little rubber bumper. You can pull that off, and what that's going to do is allow us to get, reconnect our air. It's going to allow us to get right up inside here and run a staple toenail down into the cabinet side. Now, oftentimes, if you have a clamp, we like to clamp this together to make sure the sides are sucked in nice and tight. So, I'm going to do that just to demonstrate. If you don't have a clamp, it's not the end of the world. You can usually hold it together with a helper or sometimes not at all; it's just as nice and tight as it is. But that just keeps the side tight to the back.
So now, what we do is make sure the heel of the gun is flat to the cabinet. You don't want it vertical because we're trying to toenail this down in, run the staple into the corner about every 3 or 4 inches. Now, what you usually would do is, as you move down the panel, you can move the clamp down. We have a nice tight gap, so I'm not worried about it, but those clamps really are priceless for that. Now, I'm going to disconnect my air again. I'm going to put my rubber bumper back on because you don't want to put a pin through or staple through your finger. And now, we're going to try to come through the cabinet side. This is an unfinished cabinet side, so we're going to come right through the side. It's a much better way to nail it; there's no scribe line.
So, what I usually do is take a pencil, you can use a straight edge like a square as a guide, but I find the center of that dovetail and just use your finger as a guide and strike a line. And now, we're going to come right through the side of the cabinet, again every 3 or 4 inches is fine. And now, these sides are basically fastened to the cabinet back, and that really is your assembly. Last operation is to stand it up. We want to make sure our front frame is married up to the top of the cabinet frame or the box rather, and in this case, it's not. My frame is a little low, so I'm just going to tap the box down until I get it perfectly flush on both sides. That's acting to square the cabinet. And now, I'm also going to wipe out the inside, and I actually don't have any. We have our wet rag; you want to just wipe out any glue you have in there. And I don't really have any to wipe; a little bit there, that was a nice tight assembly. So now, you want to make sure that inside of that cabinet, wherever your cabinet back juncture is or these cabinet sides, make sure you get all your glue squeeze out.
And the last thing is on flush ends, good one to demonstrate on, you're going to see you have a little bit of a gap there. This is where you want to have clamps handy, as our tools and supplies video shows, and you can squeeze the front frame on. We'll put a series of them on here; we like to do this in all of our flush ends, and that will make sure that our frame is nice and tight to the cabinet box on a flush end. And we'll put a third one down there, and then we'll be done, and we'll set this off to the side to dry.
So again, as we wrap up here, that's the basic assembly for any wall cabinet. Doesn't matter how big or how small. There's all sorts of variations of wall cabinets. Some might have a center platform; we'll have special videos for that. But all your standard square walls that have a left and right side, a top and a bottom, they all assemble just like this. So, we hope this helped. If you have any questions, be sure to contact your cabinet coach, and thanks for [Music] watching.


