Video Transcript
[Music] Hey everybody, Brian from the Cabinet Joint here. This monstrosity in front of me is called a Wall Two Center Style W2CS cabinet. Um, it assembles just like a standard wall cabinet, so if you're looking for full assembly, just reference the video below and go straight there for full assembly. I want to talk through, we do have some assembly to show you, so stick with us after this intro. We're going to kind of do a speed it up assembly. I'm going to talk about some specifics with this cabinet, but I want to cover some things now like sizing and hinging.
So, this cabinet is available from 48 inches wide to 72 inches wide, okay? And what makes it a Two Center Style is two upright Center Styles and I have three doors, okay? 48 to 72 inches wide and then 12 inches high to 72 inches high all in 16th inch increments. So it's a very, very powerful cabinet. If you want to reduce your cabinet expenditure, why not do one big cabinet instead of three small ones? Um, so whenever you can combine up to 72 inches, you can combine a cabinet into one big one, you're saving some money. The quid pro quo is you can only do three equal openings. You cannot adjust the center Styles, okay? That would be a custom frame and you'd have to talk to your cabinet coach. But as this cabinet comes standard, it's three equal openings, all right?
They do give you, see if I can show you inside, they do give you a series of shelf holes on the cabinet back to support that very long shelf so that you don't get cabinet, you know, bow and so forth. So you do have some support there. Um, for inset, the doors are pretty straightforward. You just gotta make sure you hinge them on the correct side to get the swing the way you want. For that Center door, the outside ones are almost always opening opposite, you know, left and then right. That Center one, you can swing either way. So make sure you mount your hinges for inset appropriately.
If you're doing overlay, we get this question a lot. If you're doing overlay, that Center door, it's going to be using half-inch overlay hinges. These outer doors cover the full front frame and they share the center styles with this middle door, so this door can't be full overlay or the door would butt into this door. So you're going to use half-inch overlay hinges. It should come with your cabinet. You'll notice you have a whole bunch of full overlay hinges, you got one pair of half-inch overlay or maybe some for some other cabinets like Corner cabinets, but one of those half-inch overlay pairs is used for that Center door and you can hinge it either way you want, all right?
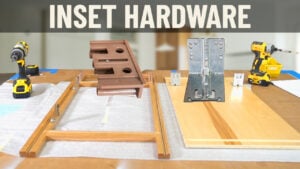
In terms of depths, it's 5 1/2 inches deep to 27 inches deep and again, 16th inch increments. So you have lots of flexibility with depth on this cabinet as well. It's a real powerhouse. Um, as far as assembly, stick with us. I'm going to go do a speed assembly now. We'll talk through a few things at the end, but we do appreciate you watching and stick with us for a few more minutes, okay? Remember, for the Assembly of this cabinet, it goes together like any other wall cabinet. So reference the video below for major assembly points before I just kind of whip through this in fast time, which you'll watch in kind of a sped-up manner. Uh, I want to mention this: the brackets that you see here, these are the inset mounting brackets for the doors. Uh, any inset cabinet, whether it's doors or drawer fronts, getting doors or drawer front, you have to make sure you fit up the back of the front frame. Reference the other video below for fitting up the back of your frame before you begin assembling. You're going to have a real problem getting to the inside back of that front frame once the box is built. If you're overlay, it doesn't really matter. You can start right in with this video. Uh, I'm going to go through in fast time how to build this. I've already got the frame glued up so you can stick around and watch it. [Music] Speedy [Music] [Music] Oh [Music] Okay, our assembly is done. Before I exit this video, want to make a couple comments. You'll see there's clamps all over this box. First thing in many of our assembly videos, we talk about how good it is to have clamps around these larger boxes. This one's like 61 inches wide. You can sometimes get a little bit of a warp to the front frame. That's not out of Speck wood moves, and so in order to get the front frame clamped tight to the box so that glue sets up, you're going to want to have some of these clamps. You could pick them up at lows, um, but we have it clamp wherever it was trying to walk away from the box. The other comment I want to make is I made the mention in the intro you need to figure out where your doors are going to hinge. This cabinet is going left into the wall, so we want that door to hinge left, this door to hinge left, this one to hinge right. So make sure you have those brackets. If it's inset, make sure you have those brackets where you want them to be to get those doors to hinge properly. So aside from that, again, assembly like any other wall cabinet. Uh, we hope you enjoyed watching this. Give your cabinet coach a call if you have any questions at all with your assembly. Thanks for [Music] watching.


