Video Transcript
[Music]
Hey everybody, Brian here with the Cabinet Joint. Today, we're going to be talking about one of the most popular options we sell with our cabinets, which is called an extended style. I would say the extended style option or a finished flush end option are the two most popular options we put on a cabinet, clearly because your exposed ends for a flush end, you're going to see a lot of your cabinet sides, so you want a finished end. And oftentimes you have cabinets that are budding up against a wall, a deep cabinet or something, and that's where the extended style comes in. So, in today's video, what I want to do is talk to you through what an extended style is and how to order it, why you need it in an application in your kitchen. I'll go through a couple different scenarios and mock them up for you, and then I want to kind of lay this cabinet on its back and demonstrate how to trim it. Okay, so we're going to start with what it is.
Okay, so on this cabinet here, pardon the clamps that are holding this door on, there's no hinges on this door, it's getting a trash pull out. So, this is just holding my full overlay door in place. This right here has a standard 3-inch extension. So, if you were to order a cabinet from us and you said I want the extended style option, the standard is for the manufacturer to project the front frame 3 inches beyond the normal edge of the cabinet. So, it'll be sticking out 3 inches, then you can trim it off any way you want. Now, we do have the option to do a custom extended style anywhere from an eighth all the way up to 3 inches, in eighth-inch increments. I think it's sixteenth-inch increments. And so, therefore, if you're very confident in your layout and you know you want an inch and a quarter extension, we can from the factory have that cut just the way you want, which is very, very, very common. Some people, they're not sure of their layout yet, they're not sure if they're going to have to push it a little further out of the corner to clear an appliance or whatever, and they want the flexibility of a full 3 inches, then they can trim it off and I'll show you in a little bit how to trim it off. But the main point I want to make here is what is it? It's simply the frame of the cabinet being or the front frame being extended by however much you tell us, 3 inches or any custom size, to give you some trim ability. Now, let's talk about why you need it.
So, I have a full overlay cabinet here. Full overlay meaning it lays over the front frame an inch and a quarter, leaving me a quarter of an inch on the left side, and we'll get to that extended style in a minute, but let's pretend this is in a kitchen and I have a wall or maybe a deep cabinet here, but let's go with wall. I have a wall here, my cabinet's going up against the side. If I had a drawer on this cabinet pulling straight out and I had a piece of door casing right there, the trim is going to hit or the door front's going to hit the trim. I might have a situation where the door knob is here, when this swings open, it's going to bind here. So, on full overlay in particular, I want to push the cabinet off that wall a little bit, let's say an inch or all the way up to three inches, that's what my extended style would do. Here's a situation you could get yourself into if you don't use the extended style on full overlay specifically. Pretend this, it's about 3/4 of an inch. Pretend this is a piece of base molding, and most of the base molding in homes these days is taller than the old 3 and 1/2 inches that we grew up with, where it would clear your toe kick under here. What you have is a piece of 4 and 1/2, 5, 6-inch high base molding. You come along the edge of your wall and then you return it back this way. And look what it does, it strikes your door. You have nowhere to run that base molding. So now, you have to do some kind of weird transition here to get that base molding to go underneath the cabinet so your door will open. It is absolutely critical that you use the extended style to push this over an inch or two inches.
So, when I run down, I can hit that front frame, and I'll mock that up over here in a moment. Now, let's look at what the extended style does for you. Okay, so now I've got the same wall mock-up but with the extended style option here, and now my base molding goes down and hits the front of that extended style. It doesn't need to be the full three inches. Remember, I can do this as an inch, inch and a half, or you can leave it as the three and trim it back to whatever you want. But the point is, you have plenty of door clearance if I was to be opening the door with my hinges on this side. So, that's really, really critical. Again, you have a refrigerator that's very deep or a deep pantry cabinet, it's the same exact principle. Okay, you want to have an extended style to make sure you got your clearances where you need them. In the case of inset, you already have an inch and a half front frame and the door is sitting inside the frame, extended styles aren't near as required. Same with partial overlay, you're already getting an inch beyond the front frame or an inch and a half. Yeah, an inch beyond the edge of the door. So, you've got clearance built in. It's really full overlay with this extended style is the most useful. Okay, with a lot of cabinets like stock boxes, what they use is a filler strip. They would just use a filler that would be butted up against the cabinet. But the problem is, you're going to have a hairline seam there, and this is oak, so it doesn't match anyway, but if you pretend this was a white kitchen, you're going to see that hairline dark seam where the filler stands up against that cabinet edge. The extended style gives you a way to have an integrated filler strip without a hideous seam where the filler would join up. Okay, very important option to understand. Okay, another area where you might use an extended style has nothing to do with walls. Let's pretend this is an island cabinet and you want to put a decorative door panel on the side of the cabinet. So, pretend this panel I just stuck there is actually a door panel with a raised panel just like this to cap off the side of the door or the side of the cabinet. We want that to run up against the front frame. So, really, I want to have this extended style from the factory pre-cut right there at the edge. So, I want to extend my front frame a half an inch and now my door panel will butt right up behind this and create a beautiful integrated door end panel. We call that a prep fall side for overlay, but for inset, you're going to need to extend the front frame a half an inch to tuck it up behind. Your cabinet coach can walk you through that. So, that's another example of where the extended style option is really going to save your day.
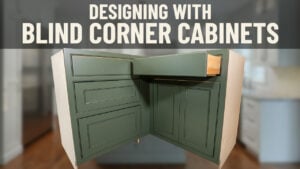
Okay, one last application for extended styles that's pretty important. You can learn a little more about this if you go to our blind corner cabinet, how to design with blind corner cabinets video. We'll reference that below. Let's pretend this is a blind corner cabinet, which has a door and drawer opening here, and then you have the blind area that runs into the corner here. And this is the cabinet coming down the other wall, which in this case is a base 24 F door. Pretend this had a drawer at the top, and of course, your blind corner has a drawer at the top. And if I didn't have this extended style here, let's just say it was a normal side like that, and I shoved it right into the corner when I open this drawer, it's going to strike the knob on this drawer. Same with this cabinet. If I don't have enough of that middle style on a blind corner cabinet exposed, and the drawer is right up here in the corner, when I open it, it's going to strike the knob on this cabinet. So, on this one, I would use an extended style option, and I want to leave at least two inches outside the edge of the door. So, if it's a full overlay door, I want to have at least two inches of front frame beyond the edge of the door. That will ensure I clear the opposing 3/4 inch thick door, the 1/8 inch thick door bumper, and the inch and a quarter knob. You want to make sure you clear whatever your knob height is. So, if your knob is a big, deep two-inch knob, you're going to need more than two inches. Your hardware comes into that consideration. So, that's where your extended style is critical, as on blind corner cabinets. Okay, remember that, because we've had a lot of people who have jammed these up into the corner, then they go to open their drawer, and they can't, and it's very frustrating, and it's extremely dangerous because there's no fallback. If you've got a bound run of cabinets, there's a wall on that end, you can't push the run further away that way because you're already at the other end. So, if you've sized this cabinet with no extended style, there's no wiggle room, you have to replace a cabinet. So, it's a very expensive mistake to make. Make sure you're using an extended style in that application for a blind corner. Okay, so now let's talk about how to trim an extended style. Now, I can't physically cut this one because it is a customer's cabinet. I don't want to make it wrong, so I'm going to take you all the way through to the point where I would actually run the skill saw down this to cut it to size, but I'm not going to cut it. Let's pretend my door ended an inch and a quarter from my opening, which is where my overlay is. So, my door is right in here. Okay, and I want two inches beyond that. So, I come to two inches beyond that, and I've got a line here. And this is where I want to cut it. Let's just pretend there's going to be a wall here, and this is where I want to cut it. Here's some things to consider before you even cut. One option is you cut excess off, like maybe an eighth of an inch off, and then when you put that cabinet in, you're going to have a big, goody gap that you have to cover, and you can order scribe molding from us. This is what most installers of stock cabinetry do. They just slam it in and scribe it to cover that bad gap. A custom cabinet maker is going to take this and he's going to cut it as close as he can. He's going to try to make sure his wall is tipped out, is it tipped in, is there a belly in the wall due to taping or a bow in the studs, whatever. And what he's going to do is cut it a little fat, and then keep testing that cabinet as he puts it in and try to scribe the cabinet to the wall, and then just a little bead of caulk and then paint up to that, and it looks like the cabinet is literally growing out of the wall. That's the right way to do it, but it's a lot more fussy. Okay, so if you want to just cut it and scribe it, it's literally, strike a line, take your blue tape, you want to have some kind of painters tape, take your blue tape, and I'm going to make the mark there. Let's say my other mark, we're just mocking this up, my other mark's here, and I'm going to put the blue tape right over the middle of that mark.
Okay, and the reason we want blue tape is it protects the finished surface of the cabinet. So when I run my skill saw down, I'm not marring any paint or stain. So I'm going to cover everything the saw might contact. And also, if you have a finish on there, you don't want the saw blade tearing up your top coat and creating like chips.
So this does two things: it prevents it from chipping and it gives you some protection for the cabinet itself. Now, just take a straight edge, again I'm just mocking this up real fast. You're going to mark that line wherever it is with a pencil and that's your cut line. Okay, you're going to take your saw, hopefully your installer or you know how to use a skill saw because you're installing cabinetry and that's kind of a required skill set. You're going to cut on that line. Here's the trick you've got to know: you're not going to keep the saw straight up and down at a 90-degree angle. What you want to do is you want to have a gentle angle on the saw blade so that this is the fattest part and you're tapering it away. And you're probably saying, "Well, why would you do that?" Picture a sheetrock wall and I'm going to take this and I want to scribe it to that wall. I have just this pointy tip going up against the sheetrock, so it'll kind of dig in and then if I need to scribe it, let's say my wall has a little bit of a belly in it because the stud was bowed, I can just take a belt sander and I can belt sand that tip very, very easily without having to remove all this material. I can just remove the material from the tip. Just that sharp knife edge makes it really fast to take a belt sander and put a big belly in this, and I keep doing that and testing that until I get that cabinet to go in, it's tied up against the adjacent cabinet here, and I have a nice seam just the way I like it along the wall, and then I can caulk it. You can caulk all the way up to an eighth of an inch so you don't have to be super tight, but that bead of caulk with some paint looks a whole lot better than a big gap scribe molding. Okay, so again the trick is to cut it at a bias, maybe a five or ten-degree angled bias. You don't have to do 45, nothing crazy, 22 and a half, whatever you want to do to give it a little bit of a bias. And you want to make sure you leave the line. Don't take the line because now you're an eighth of an inch, you've lost your saw blade, you want to leave the line so when you cut and this piece falls off, you've got blue tape with your pencil line still on it and now you can sneak up on it. It's going to take two or three times until you fit it in there right, but it's going to look proper, the way a custom cabinet is supposed to look. Okay?
I've got to bring up that the guy who makes all the magic happen behind the camera, Nick, brought up a question while we were shooting this that I think is a really valid question to answer here for you folks. And that is, I referenced earlier in the video that you can order a custom extended style any width you want or leave it as the three-inch standard and trim it. And he asked, "Why would I even want to have to trim it? It seems like a lot of work to go through." And he's right. So, here's the scenario where I would want to order a three-inch and trim it versus ordering it just the way I want it. And I kind of touched on this earlier. Let's pretend I had a hundred inches of cabinet wall to work with. A hundred inches of cabinet wall. I cannot trust that the studs, the wall was framed straight. I can't trust there's not a belly this way or belly this way on the sheetrock. So, here's where I, as a homeowner and as your cabinet coach here at Cabinet Joint, have to make a decision and that is: do I want to fill that a hundred inches and let's just say that far left-hand edge, I want a one-inch extended style, would put me right tight to the wall. You can do that and then when you get the cabinet and you stick it in, you realize it's a hundred inches tight at the bottom, but by the time I get to the top, it's a quarter of an inch or whatever that wall did. Now, you have to use scribe. So, if this is the critical point I want to make, if you're okay with using scribe and you want to just do the shove it in quick and get it done, you can just order that style exactly the width you want for the narrowest point on the wall. So, let's say that wall measured a hundred inches at the bottom and it was four at the countertop level. I would order that extended style so it ends at the hundred inch mark and then just scribe it. So, your scribe is going to cover that shadow line. That's where I would use the custom extended style and just make it set and forget it. Or maybe I'm going against a known vertical straight surface like a tall cabinet. If I'm going this way up against a refrigerator cabinet, that's not a sheetrock wall, I can make that cabinet form fit to that perfectly straight piece of plywood. That's where I would say get it cut just the way you want. If I wanted to trim this to match an odd wall or something along those lines, that's where I would say I want the customization or the flexibility as a homeowner to be able to cut this just the way I want. So, bear that in mind. Some of the answers to the question of leaving it three inches and trimming it or ordering it just the way you want is what you're going against and how you want to install it. These are questions you can ask your cabinet coach. Don't leave it on yourself. Our guys and gals are so good at determining what is needed for a given application, your designer can help you out. Don't feel like you're being left off in the woods on this. Give us a shout, we'll be happy to walk you through it. Very critical option though to order to get a good fit on your cabinets. Okay, so there's your detailed explanation of an extended style. Again, if you have any questions, call your cabinet coach. We hope this helps in your design. Have a great day and thanks for watching. [Music]


