Video Transcript
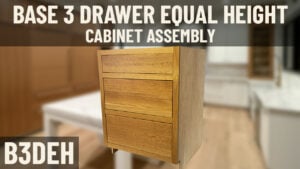
[Music] Hey everybody, Brian here at the Cabinet Joint. Today's topic is this, uh, large four-drawer cabinet I have before me. It's got a very long name; it's a B4D 2S2. Let me break that down for you. Basically, it means base four drawer with two side-by-side drawers and two equal height bottom drawers. Equal height meaning both these openings are the same.
Before I get into the assembly on this, I want to talk about a few of the things and things to be aware of. First of all, the cabinet's available 30 inches wide to 39 inches wide in 16-inch increments. It's available 31 and 1/2 inches high to 34 and 1/2 inches high again in 16th-inch increments. Um, some things to be aware of: if you're doing inset, these two openings will be identical because the goal is to make the drawer fronts the same size. So this opening and this opening will be identical. In the case of overlay, particularly full overlay, I'm referring to this bottom opening. It's actually smaller than this opening. And if you get your front frame, we've had a lot of customers call and say, "Wait a second, you made my frame wrong. These are not equal," and they're supposed to be. Remember, the intent is to have the drawer fronts be the same size. And since the bottom drawer on a full overlay drawer front hangs all the way to the bottom of the frame, the two drawer fronts will be the same size. But when you open them, the openings are different sizes. So it's a visual we're trying to give you. When the cabinets shut doesn't matter what it looks like when they're pulled open, we want those drawer fronts to be the same size. So to sum up, if this opening is bigger than that opening on a full overlay job, it's correct. Okay?
Watch for this in this video. We're going to kind of rush through the assembly because it is identical to a base three-drawer equal height where this is all one drawer. There's really no difference except where you have the support for these drawer boxes in the case of 27 and 30-inch deep. So I'm going to ask if your cabinet is 27 or 30 deep, watch till the very end where I talk about how to support those drawer glides right here and at the back of the cabinet. Okay, very, very critical. If it's a standard depth, you're fine because the little brackets carry it at the rear.
On sizing, if you do deviate 31 and 1/2 to 34 and 1/2 inches, as you mess around in that size range, these two openings are what flex. These are always fixed at 5 inches high, and they're always equal width. If you need it to be, for some reason, asymmetrical, talk to your cabinet coach. We can't do that standard, but maybe your cabinet coach can work something up for you. Those are going to be equal width always, and these are going to be what varies as the cabinet gets bigger or smaller. Those are fixed at 5 inches high.
Depths, as with any cabinet with drawers, 12 inches to 30 inches in 3-inch increments. Remember that 3-inch increment only. That's not a limitation with us; it's a limitation with the bloom soft close hardware only being available in 3-inch increments. So 12.5, 18, and so forth all the way up to 30 inches. That's about it. Let's get into the assembly of this. Again, we're going to speed through the assembly almost in quick time, but pay attention to some of the things I call out as we talk about the nuances of this kind of strange box.
Okay, so let's get started building our B4D 2S2, which again stands for base four drawer, two equal height or two drawer front side by side, two equal heights below. We're going to do like a fast video on this because really, if you refer to the video in the description below for a B3D, this is the exact same cabinet. The B3D is one drawer up the top and two equal height below. The only difference between this cabinet and that is this upright divider. So we're not going to bore you with a full demonstration on the assembly. We're going to fast pace it through, and you can kind of watch in fast time.
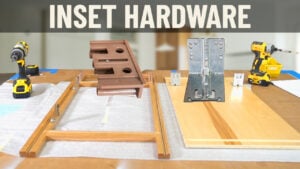
What I do want to draw your attention to is a couple of anomalies. One, I'm going to talk about now and the other after I'm done building. First thing is the cabinet back. The cabinet back, again, if you have inset, you're going to want to mount these brackets to your front frame before you even get started. If you're overlay, you don't need to. But in the case of overlay or inset, you want to mount these metal brackets to carry your drawer glides. The back end of your bloom drawer glides. What our sales reps or cabinet coaches do quite often is they'll customize a standard-based full F door cabinet and strap on an odd cabinet front frame at the customer's request. One that doesn't fit the size range for this B4D 2S2. What then happens is these little pre-marked holes for these brackets, there are none, and you have to find them yourself. So what people struggle with, these ones are pretty self-explanatory, what people struggle with is how to locate those marks. And I want to show you a quick, easy way to locate that on your own. And that is you would simply take your front frame and lay it over the top of the cabinet back. I can't really quite do it because that one's going to hit. But you would lay it over the top of the cabinet back and just make a mark where your drawer glides are going to go. I'll show you real quick. The center ones are actually, if you took the width of this panel and divided it by two, my panel is 38. So if I divide it by two, it's 19, and I go 38 of an inch to either side of that mark. That gives me the location of these two inner edges. And then, of course, the bottom is lined up with the bottom of my opening. So it gets to be pretty easy to self-locate those. But bear in mind, if you ordered a custom oddball cabinet and it does not come pre-marked, you're going to need to locate those bracket locations on your own.
So I'm going to fast-time it through the assembly. You can watch for your enjoyment. And then we'll come back and talk about another tricky thing with 27 and 30-inch deep versions of this cabinet. [Music]
Okay, so the cabinet box is built. Now, we're going to get a little bit technical when it comes to cabinet depths and hardware. You'll notice if you look in here, I've removed the 10ex brackets that carry the drawer glides from these two spots here. I removed those and I removed the rear brackets from the back of the cabinet because what I want to demonstrate here is on standard, I think it's 18, 21, 24-inch deep cabinets wherever there's that slot at the back of
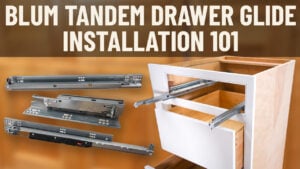
the drawer glide, those brackets work because they nest into the back of the drawer glide. The front carries on that 10ax bracket, and that's what suspends the drawer glide. When you get into longer drawer glides on 27 or 30-inch deep cabinets like I have here, there is no rear slot. The drawer glide protrudes way beyond the carrier here, and so the drawer glide has to mount to the side using these screw holes here. It has to mount to the side of the cabinet. The problem I'm trying to illustrate here for you is there is no side of the cabinet to mount to.
So to demonstrate this, I've removed the rear brackets and the texes like I mentioned. And what I've done, and you're going to have to do this on your own at home, I do not believe at the time of this recording that the vendor, the manufacturer, is providing this plywood for you. I just took 3/4-inch plywood available at any lows. I doubled it up. I cut it to 5 1/2 inches, which gets me to the bottom of the drawer box opening right here. And then I've laminated those two together. You can screw it. You can pin it. You don't have to get crazy and glue it, but you got to pin it together real good to create a one and 1/2-inch thick block. Could you use a 2x6? You probably could. It just wouldn't look as good. But I've got doubled up plywood. What that does is that once I've screwed it through the top of the cabinet here, here, and at the back of the cabinet coming through the cabinet back, this is now held on with six screws, lots of weight or strength, I should say, to carry the weight. Now I have a cabinet wall that I can insert my drawer glide, run it in, I can screw this where it's supposed to be right behind the front frame, just like the 10ax bracket held it. I can screw it right to that piece of plywood, holding the bottom of the glide to the bottom of that piece of plywood, so I know I'm level, and then my drawer glide is going to run on that carriage nice and smooth.
So this is the part I really want to draw your attention to. You're going to have to laminate that. If it through and put it in, make sure you're centered on the back of the cabinet so your glides aren't tilted or not running parallel, and secure that in place. The rest is pretty straightforward. So that's just a little nuance to any of these front frames or cabinets that have double openings, and there's no cabinet side or partition in there. You're going to have to create one. In the case of inset, where you have a deeper cabinet, if this was overlay, same thing applies. The only difference is the front, the glide is going to sit on the front frame. I can't get it all the way back. It's not the right glide for it, but it sits all the way on the front frame versus going back into the cabinet. You still have to screw it to that piece of wood. So this works for both inset and overlay. Only difference with inset is you don't have to remove these because there aren't going to be any. So hopefully that makes sense. I'm 100% certain your cabinet coach can walk you through this if you get stuck. Feel free to give us a call, and we can talk you through it. But it's a pretty straightforward thing. You just got to get a little creative with a table saw. So hope this helps, and thanks for watching. [Music]


