Video Transcript
[Music] Hey everybody, Brian from the Cabinet Joint here today. Our topic is a base three-drawer assembly, particularly the equal height. I want to stress before I get into the details of this cabinet and the assembly that all the base three-drawer cabinets assemble pretty much the same. The only difference is the sizes of the openings and the drawers that go in them, but the assembly will work regardless.
So, in the case of a base three-drawer equal height, I'll talk about that first and then the base cabinet, base three-drawer cabinet. What you have is a 5-inch top opening and then two 9 and 3/4-inch openings, assuming the cabinet is standard 34 and a half inches high. The thing I want to stress is, no matter what, this is always going to stay 5 inches high, and no matter what the height is that you choose between 31 and a half and 34 and a half, these two openings are what flex. So, they're always equal height. And in the case of inset, as you see here, you have two equal height drawer fronts. We get a lot of questions from people who buy this cabinet and are doing overlay, where your door fronts are hanging all the way over. We get a lot of questions because the customer will get the front frame, and lo and behold, this opening is actually larger than the bottom opening, and they say, "Hey, these are supposed to be equal height. Something's wrong with my front frame." And that is not true. In the case of overlay, this middle drawer front is sharing half of these two front frames, but on the bottom one, the drawer front is laying all the way over this lower rail. So, by nature, the bottom opening has to be smaller. When you shut the drawers, the two full overlay drawer fronts will be the same height. So, that's the critical part is when the drawers are shut, we want the drawer fronts to be the same height. It's a visual thing, not a storage thing. So, bear that in mind. If you're full overlay, that opening will be larger than your bottom opening. It seems a little odd, but it will look fine when you're done assembling.
This cabinet, the base three-drawer equal height, is available, as I said, from 31 and a half to 34 and a half high in 16-inch increments. Width, it goes from 12 to 39 inches wide, so you have a nice big spread there, again, in 16th-inch increments. And the depth is between 12 and 30 inches, in 3-inch increments. And that's a function of the drawer glides from Blum, the manufacturer, only come in 3-inch increments. So, it's 12, 15, 18, all the way up to 30. So, you've got a lot of design flexibility there.
In terms of drawer bases in general, they're getting really popular. People are trying to move away from reaching deep into a cabinet. If you do have a typical base cabinet, people are doing pullouts, but we're seeing tons of kitchens with this particular equal height drawer throughout the kitchen. Almost all the bases are equal height drawer bases. So, very powerful cabinet to use in your repertoire.
I mentioned the regular base three-drawer because, again, this video is going to work for that as well. The difference here is this will be an 8-inch opening, and this will be 11 and a half, so you have kind of small, bigger, biggest. And as that cabinet goes from 31 and a half to 34 and a half, this opening and this opening stay the same. So, 5, 8, flex, okay? Other than that, the assembly is going to look exactly like this base three-drawer equal height when you go to assemble your normal base three-drawer.
Alright, let's get started.
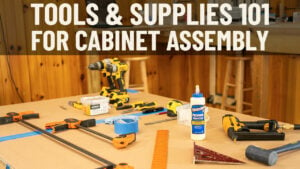
Alright, everybody, before we get started on this base three-drawer equal height assembly, just going to run through tools real quick. If you look in the description below, we do have a video reference that'll take you to a video that shows all the tools and materials you'll need to build most of our cabinets. The core ones we always use Titebond II or any kind of white wood glue. We've got a stapler with inch and a quarter, no longer than an inch and a quarter staples. Pencil, rubber mallet, dead blow rubber mallet, something to tap some parts together. I've got a couple of clamps shown here. We oftentimes clamp various parts together. You might see that in the assembly. And then a wet rag to wipe your glue out. For the astute viewer, you're going to see that we have this front frame already fitted up with some brackets and our cabinet back panel has these brackets on. If you're doing inset, you're going to want to fit up, if it's a door you have to put the hinge brackets on. In this case, it's a full drawer base, you're going to want to put these beige, they call them 10EX brackets, but they carry the drawer glide because it can't sit on the front frame. You want to make sure you install those before you start your assembly. Again, video reference below will take you to how to install and fit up your front frame for hinges and drawer glides. Go ahead and do that if you're inset, and then come back to this assembly. If you're overlay, you can stick with us right away. And regardless of inset or overlay, you're going to want to put these brackets on the back of the cabinet. Again, there's pre-marked holes to show you where they go, and that's covered in the other video. But just make sure you have this fitted up. These can be put on after assembly. You're just kind of reaching inside the cabinet, so try to get those fitted up before the assembly, and it just helps you out to start. We always glue our front frame up. You're going to see hopefully in the video, you have two shoulders here, one on either side, and then a deep groove. That groove is where your splines go. You want to put glue on both shoulders on either side of it because that's where the in-cabinet side panel or 3/4 inch thick flush end, that's where it's going to contact it. You want a glue bond there, so both shoulders on both sides. And then we're going to glue here and then across here. We're not going to do anything with these because there's no panels there. These are just front frames that don't have any partition. So, let me get glue in here and show you how that looks. You don't want to use too much glue because it tends to want to squeeze out the bottom, and you also see that it's very hard to get around these tenex brackets. It's not critical that you get glue on every inch. That main one you do want to get glue on, but that outer groove, if you can't get every inch of it, it's okay. This glue holds really, really well. And then we're going to go on the outside on the top and bottom rail. We go on the outside so we don't have glue squeezing to the inside of the
cabinet. And now we grab our cabinet side. I'm going to show you a trick here that we use. Grab my two sides. Sometimes, our videos might show you just assembling the cabinet with the side first. The side panels tend to want to fall away, so if you're doing this by yourself, I'll show you a trick we often use in our shop here in Gettysburg. We'll take the hanger cleat, the one with the spreader strip, I should call it, with the splines in it. You want to make sure the finish side is facing in and the splines are down, and you just line up the outer edge of the dovetail with the dead center of your spline groove. That'll get you close enough you can tap it into place later, and tap that into place, and this will act as a second set of hands. So now, when I grab my panel, I'm just going to put a little glue there and run that down the dovetail, and that'll hold that panel upright for me. So, I can do the same thing on this one. Now, a little bit of glue, line up the dovetail. It's always easier with two people, but okay. So now I have that one in place. I can take my second spreader strip for now. Again, finish side in. You can just kind of leave that one there for a minute. Now, I'm going to run glue through these dovetails halfway down or halfway up. You don't want to go all the way because if you glue from top to bottom and you slide your panel in, it's going to smear glue everywhere. Our cabinet bottom, we want the finish side in with the splines down. Line up our dovetails. Sometimes, you might want to grab your rubber mallet and do the final tap with that. What you want is down here, we want a tight gap where there's no gap at all. So, now I have a nice, can't even get my fingernail on there. Got a nice tight gap. Now we should have a nice tight gap. Yeah. Okay. Now, we're going to glue for our cabinet back. We have a vertical unfinished edge here and then the shoulder of the rabbit. We want to put the glue on that vertical edge because that's where our unfinished plywood is going to make contact. Our cabinet back, we want to glue any surface that this cabinet back is going to touch. Get a little carried away there. And then across our spreader strip. When we put our cabinet back, and with drawer bases, we want to make sure we have our cabinet back oriented. If we flip it this way and you staple the cabinet together, you're going to have a problem. Your drawer glides are upside down. Want to make sure you have these oriented with the LVs going this way. Set your cabinet back in place. And now you can tap it with your rubber mallet. You can hear how it gets dull. That means that that panel is nice and seated. And we'll work on that top part in a minute. So, for now, I'll take my stapler and just get this back locked in place. What you're going to have is all across here, there's a series of holes, little pilot holes. You're going to put a staple on either side of that. So, I've got there, there. Go over here in the corner, there, there. I did there already, and we can do there now. I mentioned clamps earlier. This is a nice time to use clamps. I'm going to grab one of these. See if I can come around here and show you. You want to tap this back up in first before I do that. I want to put a little glue in there. Okay. Now we can use this clamp to kind of hold this in place so that doesn't fall down while we run our staples. Same as the other panel at the other end. Either side of the pilots. Okay. Now we want to run staples in this way. If this was a finished end, you couldn't. I'll mention that in a second. But we have two unfinished ends, so what we're going to do is take our pencil and find the center of this back panel and just strike a line. If you're more comfortable using a straight edge, you can do that, or you can use like a little speed square and just put the speed square this way, find the center of the panel, and use this as your guide. Either one will work. These do not come pre-marked for you, though. So, I just use my finger as a gauge or a guide, almost like a fence, and run it down. Take your stapler and every 3 inches, you're going to put a staple right on that line. Same on the other side. Alright, now if this was a flush end, disconnect our air. We're going to take this little protector. All this is is a finish protector, so if this was a finished surface, you wouldn't mar it. This will allow us to get the gun up into the corner. I reconnect my air. And if this was a flush end or a finished end, I would just jam the gun all the way up in, keep the heel at the bottom, and same thing, just go along here and staple. Again, I don't have to do that on this one because it's not a flush end, but if you were doing a flush finished end, you can't put staples here. You have to do this toenail method. So, keep that in mind. And that is a finished assembly pretty much. I just got to wipe my glue out, stand this up, and show you the inside. Grab my wet rag, and anywhere you had glue contact inside, you may have squeeze out.
I have a little down here in this corner, so I can reach in there and wipe that out. Wood glue typically dries clear, so if you don't get it all, it's not terribly critical, but it sure makes a nicer assembly when you wipe the inside of the box out. So, I can just inspect this cabinet now and make sure of a few things. I want to make sure that my front frame and my cabinet side are at the same level. In fact, they're not, so I want to knock my frame up a little bit till I get that nice and flush. Same on this one. A little glue there. So now I'm nice and flush here. You want to make sure you got the frame pressed on real good. That's where a clamp like this can be good. You can just work your way down and just kind of make sure it's squished on all the way, but you can do that with your hand as well. Make sure you have a nice tight gap here. Just a quick visual inspection, and that cabinet's pretty much done. See a little glue drip there. That cabinet is pretty much done. If you have any questions, your sales rep or cabinet coach can always help you out. You can just give them a call at 888-211-6482. They're always happy to help you out. Thanks for watching. [Music]


