Video Transcript
Introduction
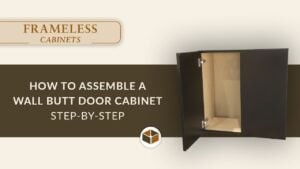
It's a glorious day here at Cabinet Joint. My name is Justin, and in today's video, I'm going to be showing you how to assemble a frameless apron sink base cabinet.
This is a pretty straightforward assembly. On the screen are all the tools that you'll need. Once you have all those tools ready, we can get right into it.
Chapter 2: Tools and Supplies
Chapter 3: Assembly
To begin this assembly, I'm going to get both of my cabinet sides and lay them out like so. I find that laying them out helps me orient them correctly.
Then, once I do that, I'm going to take my door hinge mounts and install them in the pre-drilled holes that are already going to be there on your cabinet, making sure that the arrow is facing toward the front of your cabinet.
Taking a Phillips head, I'm going to tighten those screws and tighten up those mounts. I'm going to do it both on the top and the bottom. This is a butt-door cabinet, so I'm going to be doing this on both sides.
It's important not to overdrive these screws as you're doing this. You don't want to strip them out. You want to make sure they have a nice, good hold.
Something that's simple but might help you in the long run: if you see any sawdust in that back groove, just take a screw or something thin and scrape out that sawdust, because that might interfere with your back panel later on.
Then, once I have my hardware on the cabinet sides, I'm going to take some wood glue. I've got Titebond II here, and I'm just putting a dab of glue in each and every one of those dowel holes, both on the top and the bottom, as well as putting a bead of glue down the back groove for our back panel.
Once I have all that in place, I can take my cabinet bottom and make sure I have it oriented correctly. Once again, the edge banding facing forward, and the back groove lined up with the other back groove. I'll line up those dowels, apply pressure, and close it into place.
I can then go and do the same thing with my cabinet top. Then, I will take my back panel and slide it in between my top and bottom until everything fits nice and snug.
Now, on my other side, which I haven't done anything with besides the hinge mounts, I can put a dab of glue in each of those dowel holes as well and repeat all the same steps as we did for the first side.
Once that's all glued up, I have a little bit of time to line up all my dowels and everything and get those into place before the glue starts falling out. So, make sure it's a quick maneuver.
Then, I'm going to line the back panel up, line all of our dowel holes up, and apply some pressure there with my hand to lock everything into place.
If you do get some wood glue that spills out, don't worry. It's easy to clean up with just a wet rag.
Once everything's pounded all the way down, I'm going to take that wet rag and clean any glue that made its way into the interior of our cabinet.
Then, taking the 2" wood screws that come with your job, I'm going to install those in all of the holes that are pre-drilled for you on your cabinet side. There should be three on the top and three on the bottom.
These screws really help lock everything into place and make sure that your cabinet is nice and sturdy and will last for years to come.
Once I have all six of those screws installed, I'm good to go and move on to the other side, which I'm doing here. I'm going to repeat all the same steps, just installing those six screws and giving everything structure and rigidity in the process.
Then, once I have those six screws in, I can take these 1¼" pocket screws and install my back stretcher by just getting that seated all the way in the bottom and then using those pocket screws to lock the stretcher into place. This just provides a lot of rigidity once again to your frameless cabinet.
Then, I'm going to do the same thing with my toe-kick backer.
I want to say it's helpful to have a longer square bit for this. That way, you can get at a shallower angle as you install these screws.
A little pro tip: as I'm installing these, I'm having my piece raised just a little bit, as you can see. That way, as I tighten the screw, because of the angle, it will actually tighten it to be flush with my toe kick. So, instead of starting out flush, start it just a little bit proud. That way, as you tighten it, it will then sit flush.
I'm putting a 1" screw in all of the pocket holes that you see. Then, you can put those pocket screws in all of the holes that are routed out for you.
Then, I'm good to install the door. If you want more information, we have more videos on how to install the door hinges.
But look at that nice soft close! It just takes a click and a little bit of pressure, and then those doors should connect to your mounts. Once it's lined up, once again, just a little pressure and a click. And now my doors are installed, but they will still need a little bit of adjusting to make sure all the reveals are nice and even.
I'm looking down the side. I should have a ¹⁄₁₆" reveal all the way around.
Looking at the top and the middle, same thing. I want an ⅛" reveal in the middle.
Now, using the adjustment screws, the first screw that you see on your left will adjust your door left and right. That middle screw will adjust your door up and down. And then that back screw will adjust your door forward and backward.
So, I'm going to make my necessary adjustments in order to get these reveals all perfectly even around this cabinet.
Now, you can see everything is nice and even all the way around, and I'm super happy with all the reveals.
I'm going to take these rubber door bumpers and install those on the corners. That way, everything will be quiet as it closes. It'll increase durability, and it will keep your doors in one even plane.
And that's going to be your final step to assembling your frameless apron sink butt-door cabinet. And that's all there is to assembling your frameless apron sink base cabinet.
If you have any other questions, you can reach out to your cabinet coach, or you can call us at 888-211-6482.
Chapter 4: Conclusion
Thank you for watching. Have a great day.