Adding custom wine storage to your cabinetry doesn’t have to be complicated. Here’s how to properly size, cut, and install a wine lattice kit for a clean, professional finish.
This video walks through the complete installation process for a wine lattice kit, from sizing oversized lattice pieces to securing them inside the cabinet with retainer molding. You’ll learn practical techniques for achieving a symmetrical layout, clean cuts, and a secure installation.
Key Takeaways
- Why leaving the cabinet back off simplifies installation
- How to determine the best lattice placement for symmetry and bottle storage
- Tips for marking and cutting oversized lattice pieces
- Using a straight edge and clamps for accurate cuts
- How painter’s tape can help reduce chip out
- Installing retainer molding with 18-gauge brad nails
- Proper orientation of the front lattice to conceal staples
- How to space and secure the second lattice section
- Reinstalling the cabinet back to complete the project
Whether you’re a DIYer or a professional, these tips will help you achieve a high-quality result. If you have questions about wine lattice sizing, installation, or cabinet configurations, reach out to your Cabinet Coach or call us at 888-211-6482.
Video Transcript
Chapter 1: Introduction
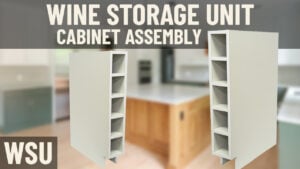
Hey, it's a glorious day here at Cabinet Joint. My name is Justin, and in today's video I'm going to be showing you how to install your wine lattice kit.
This video is just covering the kit, not the cabinet box itself. If you want to see how to assemble this cabinet, we have video links in our description.
This kit, I do recommend leaving your back off during your assembly. It will make the installation of the kit easier later on. But if you've already built the box and already have your cabinet back on, you're going to follow the same steps. You're just going to reverse engineer it a little bit and work this video backwards and install the back first, and then work your way forward.
On the screen are all the tools you will need.
Once you have all those ready, we can get right into the install.
The reason I say it's easier to keep your back off is because these lattices will most likely come oversized.
Chapter 2: Tools
So, you need to cut them down in order to fit inside your cabinet.
So, what I'm doing here is lining up my lattices, my front and my back, lining them up, and then using the open back of the cabinet, I'm going to simply lay the cabinet on top of the lattice.
Chapter 3: Install
Then I'm going to adjust to do a couple of things. Adjust my placement. Don't just start cutting from one side because you want to maximize the amount of usable storage that you have. Try to maximize the amount of holes that you can put your wine bottles in, as well as make it look symmetrical. You don't want it to look totally lopsided.
Now here I opted for another slot to put a wine bottle over being perfectly symmetric, but that was my process and that's what I'm looking for as I'm laying out my cabinet box on the lattice.
Once I've been in the spot where I like it and measured and made sure everything was even, I'm taking my pencil and making marks across the lattice.
With those marked, I'm going to take my cabinet box off, and I'm using just these little clamps to make sure everything stays perfectly aligned. That way, as I cut, both pieces will end up looking the exact same. These clamps aren't 100% necessary—you can cut them individually one by one—but I think this process just makes it easier and more efficient.
Then after that, I'm taking a level—you can use any straight edge really—and connecting all of my lines on the lattice. This is where we'll be cutting.
Then I'm measuring from the edge of my base plate of my circular saw to my blade. So mine was 1¼" to the edge of my base plate. And so I'm going to take my straight edge, whether it's a level or whatever you might be using, and measure 1¼" over from the line that you made.
With everything lined up, I'm then clamping my straight edge to the lattice to ensure that it doesn't wobble or move and that I stay on my line as I cut.
Then I'm going to cut my lattice. I'm going to complete that step on all four sides.
It's important as you're doing this to make sure you are holding your saw straight and not tilting it either way because then you're going to get a cut that isn't square.
Also, because these are just little pieces, be aware that some of these little pieces of the lattice might come flying back at you, but that's okay.
Something else you can do to help avoid chip-out is use some blue painters tape. That helps keep the wood fibers all together. I got mixed results with this. It didn't make a whole world of a difference, but it definitely does help.
Now that everything's cut, I'm going to see if it fits. Mine was a little tight. So what you'll want to do is if your lattice does end up being a little oversized—which is fine, rather oversized than undersized—you can do the exact same steps, just cutting off whatever amount you would need.
I try to split the difference and cut it off both edges, but you can also just cut it off of one.
Also important to note that whatever side you put the scribe molding on, you will not see that cut to the cabinet itself. So if that cut is a little loose, that is okay.
Then once my lattice is fit, I'm good to cut my retainer molding. This retainer molding is really just our scribe molding that we're repurposing, but it works great here in this instance.
Attach it to your cabinet using a ⅝" 18-gauge brad nail. The reason you want to do ⅝" is because you don't want to be poking out the side accidentally.
Using those nails, I'm attaching it to my side. You want to take your retainer molding and bump it all the way up to the front of your cabinet and then attach it on both sides.
Then you can put in your lattice. I recommend inspecting your lattice, seeing if one side's better than the other. Keep in mind there is a front to your lattice—the back will be noticeable because you'll see the staples. So put the front towards the opening of your cabinet, not towards the back.
Then you're going to sandwich it with another piece of retainer molding, butting it up against the lattice, and then installing it with those ⅝" brad nails.
Now you're going to measure, butting your tape against the back of the first lattice, and measure 7" up from there on both of your sides.
Then taking your wine lattice, you'll want that 7" mark to be, in this case, above your wine lattice. Really, you want the front of your back lattice to be 7" away from the back of your front lattice.
Using those marks you just made, you can go ahead and nail your retainer molding to the cabinet, making sure it is oriented correctly like shown in the video.
Then you can take your back lattice and install that. Once again, like you did with the front, you are then going to sandwich it in with another piece of retainer molding. Slide it right in there, take your ⅝" brad nails, and nail it into place.
With everything nailed, you can install your cabinet back. Now your wine lattice is installed.
So now go ahead, enjoy a glass of wine.
Chapter 4: End
You have a place to store it.
If you have any other questions, you can reach out to your cabinet coach or you can call us at 888-211-6482.
Thank you for watching. Have a great day.