Video Transcript
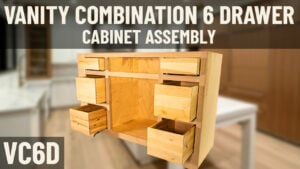
[Music] Hey everybody, Brian from Cabinet Joint here. Today, we’re going to be talking about the assembly of a vanity sink reverse cabinet; it’s a VSRV. What makes us a reverse is, normally, your sink cabinets have a false drawer above, and then the doors go all the way down. Uh, in this case, we reverse it so that we have a drawer below—an actual operable drawer, it’s not false—and two doors above.
Some things to be mindful of with this cabinet is, when you open the doors, you’re going to see the bottom of the sink bowl hanging into the opening. That’s normally what the false drawer is meant to do, is kind of hide the ugly sink, and all you’ll see is your P-strap in the bottom, but you won’t see the sink bowl. Here, you will see the sink bowl, but it raises the door area up so that you have full access to the bottom of the cabinet with a drawer.
Now, immediately, what you should be saying to yourself is, “Can I even use this cabinet?” Your plumbing has to come out the back wall; it cannot come through the floor. You’ll be going through the door box. I guess there could be a case made that if you wanted to do a drawer box with one of the U-shaped cutouts we do—we do do that option—then you could have a drawer. But really, what I would do is try to make sure, if it’s new construction, your plumbing is coming through the wall.
Thing to be mindful of is the distance from the floor of the cabinet, or where the floor would sit, the bottom of the front frame here to here, is 12 inches. So, you need to make sure your plumbing is coming in probably 16 or 18 inches up, so you have enough room for your trap. If you have your plumbing stub coming out of the wall just above this opening, you’ve got no room for the trap. So, there is some planning required to make sure this cabinet’s of use. You may not be able to use it if it’s a remodel, and your plumbing is already coming through the floor, and you don’t want to go through a lot of hassle to move it. That’s a case where you can talk to your cabinet coach about doing one of those cutouts in the bottom of the drawer box, and when you open the drawer box, the notch misses the plumbing. So, just some planning required.
Okay, another thing to be mindful of on all of our sink cabinets is, there’s a—the spreader strips don’t run front to back, uh, as with a normal base cabinet. There is no full top. Instead, the spreader strips run this way, and they’re kind of C-shaped cutouts. You’ll see that in the assembly aspect of this video a little later on. The reason for that is so that you can actually place your sink in there without the spread strip of the front and the back having to be ripped out or cut on site because the sink will not fit. Instead, they put the spreader strips on the left and right-hand side, and your sink bowl theoretically should fit.
When you’re thinking about sizing on any sink cabinet, whether it’s a vanity or, more importantly, kitchen sinks where they’re really wide—if this is, say, a 33-inch cabinet, which is what it is, and you order a 33-inch sink, you got to be mindful of where your sink bowls end because you don’t want to have to hog out the side of the cabinet to make it fit.
This is finished; ends on this cabinet that wouldn’t even work. So, what we normally advise is, whatever your sink size is—let’s say it’s a 30-inch sink—you want to up the cabinet size by an inch or two anyway because the interior dimension is only an inch and a half less than the outside dimension. So, this is 33; my inside dimension is 31 and a half, and that’s where the bowl would fit. That doesn’t include your flanges that have to go up and mount to the bottom of the countertop. So, to give your countertop people and yourself some room to work, we always recommend upsizing the cabinet size. You order a couple, three inches more than the sink bowl width itself.
So, check your specs. Your cabinet coach can help you with your specs on your sink and what cabinet would fit best. So, really powerful cabinet for your design repertoire. Sizes are kind of limited in terms of width; we can go from 24 to 36 inches. Um, from the 24 to 36, you can get with butt doors like this, where there’s no center stile. From 30 to 36, you have the option of an upright divider. Um, the widths are variable in 16th-inch increments; you’re not stuck in 3-inch increments. We can do 16th-inch increments, uh, all the way up from 24 to 36. And the depths are, I believe, 12 to um, 30 inches in 3-inch increments because you do have a drawer box, and those slides are coming in 3-inch increments. So, we can’t do any increment you want; it’s got to be 3-inch increments from 12 to 30 inches deep. Um, so really, again, great, great, uh, cabinet to think about for any of your, uh, applications. Doesn’t have to be a, a, um, vanity; it could be used in a kitchen if you want because of that depth. You can do all sorts of things with this cabinet.
Okay, one thing this cabinet is showing, before I get into the assembly, is this flush toe that is not a standard option. This particular cabinet, for our assembly shop here in Gettysburg, the customer wanted that. This cabinet comes standard with your normal toe notch, like a vanity or kitchen cabinet would. If you want to add that option, your cabinet coach can certainly help you with that, um, but this one came with it; that’s not standard, just be aware.
Let’s get into the assembly and show you how this goes together.
Okay, let’s get going on our assembly of this vanity SN reverse, uh, before I do, a little bit of housekeeping. Want to talk about tools real quick. Video below in the description, you can reference to see the full plethora of tools we sometimes use in our cabinetry, but I have the basics out here. Bottle Tight Bond 2, Tight Bond 3 is just as good; it’s a little longer open working time. Got a marking pencil, a dead blow, which I like—they’re a little more money—but you can also just use a basic old rubber mallet with a wooden handle from Lowe’s, probably cost you six or seven bucks. I have a Bostitch stapler, not a brad nailer. You can use a brad nailer, but we like the stapler as long as you orient the staples the proper way; they won’t shank through, but you get a little more bite. You want to use 1-inch brads or staples; anything up to an inch and a quarter is okay. We like the 1 inch, um, one one and a quarter is fine too, though. Any longer than that, you run the risk of something blowing out to the inside of the cabinet. I have to wipe out excess glue on the inside of the cabinet when I’m done with my assembly, and then I’ve got a little speed square. Any size speed square will do, but this will assist you in marking scribe lines, which I’ll show you in a minute.
Um, this cabinet is a little difficult to show that on because it’s finished sides on both sides. So, I won’t be coming through the sides of the cabinet like we do often in our videos. But I will show you a quick video within a video, or something, to show you how—if you have a normal side—how you would come through the sides and how to mark them. Um, another point of housekeeping is, you’ll notice this is an inset cabinet, so I’ve got all my hardware already mounted. Go to the video below if you’re inset, and go fit your frame up, and then come back and watch the assembly. You want to make sure the hinge brackets and your Tenex drawer brackets are on the cabinet before you assemble; otherwise, trying to work through the inside of the cabinet when it’s already built is really a bear—you will hate it. So, make sure your cabinet is fitted up before you begin.
Alright, let’s talk about parts before we get going. I’ve got, uh, cabinet top and bottom here—oh, I should say a bottom and a mid partition—and then I’ve got two funny-looking spreader strips that we use for sink cabinets. They orient differently than your normal spreader strip that runs left to right; these run front to back and are kind of cut out for your sink bowl. I’ll show you how those go in. So, that’s for the top; the two partitions are for the middle and bottom. And then I’ve got two ends here—again, these are finished, flush, painted ends—so it’s going to be a little bit of a different assembly. We’ll show you how to do flush ends.
Then I’ve got my cabinet back, and you can see, in addition to these brackets, I’ve gone ahead and fitted up my angle brackets for my cabinet back. These you can do through the cabinet once you’ve already built it, so it’s not mission-critical, but it is much nicer to just lay this on its back and put these on before you assemble. So, if you have the presence of mind to do so, mount those angle brackets using the pre-located pilot holes. If you don’t have pilot holes because, for some reason, you and your cabinet coach worked up a custom box and you have to hand locate those, we have another video below you can watch that will show you how to do that.
Let’s get started on the assembly. Okay, so I’m going to set this off to the side real quick—it’s the last piece I need—and I’m going to start with my glue, uh, like we normally do. Okay, so we’re going to glue both shoulders, and again, we’ve said this in all of our videos: you don’t want too much glue. Too much is really going to be messy; you just need enough that when the panel makes contact, it’s got some glue on it. If you really fill this up, it ends up just flowing out the bottom of the cabinet when you stand it up.
If you cannot get glue behind the hinge in the brackets, that’s okay; it’s not mission-critical. You’ve got a good bead of glue on the one long, um, shoulder that I just did. And you’ll notice, like here and here, I’m just going to go around that Tenex bracket. I’m going to go around the hinge. Now, here’s where I have to have presence of mind: I only want to glue a little bit where those, where those, um, spreader strips are going to grab, and then I’m going to go below so I don’t squeeze out, and I’m going to go below here.
Alright, now I’m going to grab one of my finished ends. I got to be very careful because I have painted white ends here. So, I want to take this panel, and I want to make sure I have it oriented. This is my cabinet bottom; here’s the bottom of the door area, this is my drawer area, and here’s my top. You don’t want to accidentally reverse this, or nothing’s going to line up. So, make sure you’re keeping a presence of mind as to what’s a left and what’s a right.
So, I’m going to put that in. Now, this cabinet side wants to kind of wobble a little bit, so one trick you can use is run your bead halfway for this cabinet top strip. And this is where these C-shaped spreaders are a little bit different. So, what I can do is, so I’ve only got—I got a spline in here, and I’ve only got 3 inches that lines up with the glue I did there. I can press this all the way down in until it latches, and now that spline will keep that panel nice and stable.
I’m going to do the same thing with my, my, uh, left side of the cabinet. Now, what I can do is my mid partition and my bottom. So, I’m going to go ahead and glue those up, and I’m going to go off-camera and spin the cabinet at 180 degrees, so I can actually press these in without putting my back to you. So, we’ll be right back.
Okay, I have two mid panels—bottom and mid panels—one for here, one for here. There is a difference: this one has no finish, and then a finish, so that’s my bottom. And then this panel is finished on both sides; that’s my mid partition. Probably not mission-critical if you got them screwed up 'cause you’re never going to see the inside of that drawer opening, but it’s the same situation as you have with tall cabinets and some other cabinets where you will see both sides of the panel. So, it’s just a good habit to get into, to make sure you’re using the top and bottom where they’re supposed to be. I should say the mid partition and the bottom where they’re supposed to be.
So, I have my matching, or my, my, uh, finished interior with my spline. So, spline’s down, interior matching, interior or finished interior in facing you. And now, I just slide that panel down until I have no gap here.
I want to make sure I’m in nice and tight; this is where I can use my dead blow to make sure that’s seated. Do a little tapping on my sides to make sure they stay seated. And now, making sure I’ve got a bead of glue in both of those—and I do—splines down, push that panel in. Same thing, I want to make sure I’ve got a good contact there.
Okay, got my middle partition and my bottom in, my spreader strips at the top where my, uh, front-to-back runners—we’ll call them. And again, you can see the C-shape cut out to receive your sink. Now what I’m going to do is put the back on, so I have to glue on both sides across here, here, and these two little tabs. When we’re doing the side, we only want to glue this, not this little shoulder, because if we glue that shoulder, our pre-finished cabinet back won’t really glue well. So, we want to put the glue on the vertical, kind of rough surface here. So, our glue bottle has a slot where the glue comes out; I want to orient that vertically and I want to smear that glue on that vertical surface in there, same on this side, and then I want to put it all across this panel here, and then across these two little tabs—oops, a little piece of veneer—those two little tabs.
And now I grab my back, and this is where, by putting those brackets on before I assemble, I don’t need to try to reach my hand to that small drawer opening way in the back and put these on. I’ve got them already mounted, so if you’re doing overlay or inset, you still need those brackets; that’s a good thing to have put on. Now I just lay that back on there, I grab my dead blow hammer, and going to make sure I’m in. I want to make sure that these panels and those two little tabs are all inside this dado slot. So, by tapping it down, I can make—you can hear that thud—that means I’m seated, so I’m good.
Now I’m going to grab some clamps. If you don’t have clamps, maybe a buddy can help you squeeze these together, but the clamps sure are helpful. If you don’t have a wide enough clamp, oftentimes the clamps can be joined together to create a longer one. But in this case, 30—I think I have a 33-inch cabinet—I got to make sure I got enough clamp to stretch it, and I’m going to put a couple of these on because this is a finished side cabinet on both sides.
So, I’m going to show you how to handle a flush end where I cannot run nails through the cabinet side. We’re going to show you kind of a quick video here in a second if you have a regular side, how to mark that side, and then nail it. But what you would basically be doing is finding the center of this back panel, which is about, I know, 3/8 of an inch or an inch down, and you would strike a line down the whole cabinet side. You can use a little square to do that, but you want to be in the dead center of that panel and strike a line all the way down the cabinet side, and then you would come through with your staples into the side of the cabinet every 3 inches.
Again, I’ve got white sides; I cannot do that. I have to come through here and nail the cabinet back at a toenail into the cabinet side. So, that’s what I’m going to show you here. What I do is, I take my, my, uh, stapler, and I pull the rubber bumper off. All that rubber bumper is for is to protect finished surfaces. This allows me to jam the gun further up into the corner to make sure I’m getting that staple as into the corner as I can, and I leave the heel of the gun on the cabinet back, so I’m actually angling that staple in.
If I do this like I normally would, I’m barely catching the edge, and I might shank to the inside. I want that staple going into a toenail. That hook my air up, and I’ll show you how it works. Okay, heel of the gun to the floor, up into the corner, every 3 inches. I’m going to do the same thing on this side, and I’m going to flip my clamp. The reason these clamps are here is to keep the cabinet side tight to the cabinet back; otherwise, I might be pushing it away, and I get a gap. And now, I just put another clamp up there to make sure it’s tight all the way down.
Okay, now I can pop the clamps off because my cabinet back is fastened through the sides, and now I’m going to disconnect my air and put my rubber bumper back on. You want to make sure you disconnect the air; otherwise, you could accidentally drive a staple through your finger, and we don’t want that.
Now, all along the cabinet back, there’s every 5 inches, there’s little perforations here, here, and across the top. What we’re going to do is put a staple on either side of all those perforations; that’ll hold our back on down here, up here. Even though there’s perforations all the way across, the manufacturer uses the same back for other kinds of cabinets that do have a full spreader strip, so you have holes all the way across. We only want to nail it here and here 'cause we don’t have any material in here. So, don’t get all happy and go across all the way, or you’re going to have staples driving out all the way through here. Be mindful; it’s just those tabs in this case.
So, I’m going to mark here with my finger. I use my finger as a gauge, and I’m going to go on either side of these holes all the way across, and now my back is fully on. I’m going to go ahead and stand the cabinet up and show you what’s going on here.
Okay, going to grab my rag. A couple of things I want to do on this cabinet is, I want to make sure I have no glue squeeze-out on the inside, and I actually don’t. I have a little bit down there, no glue squeeze-out on the inside of the cabinet. I want to make sure I’m level with my front frame and my cabinet side here and here because if I’m not level, that means the cabinet is actually racked, and I want to make sure by being level, the front frame is keeping that box square. So, that’s a double check.
The last thing I want to do, because this is a finished side on both sides, I’m going to clamp all these sides. And the reason is, we want to make sure we have a good tight gap where that frame meets this cabinet side. So, by clamping it on, I’m ensuring that my cabinet box is tight to the frame, and we won’t have any ugly, unsightly gaps. It’s especially noticeable with painted cabinets; you’ll see that hairline become more than a hairline. So, I’m going to go ahead on both sides and clamp it up, and I’ll come back and show you in a minute what we’ve done.
Okay, so that wraps up our assembly of a vanity sink reverse, which calls for the drawer below. Um, pardon the clamps; we’re just going to wait for these finished ends to set up. Uh, note about clamps: um, if you’re doing a full assembly, you’re going to have some flush ends, so it is not a bad idea to run out and grab three or four of them. If you have a lot of flush ends, that could slow your process of assembling down; you have to wait till one side dries up before you can start the next box assembly. Um, these clamps are available at Lowe’s or Home Depot, but without them, you’re not going to get that good tight seam on the side of the cabinet where the flush end meets the back of the frame, so just a little note there.
Um, other than that, this assembles a lot like an upside-down base cabinet, drawer below instead of the drawer above. And the only thing is those funny little C-shaped spreader strips that we talk about in the intro, which allows you to drop your sink in. So, if you have any questions, give your cabinet coach a call. Great, great vanity to use when your plumbing allows for it, and your application allows for it because you do get some extra storage. So, be sure to add it to your design repertoire. Thanks for watching, everybody.


