Video Transcript
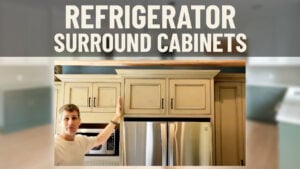
[Music] Hey everybody, Brian with Cabinet Join here. Today, we're going to be showing you how to assemble a refrigerator tall cabinet. This cabinet comes in a couple variations, actually three. One is as you see it here, with two panels, one on each side. We call that a refrigerator tall both (RTB) because it has both legs. There's also an RTL where you have a left leg and then just the bridge box, or an RTR where we have the right panel. The left and the right kind of look like a flag if you want to view it that way. And that's if you're going against a wall or another cabinet to act as your other leg. This is more like a freestanding approach. And really why these cabinets are nice is because the refrigerator appears built-in. In the olden days, or even with less expensive stock kind of lines or semi-custom lines, they sometimes force you to have a refrigerator and panel on both sides and then a bridge cabinet between, and you end up with a seam where a bridge cabinet adjoins with the end pan. And because this cabinet is all one, you get a really seamless look.
Now, this cabinet's available from 84 to 120 in tall. This one here I can reach to 8 ft. This cabinet is a good 100 in tall, but we can go all the way to 120 in with no seams, just continuous. And you can go from 24 to 30 in wide with no divider between the two compartments above. It's just one big opening. Once you go beyond 36 in, you're going to get into a mandatory center style. And since most refrigerators are 36 in wide or more, you're going to end up with a center style, and that's typically okay. Make note of the fact that if you order a 39 in cabinet with this RTB, you'll get the 36 in opening you need for a traditional 36 wide refrigerator. The point I want to make there, and I want to stress it, is the overall box including the end panels is the cabinet size. So if you order an RTB 36 thinking that's for a 36 in refrigerator, your opening ends up being 33 and your fridge will not fit. So make sure you're upsizing the cabinet box you order 3 in for an RTB. You want to be 3 in bigger than your refrigerator. If it's an RTR or an RTL, these are an inch and a half each. You want to be an inch and a half wider than your refrigerator. So a 37 1/2 in wide RTR or RTL would fit your 36 in fridge. Also be mindful that if you do the standard 24 in depth on these, you can go all the way up to 30. But if you do a 24 in standard depth on these, your normal refrigerator, your non-built-in or non-integrated refrigerators are going to stand proud of this unit by a good 6 in. So you'll have your door, and you'll see the side of the refrigerator case right here. That is not a flaw of the cabinet, that's the way those refrigerators are. They protrude out of the opening because the compressors are behind. If you want to get a flush, what they call it, built-in and integrated, where the door panel on the refrigerator is flush with this, it looks like cabinetry, those become taller refrigerators. Your box up here gets much shorter and your compressor is above, and they can make that refrigerator fit the front of the cabinet, but typically they're going to stick proud. So make sure you picked the right refrigerator for your cabinet. I'll talk a little bit later in the video about standing these things up. Make sure you can stand a finished assembled box up at your job site; otherwise, you're going to want to assemble it against the wall, which we have a separate video for. And that's about it. You're going to want to make sure you specify finished interiors if you want this. Most of the time, you won't see this 'cause your refrigerator fits tight and you will not see the inside of the cabinet, except maybe a little bit above if you have a shorter refrigerator than your opening. But if you really are concerned and you want that to be painted with or whatever the exterior is, you must ask for a matching interior.
Okay, so let's get started on the Assembly of this cabinet. It just assembles like any old tall cabinet, but there are some things I want to walk you through that are kind of important with these boxes. Let's get started.
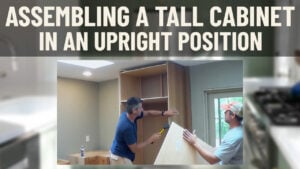
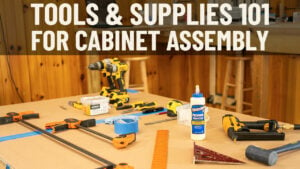
Okay, we're going to get started building this refrigerator tall cabinet. Before I get into the actual assembly, I want to talk you through a few nuances and the tools basic tools require as in all of our videos: staple gun with inch to inch and a quarter Staples is fine, a wet rag for your wiping out the inside of the cabinet with any glue that gets to the inside finished surfaces. Now we got a pencil for Mark and Scribe lines, a bottle of tight Bond two, tight Bond 3 is fine, actually tight Bond one would be fine, we just like tight Bond two a little bit better. Tight Bond 3 gets into a little bit more of an open working time as well as it being waterproof so some folks like to spend a little more money and do the typon 3 any white wood glue is fine. And then I've got a dead blow here which I like because it kind of accentuates The Swinging action of the hammer the sand in there moves around might be safer if you just go with a little $5 rubber mallet at Lowe's either one is fine that's just for tapping your back or your sides and your back into the front frame. Before we get started what I want to talk through is a strip at the bottom leave that in place that is a spreader strip that keeps the two legs in this case I've got an RTB which is a refrigerator tall both so I've got two long legs on this cabinet that spreader strip keeps those two front frame pieces from flexing and breaking you want to leave that in place until you're actually putting the refrigerator cabinet into the house when you remove that strip make sure you get the Staples that are holding that strip on if you pull the strip off and those Staples pull through the wood strip and then you stand it up you're going to gouge your finished floor so make sure when you pull that off you get the the Staples as well but leave that in place to the last minute the other big big big thing I want to mention is we're assembling this cabinet laying down particularly with the RTB the refrigerator tall both you may have an 8ft ceiling with a 92in cabinet or 94-in cabinet whatever you may not be able to stand that cabinet up because as a Cabinet gets stood up it grows from corner to corner it grows in length and you will not stand it upright your cabinet coach can kind of help you out with the Pythagorean theorem they'll run a little calculation to let you know if you can stand that cabinet up if you cannot stand it up right you're going to need to build the cabinet against a wall we're not going to show that on this video we have another video we can link you to um down below here that shows you against the wall assembly but everything I'm doing on the floor you would do it against the wall.
So then, you just turn the cabinet around, but be mindful of your ceiling height versus your cabinet height, 'cause if you build this thing laying down, there's really no work around to stand it up. If you have two finished sides, um, in our case, we have both finished sides, so I can't do much. If these are unfinished sides, you can kind of clip off the bottom corner to kind of shorten that distance and then stand it up. And we're not going to get into all that, but there are some workarounds if you back yourself into a corner. But if you're kind of conscious upfront of this, you can build it upright and save yourself a lot of hassle.
Okay, so as with every cabinet assembly, this one starts the same way. We're going to put glue on our shoulders on both the left and right side, all the way to the top and bottom. We're going to put a bead of glue right here on the outward facing. We don't want glue to squeeze out to the inside of the cabinet, so we're going to put it here and here all along those two rails. And then we'll start with the assembly. Let me get going with the glue.
Um, we don't do these big cabinets on our assembly table, simply because they're so long and oftentimes your garage floor or your finished floor in your house is adequately flat, and you'll get a better assembly that way. You don't want the cabinet bouncing while you try to assemble it, and that's what happens when you're on a table with a big box like this.
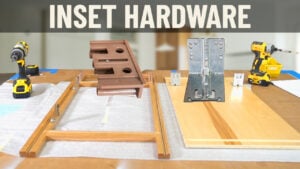
Okay, we've got the frame all glued up. If this was an inset job, we would want to make sure we have our door brackets mounted to the back of the frame. There's a video reference below you can go check that out. Um, if it had drawer glides like a base cabinet, you'd want to fit that all up. That's not going to happen on a refrigerator cabinet; we'd only have hinges. We'd want to make sure those brackets are on there before you start assembling. This is an overlay job, not a problem for us here.
Now, um, we're going to put this side on first so you can see what's going on. What I want to stress is this cabinet is like 108 inches tall. These can go all the way up to 120, which is pretty rare for a cabinet, as it's a lot of plywood demand, hence the handle, so it's not an assembly you want to take on by yourself. So, I've got Jeffrey kind to help me with this one. We're going to start with this one, spin that end down to him, and just like any other cabinet if you watched our other videos, just get those, uh, splines in the groove. Jeffrey's moving a spline; sometimes you get the splines are in the way of the actual dovetails, which will affect you when you go to slide the top and bottom down; they hit the spline. So you want to make sure you don't have a spline in this area or this area, that's what Jeffrey was moving.
So, um, what we normally do on these because we're worried about these sides falling away, we're going to put the top or bottom, doesn't really matter, we're going to do this middle one. I'm just going to put that panel in because that'll help hold this panel upright. So while Jeffrey is holding that, I'm going to grab the top or bottom, doesn't really matter, and making sure I've got the finished side facing in, the unfinished side facing down, I'm going to run this down in until it seats, and now that panel is held upright nice and tight.
Now, grabbing my glue bottle, Jeffrey, you can keep this panel from going someplace it shouldn't go. I'm going to go ahead and glue; you'll see it in a second. Okay, you got the top? Pick yours straight up, so let's roll it to show them what I did. What I did is I glued from the front of the panel down halfway because we're going to slide this down onto that dovetail. So, it's the same halfway spread of the glue; we're just starting with the front of the panel instead of the top of the panel. Jeffrey's going to line the dovetail up, and then working together in tandem, we just let this side drop all the way down until she seats.
Now, I want to stress you may see it's not tight to the front frame there. One of the last operations we do on any flush end cabinet, we've got a whole bunch of clamps, um, you know, squeezy clamps, the Irwin squeezy clamps, and we're going to compress the front frames onto the cabin sides to make sure that gap is nice and tight. That'll be our last operation. But right now, we're going to finish up on the cabinet back.
Okay, so we got the top and middle section in, sides are all on, make sure they're all nice and tight. You can see I've got a clamp on the top just holding those sides nice and tight so when I staple this back on, I have a good gap. You'll see me use some more clamps for that operation. What I want to talk about now is I'm going to glue my top and bottom in here to put the back on. But a lot of refrigerator cabinets, this is when you have to take the cabinet shelf and drop it in from the back. These cabinets often, because they're so wide, have an upright center divider in the middle and they're also a short compartment above, so you cannot snake the cabinet shell through one of the small openings. You have to set it in through the back during the assembly operation. My cabinet right here does not have shelf holes, a very shallow or narrow top area, so there is no shelf. Oftentimes, you'll have an 18-inch area or a 15-inch area, and there will be a shelf. Make sure you put that in; you're going to fight that later. It's actually impossible to put that shelf in from the front later.
So, your glue, as with all of our cabinets, you're just going to run a bead across the cabinet top and bottom. You can see I got a little on the inside there, where your wet rag comes in handy. And then you're going to want to turn the glue bottle vertically, and you want glue along this unfinished vertical part of the side, not along the lower part of that rabbit, 'cause if you put it there, the finished back won't glue to it real well.
Okay, now it's just a matter of like every other cabinet, setting this back on, lining up my doos, getting a rubber mallet, tapping that in place. Oops, and you're going to just follow that ridge along. You might have to bend the top or bottom in if it's got a little bit of a bow to it. You want to tap it in so you have your quarter of an inch back here. Then I'll come back and show you how we nail that on.
Okay, I'm going to just disconnect my air, very important step, disconnect my air, and what you want to do is take this little protective finished cap off the end of your gun. What that's going to allow us to do is get this nail gun right up tight into the back. Remember, I have two finished sides, so I cannot come through the side like we normally would on an unfinished side. Once I've taken that cap off, I can reconnect my air. I'm going to put the heel of the gun right on the cabinet back and go right up in tight to that cabinet side and just work myself right along that back edge, same thing on this side.
Okay, so I've got my back stapled on. One thing you're noticing with these clamps, you have to have, this cabinet's 39 inches wide, so you have to have sometimes two clamps. They'll often make them so they nest together with a dovetail or you have to have a very wide clamp, so I just wanted to make sure you're aware of that. This is not a standard clamping setup and you're going to have to possibly work at Lowe's to find a wide enough clamp or nest two of them together. But now I can pop these off and stand this up and we'll show you the finished cabinet box when I'm done the back.
The last operation is I'm going to go along; we have little holes right which mark the center of those two panels. Those holes are always dead center of those top and bottom panels. Now, all I have to do is go along and put a staple on either side of those holes, do the same thing down here, and we're done and ready to stand it up.
All right, that concludes the assembly of a refrigerator tall. Both, um, you probably saw the cabinet fights you a little bit as you're trying to make sure the front frame and the sides are connected. You got clamps, definitely a cabinet you want to have a second set of hands on, so make sure you've got a buddy. Uh, if you ever have any questions, give your cabinet coach a call; they're always happy to help. Thanks for watching. [Music]


