Video Transcript
[Music] Hey everybody, Brian from Cabinet Joint here, talking about pullout trays today. If there's one trend we've seen take on a lot of steam in the last 8 to 10 years, it's storage. Reason being, as kitchens have evolved into more open spaces where they're conjoining with living rooms and all that kind of thing, you're losing wall space. So, there's fewer and fewer walls to hang cabinet wall cabinets from. We also have wider windows and things like that that are prohibiting the use of a lot of wall cabinets. So, people are trying to make their base cabinets really do a lot of storage. We have an aging demographic which means we don't want to bend over anymore, so people are trying to take what used to be open two doors and reach into the back of the cabinet for the bowl of soup or whatever you're trying to get, or the can of soup. Now they want to be able to pull the shelf out. These are called pullout trays, a better term would be pullout shelves. It allows you to open two doors and just pull the goods out to you.
A couple of things to bear in mind: these are only available for 21-inch deep and 24-inch deep cabinets. We have gotten requests for these in like 27 or 30-inch deep cabinets. Talk to your cabinet coach; the installation's going to be a little trickier, and they don't make those horizontal stanchions for cabinets deeper than 24 inches, so that rear one would have to be pulled off the cabinet back by however much deeper your cabinet is. So, if you did a 27-inch deep cabinet, your pullout trays are 24 inches, you have to pull that rear stanchion 3 inches off the cabinet back. You're not going to get 27-inch deep glide, so talk to your cabinet coach about any workarounds you guys can work up. But typically, standard 21 and 24-inch deep cabinets only. They come as a PT2 with two trays, a P1 that gets one pullout tray, or again, as I mentioned earlier, the tall four-tray version. If you have a full-door cabinet like this instead of a cabinet with a drawer and you want one more tray up here, you can order an extra tray. You can also order a set of the pullout tray tall ones, which are like 48 inches high and cut them anywhere you want in here and you can put as many trays in here as you want. You can always order more single trays with the brackets and the glides to add more trays if you want. The standard height on these is 2 inches, so bear in mind, if you want something deeper like a pullout drawer, work with your cabinet coach to custom order the pots at a deeper height. The standard is 2 inches though, it's really considered a pullout shelf. It's like instead of reaching in and grabbing your canned goods off of a 3/4 depth shelf, it's like being able to pull your shelf out. So don't think of this as a drawer. If you want to set lids and all sorts of things inside there where it's not falling off the side, you're going to need a deeper drawer. So just some things to bear in mind as you design with these pullout trays.
But what we're trying to show you here today in this video is how do you put these in because almost every kitchen we sell has at least one or two cabinets with these pullout trays in them, and we get a lot of questions on how do these go in. There are some differences in the installation between overlay and inset. This is an overlay version, that's an inset version. I'll get into some of those differences, both in terms of how they install and some of the part dimensions that are different on these. So let's get started. If you have any questions, give your cabinet coach a call, at the end they'll be happy to walk you through it.
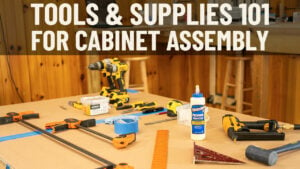
Okay, so let's get started on pullout tray installation. I'm going to do my very best to make this as understandable as possible, but there's different permutations of pullout trays for overlay and inset. The installation's a little bit different. I'm going to walk you through both as best I can. Again, if you ever have any questions, contact your cabinet coach, and we're going to put some kind of overlay images close-ups of the different things I'm talking about so hopefully, this will really help. But first of all, what I want to walk you through is the tools we're going to have to have: a drill gun with a bit, anywhere from like an 8th of an inch to 3/32 of an inch, somewhere in there, a small enough bit that it's not going to remount your hole too big and also not so small that it cracks when you put the screw in, which I'll show you in a minute. We're also going to have an impact gun with whatever screw bit your screws take. In this case, I'm using a Torx. Yours might be Phillips, it's the dealer's choice there. So, I got my screw and drill gun, I've got a pencil and a tape measure, which I'll show you why you'll need those in a minute. I have four cleats; the pullout trays come in base height where you have two trays or tall height where you have four trays. The installation's all the same. I'm doing a base cabinet, so I have two cleats, one for each side. I'll show you how that works in a second. Two cleats for each side, top and bottom, so a total of four of these. And then I have four of these notched stanchions that go in the four corners of the cabinet, which again I'll show you in a minute.
Now, what gets different here between overlay and inset is two things: first of all, on overlay, which you can see here, these cleats that hold the drawer glide are different widths. They're wider for inset because we have to clear these hinge brackets that stick out into the opening on the overlay version. If you pull this out on the overlay version, you can see that the stanchions are much narrower than they are on the inset because the overlay doesn't have to clear a hinge so it can go much wider. So, you are getting a wider pullout tray for the same size cabinet with overlay than you are with inset. Since I'm kind of here doing this, I want to show you these pullout trays are adjustable in 3-inch increments, which is the distances between these notches. And all you have to do is what I just did there. You're going to move them in and out, up and down, any way you want. That notch there goes into the rear notch, which I'll show you how to install that. And the front one rests on that notch and you just slide the tray in. Oops, like any other drawer box, you just take your pullout tray, set it on the glides, press it until it clicks, and that's how you move your trays up and down.
So, on overlay and inset, you have the differences in the widths. That's the first difference. The second difference is how these stanchions go in. I'm going to show you on inset because it's trickier. I'll also describe it on overlay and we'll show you the close-ups that will really help. Okay.
So, no matter which one you're doing with the hardware kit, you're going to get four of these two stanchions. They orient a little bit differently in the front behind the front frame and in the back of the cabinet. At the front, you'll see there's a little notch here. That notch goes uptight behind the front frame. And the reason being, and here's where you're going to look at an overlay image on the video here, on overlay, that notch is right up behind the front frame because the hinge has a hook in the hinge. The overlay hinge will wrap around the frame and that little recess there gives the tabs on the hinge somewhere to go. Okay. On inset, that doesn't matter but on overlay, it's very critical. You orient that notch uptight behind the front frame. Okay. On inset, the problem is that the hinge body gets in the way. I'm going to move here so you can see better. The hinge body gets in the way of the bracket being able to pull all the way up behind. So, there's two options. There's one Koga expects you to do which we don't like and then there's our workaround which we like better. What Koga expects you to do is notch the stanchion and push it in behind the front frame and have the notch kind of sit between the chopped out pieces. Well, now you're into a mess because you got to make sure you have that exact section this top section oriented right or your trays are going to be unlevel and it's just not good. What we've done is we just run the bracket up right behind the hinges until it stops, okay, and which is exactly two inches by the way. And then we take the stanchions or the horizontal pieces that come from Koga and you can see we've cut two of them down already. You're going to take your table saw and cut off 2 inches off the non-notched side, just lop 2 inches off, and now what's going to happen is when we put this in, this will sit in there perfectly just like a normal pullout tray. I'll show you how to put the hardware on in a minute. But you've basically shortened the carrier by 2 inches. So not a big deal if you got a chop saw which you should have if you're doing some cabinetry work and installation. I guess you could do it with a skill saw but you should have a way to cut those nice and cleanly.
Alright, now let's talk about how these go in the back. Same thing, you have these notch pieces. Whereas the front ones went like that, the rear ones go in with the notches facing the cabinet wall. Okay. And that's because these pieces that tab nests in there like that and the front rests on that bracket that's facing the back of the cabinet. So, we'll get close-ups for you so you can see. Now, the question comes, how do you put the these in? You can pin them in place if you got a brad nailer or a stapler. You can pin them in place, which is okay. Be sure you're using a brad or a staple that will not go through your finished side if you have a finished side in the cabinet. These are 3/4 inch thick; your cabinet wall is 3/4 inch thick. So make sure you're not using a brad or a screw or staple that's longer than an inch and a quarter, I would say, because it's going to countersink a little bit in our case. We like to screw them so I'm going to grab my screw gun that has my bit. And again, the front one's going up back like this so I want to screw here. I'm going to do three holes, the top, and I'm just going to do one. I'm going to do one side and then we'll go off-camera and do the rest and come back. Two, three. That's the one that goes there. Then the one that goes to the back of the cabinet, the notches are facing the back of the cabinet. So, I'm going to screw three there. Okay.
Now, we use an inch and a quarter kind of a cap screw. We use a cap screw. Again, Torx bit, this fat head keeps it from countersinking too much and possibly poking through the side of the cabinet. So, I'm going to use these again. They have a Torx bit on them but you could probably get them with Phillips, okay. Get my piece oriented right. And you see me, I'm not pre-drilling the cabinet side, okay, or the cabinet wall because plywood will not crack or split so I'm not worried about that. I want to be screwing into virgin wood. So, there's my middle one. I'll just do the top one and then come back and show you the rear, okay. Okay, that's good enough for now. I'm going to come back and finish my screwing up in a second but I want to at least show you how these brackets now go in. Those will carry my drawer glides, which I'll show you how to put on in a moment.
Okay, now what we have to do is mount our drawer glides to these horizontal carriers. I took the one out of the overlay cabinet to show you. No matter how long this piece is, because remember you had to cut yours down 2 inches for inset, no matter how short these are, the goal is to line the back of the glide up with the back of the notch. So, here's my wider inset one. It's also shorter, as you can see. I'm going to take the left drawer glide and I'm going to line it up with the very back of the cabinet or the back of the notch. I don't want to go all the way to the back of this or now it's going to hit the back of the cabinet and I want to line the top up so this is flush with the top of that horizontal piece of wood. Once it's there and I like where it is, I'm just going to demonstrate one of them. I like where it is. I'm going to take my drill bit. We have a centering bit we kind of like. If you don't have one, just make sure your hole is in the dead center of the screw hole. And I'm going to run a screw hole and I'm just going to put one in to show you. Then I'll come back and give you the final, my bit real quick. Using the Torx, you're going to use the large screws that come out of your hardware bag that came in your drawer glides. The largest screws that should only be, and now you actually might have to use some of your own. They only come with a couple and you're going to need three on each side. And what we found is the medium screws kind of push through that hole. You may need to find your own screws if you don't like the attachment you're getting. But and I'm going to do the other two holes, one here, one up front. Put these in and then we'll show you how they all go in once I've got them all fitted.
There you go. Even with the end, it doesn't matter how far that sticks out. I'm going to go ahead and put this left one in at the very bottom. But again, these are all adjustable. You can move them up any way you want. I'm going to go fit up my other three stanchions or horizontal members and then we'll come back and show you the finished product.
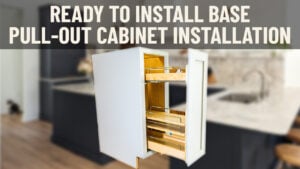
Okay, I've got all four of my glides in. Again, to summarize on both sides, you're just keeping the tail in line with that notch. These will slide right in. You pick your elevation, put the rear tab in that rear slot and just push that one in on the—it kind of rests on the front of the slot. You'll see in the close-ups we sent. Now, it's just a matter of taking the drawer box and just like any other drawer, lay it on there, push it until it clicks and now you have adjustable pullout trays that you can move up and down in 3-inch increments to your heart's content. If you have any questions, again, call your cabinet coach. We'd love to hear from you. Thanks for watching. [Music]

This does not work on inset. If the glide is attached at the notch when put into place the front of the glide sticks out and you cannot put the door on. We had to readjust several times with the glide nearly touching the back of the cabinet. It is the only way the glide will fit in with an inset with a door.
Ann – We’re not sure what you’re referring to. If the glide rail is mounted to the horizontal pieces with the back of the glide lined up with the back of the cleat, the drawer should clear easily. The glide is 3” Less in depth than the cabinet, so should be plenty of room.