Video Transcript
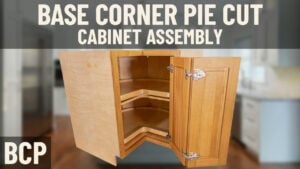
[Music] Hey everybody! Brian here to talk to you about the wall corner single entry cabinet that you see here. Great useful cabinet. We'll get into the assembly in a minute, but I wanted to talk to you about a few specifics on these units you got to be aware of. First of all, they come in sizes from 24 high all the way up to 72 high. This one here is, I believe, 30. If you're doing a 24 high unit or even pretty much anything smaller than 30, you're going to want to make sure you put the shelves in the cabinet as you're assembling it. They won't pass through the door. We'll talk about that later in the video. They go all the way up to 72 high.They come in two depths: 12 and a half and 15 and a half. And when I say depth I'm talking about this part. And they also come in two widths: 24 and 27. The 24 inch depth, which is what this is, always has a 12 and a half inch deep side. The 27 deep always has a 15 and a half inch deep side. So be mindful that if you go to a 27 inch unit, this is going to stick out three inches further than the rest of your wall cabinets running down the adjacent runs, unless you happen to make them custom and deepen them. This cabinet is going to protrude further, so you're going to want to make sure you put finished ends on these sides if you're doing the 27 deep, because you're going to see that leading three inches of cabinet sticking out. So other than that, there's not a lot to know about these. This is an inset cabinet, here. You can see the door is inside the front frame. We'll talk to you in the video about making sure you put your mounting brackets for the door on the back of the frame before you assemble the box. But if you're doing an overlay be mindful, though no matter what overlay you do whether it's a full overlay or a half inch overlay, the door is only going to lay over the front frame by a half an inch. You're not going to get the full overlay this way. That's by design. If the door was to lay the full inch and a quarter over, when you open the door, it will bind against the adjacent door. On a 12 and a half inch deep box, your other cabinets are running off of this front frame and those two doors will collide. So Conestoga makes the door narrower, giving you a half inch of exposure, so the door has plenty of room to clear. So that's by design. When you're putting your hinges on, on a full overlay, wall corner single, make sure you use the half inch overlay hinges. They'll be in a different pack labeled half inch overlay. Other than that, a pretty straightforward cabinet on the corner side of things. So we will get started right now, and show you how it actually goes together. Stick with us.
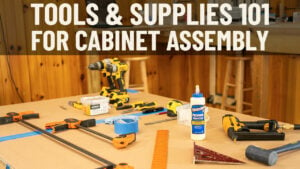
Okay let's get started with this wall corner cabinet assembly. Before we do, and want to walk through what comes with the cabinet, and also what tools you're going to need. For tools, pretty basic: we've always got our bottle of glue, a rubber mallet or a dead blow is great - a pencil for making subscribe line marks - that we'll show you how to do in the video. A Brad - it's not a brad nailer - it's a stapler that we use. It’s a Bostitch - it uses an inch and a quarter staple and of course a compressor. And a wet rag. We'll always want to have some way to wipe off excess glue, which there will be some. If you don't get excess glue squeezing out somewhere, you might not have used enough. So it's not a bad thing to have some glue squeezing out on the interior of the cabinet, and you can wipe it away with that.
As for the cabinet, this one comes with a few more parts than most of your base and wall cabinets. You have the frame, of course. You've also got the two sides, the two backs, and then this corner strip in the far back that goes, you know, kind of clips off that corner where the corner of your sheetrock is. And then you've got shelves. So the shelves you don't necessarily have to put them in if you've watched our base Lazy Susan video. You don't necessarily have to put the shelves in during assembly, but depending on the size of the cabinet, remember this cabinet can get ordered very short, you may have a situation where the cabinet shelves won't clear the front frame. So we're going to show you how to drop the shelves in during assembly. It's not a bad practice to get into, but these should go in through the front of the cabinet just fine.
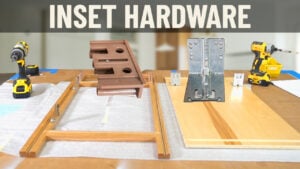
So we're going to get started with our gluing process. Okay, just like a normal cabinet we're going to glue up our front frame. Before I do that, you're going to see these two brackets, well those are for inset cabinets, this job is inset. If you have an inset job you want to install those brackets on the frame before you start the assembly there's a video reference below in this video that will show you and take you to the video that shows how to put all the mounting hardware on, whether it's a drawer cabinet, a cabinet that's got hinge brackets like this - you'll want to put all that stuff that mounts onto the back of the frame before you begin to build the box. It's very difficult to come into an assembled cabinet and work into the back of the frame to install these brackets. So we already did that for our cabinet, and now we're going to go into the gluing process. So get your bottle of glue. And you're going to see there's a groove at the top and bottom where the top and bottom panels go in. You want to put a bead of glue to the outside, not to the inside, because the inside is going to squeeze into the cabinet face. We just want it on the outside. And then you have these two trenches, or troughs, where the cabinet sides die into. We're going to run a bead of glue in there. This is different from your normal front frame where you have shoulders, two shoulders, to put the glue on. You don't have that. This is just one shoulder, and you kind of run along that one shoulder. And set the glue off to the side for a second. Now also very different than most cabinets - we usually start with the cabinet sides going in. In this case, we're going to start with a cabinet top and bottom because they're splayed. So I can't run the cabinet sides in after them, you know. we have to do the top and bottom first. If you do the sides first, I can't put a splayed side into the cabinet side. So we're going to put the top and bottom in. They have that fanning effect, and we'll slide the sides in. So Jeffrey, if you would step on screen, I have my helper we're going to do this as a two guy cabinet. I will make the comment you're going to want to use two people for these cabinets. They are very difficult to get together with one person. This is a small one you might be able to do it. But a lazy Susan or a larger wall corner cabinet, they're a little unwieldy. You'll also notice in all your parts you have these stickers. We tend to like to tell our customers to leave these stickers on these panels until you've got the cabinet built. If you should have an issue where something's not machined right, all you have to do is take a picture of that sticker and send it in with your replacement request. That tells us everything we need to know about what the part is and what cabinet it goes with. Once the cabinet is built, you can go through and peel everything off.
Okay, so the way this works is you have a finish side and an unfinished side. The finish side goes in. We're going to line those splines up in that groove. And you want to get kind of the center of the dovetail, right at the edge. And the sides will just kind of straighten it out for you. You'll be able to knock things into place. But you have this dovetail running down here, and the dovetail outer edge of the dovetail is just about on the edge of the front frame. All right so now we've got our tops and bottoms, and again, backwards from what you're used to with a cabinet. All right, so your next part is you have the shallow cabinet sides. These are the backs and these are the sides. So we have the shallow cabinet sides that go in this way on both left and right. So we're going to move over here. We have our typical bead of glue about halfway down. And because I'm pushing this this way I'm going to start the glue here so it smears out through the groove. So Jeffrey's going to manhandle one side, I'll do the other. We kind of have to do this in unison if one guy gets too far ahead it kind of gets bound up. Okay, now let's turn this cabinet so you can see. What you're going to see, here, is this diving into that slot. You have a tab going into that slot. This has to be tight in here. Okay, and what's going to happen is as you push this in, you're going to see this panel will kind of shift to where it needs to be. And when we get both these in. Our goal is a nice tight gap all the way across the bottom. We don't want any gap between our top or bottom and the front frame. So let's get my rubber mallet there, Jeffrey. We're just going to tap this to make sure she's seated. She is in there nice and tight here. I got a nice gap all the way across the bottom. So now we're going to do the exact same thing on this panel. Do me the honor of gluing sir. Okay, and then, okay. A little tap-tap nice and tight all the way across the bottom. Get that out of the way for you. Yeah nice and tight all the way across the bottom. So now, the backs go in this way. And the way the backs are oriented is you have a flat edge and you have a bird's mouth edge. That bird's mouth has to go here. So that's going to mean this panel goes in this way. And when it's all the way in, you'll see that bird's mouth is facing up here. And that's so this piece, when it lays in, can sit in that bird's mouth. So you want to make sure you have this oriented with the dado end going in there, bird's mouth up top on both pieces. So we had already had this one glued up I think earlier, but let's just throw a splash in there again. So now we're going to spin this over. We'll line up our dovetails - okay stop there. Bottle of glue, sir. Now we're going to glue this dado along here. We want glue on all these contact points, and that should contact nice and tight down here.
Okay so now we've got the side pressed down. We've got a nice tight gap here. Panel is tight to the panel. Just going to turn this thing up, and what we typically do, I use my finger. You can make a jig if you want. I find the center of the panel okay, and I'm going to make a pencil line using my middle finger as a guide. I'm just going to make a pencil line all the way down the side of the cabinet. The goal is that a pencil line comes out in the center of that side. That's my nailer line. So now I just take my stapler, and I go all along the cabinet on my line. Staple my sides together. I'm going to do the same thing to put it back on its face, and Jeffrey and I will do the same thing on that side. So on a Lazy Susan cabinet, we'd already talked about how on a base Lady Susan you got to put the shelves in, and you'd have done that before you put this back on, would you just drop these shelves in. But I can show you. Let's flip the cabinet up, Jeffrey. You can see these shelves. We'll drop in just far into the front of the cabinet. Okay, it's sitting up on the bracket, the hinge bracket. It's not a problem, but these shelves will fit. You can go through the front of the cabinet. Some cabinets can be mindful. Try to pass it through the opening, make sure it'll fit. But you can go through the back or just drop it in after the assembly.
All right, so now the last little step. Very simple. We have this strip that goes on the back. We just put glue here and here, a little inside these little bird's mouths. This doesn't give you a lot of bond because the panel is finished. So you're getting glue on a finished surface, which isn't going to bond real well but we throw some on there anyway. It never hurts. And then we take our strip again. You got these scribe lines with the dado - you just set that on the top and rubber mallet right here underneath the gun. As you can see, it's sit down nice and tight, right on top of my bird's mouth. We're in good shape. And then we just take our stapler not a bad idea on these scribe lines to make sure they are located right. We use a jig that we made up. You don't need to, but basically you just want to eyeball these and make sure you have this dovetail here - you want to make sure that that scribe line is in the center of the dovetail. And our little jig will tell me that, yes, it is. But if you see it waving off, you want to re-strike a line and make sure that you got a pencil line to actually nail to. And we just follow that scribe line. Conestoga is talking about changing this to a series of perforations like dots, and you would just nail on either side of the dots. They're finding that to be a little more consistent than the scribe line. They get a better consistency with the center of the dado. The same thing - top of this panel here. And here we're going to finish that up off camera, come back and show you the finished product.
Okay so that completes the assembly! Don't forget your wet rag. Wipe out any glue you have on the inside of the cabinet. We already did that. Peel your stickers off, which we already did. And that's your finished cabinet. As you can see we were able to drop the shelves in through the opening as I mentioned. If you're concerned about that. you'll want to be 100 sure that your shelves will go into the cabinet. Just drop them in during the assembly through the cabinet back.
So that's your corner cabinet. The base corner cabinet has a base corner sink that's got a little false drawer here. A base corner full door, and then of course the wall diagonal cabinets. Any of these that have a clip corner versus a pie cut shape, this video will suffice to show you how all of those are built. If you ever have questions give your Cabinet Coach a call: 888-211-6482 Thanks again for sticking with us! Have a great day!


