Video Transcript
[Music] Hey everybody, Brian from the Cabinet Joint here. Going to be talking about a base one-drawer cabinet assembly today. Let me give you some background on the cabinet, some specifics about it before we get going on the assembly. It comes as a one-drawer wide or also a two-drawer wide, so you want to make sure you get in the right configuration. The single drawer is available 12 inches wide all the way up to 30 inches, 36 inches wide rather, as one drawer. The double drawer is available from 30 inches to 48 inches. And when I say double drawer, it's a drawer here and a drawer here separated by an inch and a half front frame member. Cabinets are available from 12 inches to 21 inches high. The 12 inches is going to include that 4-inch bottom toe kick. So when you get a 12-inch cabinet, you're talking about an 8-inch high front frame. It's pretty small. You're not getting a lot of use there. So bear that in mind.
Aside from that, it assembles like almost any other base cabinet. You do have the one drawer that you're going to have to put in with the hardware. We should have that in our videos. Very popular for window seats. We see a lot of people putting these under windows and then putting a full top or even granite, but typically it's a wood top that we can sell you or you can get elsewhere and put a cushion on it. You've got a nice window seat. So talk to your cabinet coach about various uses for this, but they're getting more and more popular. So let's get started on the assembly of this cabinet, and we'll go from there.
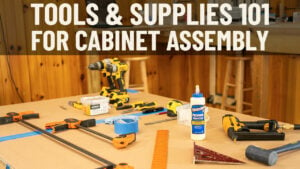
Okay, before we get going with this base one-drawer assembly, a couple of things for overview. Tools: we have tools and supplies video for all of our cabinets you're going to need to have handy. That's in the description below. You can go right to that if you want to see a broader list of tools and supplies. But I got the basics: stapler with 1 and 1/8-inch staples, I got my glue, rubber mallet, rubber wet rag, and a pencil. You may or may not need some other things for various assemblies, but that's the core stuff you're going to need.
The other thing astute viewers will see is these brackets here. I want to stress, if you're doing inset cabinets, that's flush inset or beaded inset, you're going to want to proceed as the video in the description below talks about how to fit up the back of the front frame before you assemble the cabinet box. If you try to put these brackets on or your hinge brackets for doors on the back of the front frame after you've assembled the box, you're trying to work inside the cabinet to the back of the front frame. The drill doesn't want to fit. If you have a shallow cabinet, the drill won't fit. So you really want to make sure you do all your frame fit up before you assemble the cabinet.
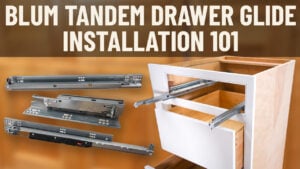
Okay, so as for inventory, I've got my frame with it already fitted up. I've got left and right side, got my back comment on the back. As you also, it doesn't matter if you're doing overlay or inset, if your cabinet has a drawer in it, you want to make sure you mount your carrier brackets for the back of the drawer glide. On any drawer glide, I think it's 15 inches up to 24 inches, they'll carry, they'll have these carrier brackets. Might be more than that. I don't want to quote me on that. I know the longer drawers for like 27 and 30-inch deep cabinets don't use these. They actually get mounted to the cabinet side. But for most of our cabinets, there's going to be little pockmarks here that mark where these go. We have a video to show you how to put those on, but you want to put those on before assembly if possible.
So you're not having to reach into the back of the cabinet. I've also got two panels for the top and bottom. Now, this is a customer's cabinet for a job here in our shop in Gettysburg. I want to stress, the base one-drawer cabinets, any variation of it, does not come with a full top. It normally has spreader strips like that, where we have a top, a front, and back spreader strip like our normal base cabinets show. This one's different where the customer ordered what we call a dust top option, which gives you a full top lid. So we have a separate video that will show you what a dust top option is, but that's a little bit of a variation on this assembly. So bear that in mind.
Okay, let's get started. The way we normally do, grab our Titebond II, and we're going to run glue in the shoulders, I should say, on the shoulders of the front frame. The left and right sides have these little shoulders where the splines, the spline goes in below it. Got a little goober there. These brackets are really tough to work around. So you're only going to get a good bead of glue on this side, and then you've got to kind of work around the bracket. And that's okay. You're getting plenty of glue bond with that inner bead. This outer one is just a kind of security.
And then we're going to run glue on our top and bottom. You really want to make sure your glue bottle is functioning well. And mine is not. There we go. Put a good bit of glue on the top and bottom on the outer facing surface so that when you push the panel in, glue doesn't squeeze to the inside. Okay, now we grab our left and right side, and I'm going to use my finger as a guide to get the front frame and the panel lined up as good as possible. Tap that into place. Same thing with this one. If you had a spreader strip, we often like to put the spreader strip here and then push these in so they don't splay out like that. But because I have a full top and bottom, I don't have spreader strips in this case. But you can watch some of our other base cabinet videos to see that.
So now what I'm going to do is we're going to bead of glue halfway down these channels. These are dovetails, so when you slide the panel into place like you'll see in a moment, it will spread that glue out all the way down to the dovetail. So if you glued it from top to bottom, it's going to make a real mess at the bottom. So we take our panel. I'm going to do the bottom first, finish side in with the splines down. I just line up my dovetails, kind of start one, and then work to the other one. And once they're in place, you should be able to push that panel down using your body weight. If you're not heavy like me, you can just tap those panels in place with your rubber mallet. Going to do the same thing with this panel, finish side in, splines down, line up my dovetails, and push her down. Give her a little tap.
Okay, so now I've got the box built with everything but the back. We're going to run a bead of glue on the edge. And when I say edge, there's a rabbit on the side panels to catch that cabinet back. You want to put the glue on the side of the rabbit, not the bottom, because that's where your unfinished plywood is going to contact this cabinet side. You'll see what I mean in a minute. Now, you want to make sure you put your back on with the brackets oriented right. So this is the bottom of my cabinet. I want my brackets oriented right. If I put this panel in like this, I have to take those brackets back off. So make sure you have your cabinet back oriented properly. Set that in place.
You can sometimes do that with body weight or with a ham fist, but we like the mallet just to kind of make sure that back is seated. And now what you're going to do is these cabinet backs have little drill holes every four or five inches. Those are put on by the CNC machine when the back dado is done, so they're guaranteed to line up with your cabinet top and bottom. So when you're pinning, you're going to go left and right of those holes, just on either side of those holes, all the way across.
Okay, can use your finger as a kind of a fence if you want. Just going to do a staple on either side. Do that on both top and bottom. And now we're going to do a scribe line. So if you can see on the video, we've got the center of this panel here. You can either use a 90-degree like this, find the center and just use this to use your as if you're not good with your finger, a lot of carpenters would just use their finger as a guide, find the center, and strike a line. And you're going to do that on both sides. And then what we're going to do is take our nail gun on that scribe line and following it exactly with our gun nice and straight, we're just going to pin into that cabinet back right. So I'm going to do the other side and come back on screen and join you.
Okay, cabinet's all stapled together. We lay it back orient it normally. What we want to do now, couple of housekeeping things: make sure our front frame and our cabinet side are lined up on both sides. In fact, I'm not. I want to tap either this up or the cabinet side down, but I want in this case get the front frame to go up a little bit. That was too much. Okay, so now I'm lined up. That's going to square the cabinet. You don't want to have this or this high on one side of the other or your box is not square.
Second thing I want to do is grab my glue rag, my wet damp rag, and I'm going to reach inside. I'm not going to do it on screen because I'm going to look like a monkey climbing in there, but I have some glue squeeze-out in there where the cabinet back pressed the glue out. You're just going to take your rag, look to the inside of the cabinet, and clean any glue up there. Maybe you got some glue in the front frame. Just be very thorough and make sure you wipe up that glue and get that residue off. You don't want it to dry on you.
The third thing is, and I don't comment on this in all the videos, but my eye just caught it there's glue dripping out the bottom of the front frame because of those channels. That's normal. If you want to prevent that, I would say either put the cabinet on something like C-board or a floor you're not worried about. If you set this on an unfinished oak floor in your house to dry and you get glue dropping out of it, that's going to really upset you. The other option is just lay the cabinet on its back while it's drying up so the glue can't fall out the bottom like that.
We tend to set it on cardboard, and then as that glue dries, you can just take it off with a chisel. But you do not want to have that drip out on your finished floor. So now we can go ahead and fit the cabinet up and get it ready for installation. If you ever have questions, your cabinet coaches are always available to help you out. Just give them a call, and they'll talk you through it. Thanks for watching. [Music]