Video Transcript
[Music] Hey everybody, Brian here from the Cabinet Joint. Today we're going to be covering the assembly of a base four-drawer cabinet. I've got one shown here in various stages of assembly. Full bottom drawer, then three equal-height drawers above, and you can see we haven't put our top drawer in yet, just giving you an idea of how this cabinet fits up.
A couple of things to know about this: you have three equal-height top drawers and one deeper, taller drawer. This cabinet is available from 31.5 inches high to 34.5 inches high, anywhere in that range, and in 16-inch increments. If you happen to order it bigger or smaller, the variable is this bottom drawer. That drawer gets smaller or bigger based on the height of the cabinet. These top three openings stay fixed at 5 inches, so bear that in mind.
The cabinet is available from 12 inches wide to 39 inches wide, again in 16th-inch increments, so you have a lot of flexibility there. In terms of depth, you can get it from 12 inches deep to 30 inches deep in 3-inch increments. That's driven by the drawer glides; the drawer glides only come in 3-inch increments, so you can't do a 12 and 1/2 inch or a 13-inch deep cabinet. It's 12, 15, 18, all the way up to 30. So bear those size restrictions in mind; they're all noted in our catalog.
Lots of options available on this cabinet, pretty much every option we offer for base cabinets, including the extended style that's shown on this box, furniture toes, you name it. So you can really get creative with this, and as we're seeing kitchens evolve, people are wanting more and more drawer space and fewer and fewer just full-door cabinets. And if they do have doors on them, they usually have pullouts behind them. So we're seeing a lot of requests for drawer cabinets.
This assembly, we'll show you in a minute, follows the same basic principles as our three-door base cabinet, two-door base cabinet, all variations on a theme. You just have more drawers to fit up. So stick with us, we'll get started on assembling this base four-drawer cabinet.
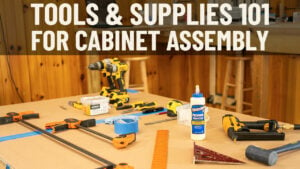
Okay, before we get started on the assembly of this base four-drawer cabinet, a couple of things I want to walk you through. We have a tools and materials video that you can reference; it's in the description below. Check that out to see what you need to actually build most of our cabinets. It's much more complete. For the basics, we have our stapler, a rubber mallet, pencil, inch and an eighth to inch and a half max staples to go in that stapler, a wet rag. I have a file here that we use to clean up dovetails on the left and right sides if we have any fuzz. We just kind of run it through there. I'll show you that in a minute. That's the basics for this cabinet.
For the astute viewer, you're going to see a couple of things. You see these brackets mounted to the back of our frame, and you also see our cabinet back has L brackets mounted to it. There's a whole separate video that shows you how to do that. So if you could reference that video also in the description below. That's for inset. These brackets on the back are for inset.
Definitely want to have hinged brackets and drawer brackets fitted up on your front frame before you assemble if it's inset. If it's overlay, you don't need those. You won't even have those, and you'll put your hinges on your door and mount them later. So overlay, you don't need to do that. If you're doing inset, you want to jump to that video below and fit your front frame up before you start the assembly.
And no matter what cabinet you're doing, overlay or inset, you want to use the pre-marked holes to mount your rear carrier brackets. There are variations. If it's a 27-inch deep cabinet, you won't have those. 30-inch deep cabinet, you won't have those. And if you have to mark your own holes because you're doing a custom-configured front frame, your sales rep or cabinet coach should have walked you through that. You won't have pre-marked holes, or they may or may not work; you'll have to manually locate them.
I'm not going to get into that for that video or for this video. This is a standard base four-drawer. These were all pre-marked and lined up perfectly. So that's what we're going to cover is the standard assembly.
Quick inventory of our parts. We have a back, top and top spreader strips for the front and back of the cabinet. You'll see that go in. A cabinet bottom and a left and right side.
Okay, one thing I forgot to show you when our tools was glue. So we're going to grab our Titebond II, it's what we like, available at any hardware store. We're going to run glue on the shoulders there. There's two shoulders, left and right side, with a big groove in the middle. The big groove is for the splines. We're going to glue on the shoulders, and when you have these little beige brackets in place, it makes glue in that outside shoulder very difficult. So just get it as good as you can. So it's okay to have intermittent glue, but we have that one inside is going to have a lot of glue on it, and that's what we want.
Alright, we're also going to glue our top and bottom wherever there's a panel contacting the front frame. Then we want to keep that glue to the outside, not the inside, or will squeeze to the inside of the cabinet. Okay, set that off to the side.
A little trick, a lot of our videos don't show this, but I want to show you a trick if you're assembling these by yourself that makes it a bit easier. What I often do is put the spreader strip in first, keep the finished side towards you, splines down, and you line up the center of the spline groove with the outside of the panel and press that into place. And what this will do is when I put my cabinet sides in, it'll keep the sides from falling away. And that's why a second set of hands with base cabinets is nice because those panels want to lean out. It won't do that if I have that spreader strip in. You don't have to do that, but you certainly can.
Now, because I've got that spreader strip in, I'm going to put a little bit of glue in the bottom of that channel, and now let line the dovetail up and just push that panel into place. Do the same thing with my other side, and then you can see that panel's not going to move on me. A little bit of glue there. So if you're assembling by yourself, that's a really neat trick.
Now I can grab my other spreader strip, finish side in. I don't need glue yet. You'll see why in a second, and just let that kind of hang out for a minute. Let that hang there. We'll glue that
and tap it up in a second.
Now what I'm going to work on is my cabinet bottom. Got finish side in, got my splines down, and we're going to run our glue again about halfway down the channel. Line our dovetail up and just push that panel into place. You'll hear it kind of click when those splines go into the back of the frame. What we're looking for is no gap where the frame meets that panel. Just make sure everything's pressed in real nice.
Now we're going to put our back on. So we want to make sure we have glue on this vertical surface here, left and right side, and across our top spreader strip and our cabinet bottom. Okay, so I've got my glue top and bottom and along my sides. We're going to take our back. Very critical, if you put this back in upside down, your brackets will not line up. So you want to make sure the Ls are going the correct direction. I have the bottom of the cabinet this way. I want the L with that plate facing the bottom of the cabinet. We're just going to line up the dado with the cabinet bottom and tap that into place. Now you'll see me come around, I'm going to push that one up in a second, get my rubber mallet ready. I also want to get my air ready, so you're going to need a compressor and an air hose. A clamp is nice for this; you don't have to have it, but I'll show you how to use one in a second.
Going to tap this up, and what we want is this to get buried into the dovetail at the bottom. And you can visually inspect to make sure, and if it is, just use a clamp to hold that panel or that crossmember up into the dado. Now on our cabinet backs, we have every four or five inches there's a little pilot hole. That's not for a screw, that's just a kind of a marking point. What we're going to do is put a staple on either side of those holes all the way across.
Let me show you how that does, just a left and right side of each hole. Want to make sure you're keeping the stapler straight up and down. I'm going to do the same thing on my crosspiece. So now my top and bottoms are nice and fastened in.
Now what we're going to do, take our pencil, you can either use a square like this. What we're trying to do is find the center of that crossmember, that back. We're going to strike a line all the way down. You can use this to do that or you can find that and just use this as your guide. I just use my finger as a guide to find the center of that panel and strike a line. Going to do the same thing over here, find the center, strike a line. And now we're just going to work down that cabinet side and keep our gun straight as we can, right on that line, about every 3 or 4 inches is ideal for your staples.
Okay, I've stapled both my left and right side. I've got my staples across the top and bottom. Now we're going to flip this cabinet over, and the next things we want to do is a couple of checks. We want to make sure, and this is actually a very good illustration, if the frame and the cabinet side are not lined up perfectly on both sides, that cabinet is not square.
That one's good; this one, the frame was a little low, so I'm just going to tap the cabinet side down till I get it to line up. You can also tap the bottom of the frame up, whichever. And now I have it lined up there, lined up here, so that cabinet is square.
We also want to check for glue. If you have any glue squeeze out inside, you want to take your wet rag. And I don't have much, got a little there, and I have a little right there. Sometimes you can get a lot of glue squeeze out, and if you do, you want to make sure you wipe it out. It should dry clear, which would be ideal, but if you miss it, it's not terrible, especially on a drawer-based cabinet like this. But you do want to make sure it's wiped out.
On our tools and materials video, we show you we have a lot of clamps. It's not a bad idea, especially if you have a finished end, to make sure you clamp the frame to the box to make sure that finished end is nice and tight to the back of the frame. We do not have finished ends on here, and I did make sure this was nice and fastened down, all my gaps are good, so we don't need to clamp that box. But if you have clamps around and you have a finished end, make sure you clamp that finished end to the frame so that's about it.
We hope this helped. If you have any questions, you can contact your cabinet coach, and they will be happy to give you any kind of links to videos or anything you need if you're having problems with your assembly. Thanks for watching. [Music]