Video Transcript
Introduction
It's a glorious day here at Cabinet Joint. I'm Justin, and today I'm here with Josh, and we are going to be talking about touch-up kits. Now, Josh, there are a lot of hands that are touching these cabinets by the time they leave the factory to the time that they're being assembled, to then moved into your kitchen and then installed. Uh, and then not only that, but once it is installed, chances are at some point in the cabinet's lifetime a little Jimmy might be riding around on his bicycle and, you know, brush up against a corner with his bike and cause a scratch. So, with our cabinets, we send touch-up kits. We try to plan ahead for this. So, how do we use touch-up kits? How do we apply it? How do we fill up scratches and dings, stuff like that? Can you tell us about that?
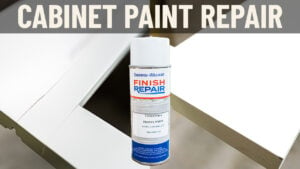
Yeah. So, with our touch-up kits, um, you're going to get basically a paint pen and a crayon, a wax crayon. They're not a perfect match, but they're pretty close. And with that being said, if the scratch or the issue is out here on the face of the door, you'll want to test it on maybe the back of the door for color consistency, because the last thing you want to do is kind of emphasize a scratch or make it look even worse with something that doesn't match. If it's a bad scratch and it's a bad spot and the touch-up doesn't quite cover it, you may need to order a replacement door. But if it's on the edge, you know, out here, maybe on the corner or something like that, it's much easier to hide and, you know, make go away with our kit.
So, when is the right time to use the crayon, and when is the right time to use the pen?
Yeah. So, the pen, I like to say the pen is good for edges, corners, not so well for faces, and the crayon is good for gouges when you need to fill in area. If you have anything on the direct face, most of the time it's going to warrant a replacement. Sometimes the paint is a really good match and you can get away with it. Um, if you tape off around the scratch, like everything but the scratch, and just paint that small scratch, you might be okay. But really, it's meant for edges and kind of inconspicuous areas.
Gotcha. And I see—
Touching Up a Painted Cabinet Door
—this door has the corners dinged up a little bit.
Yeah. So, somewhere during the assembly, it looks like this got a little dent or a ding in it. This one will be real easy to hide, I think.
All right. Well, let's see it.
Okay. Yeah. So, this dent has a little bit of the exposed core material. So, before we use the wax to fill in the missing wood, we want to take the pen and color the raw material first. That way, when we do fill it, you don't really get a bleed-through of the raw wood should it not completely fill flush. Okay. So, when you get this, um, this one's already been primed, but the way this is going to work is this tip is going to look white most of the time, unless it's a stained cabinet. You're going to shake this thing really well. And what you're going to do is you're just going to press it down until the material starts to flow out like that.
And then you're ready to do your touch-up.
You don't want it dripping. So, here you can see the raw material. We're just going to color that and try to get in there as best we can. Just going to wipe off the excess. We'll let that dry for a few seconds. We'll come back with the wax crayon and fill it in.
So, we're going to go back and forth, back and forth, until it actually softens from heat. You're going to slightly overbuild it. And in most cases, you're probably going to have white cabinets. So, you want to make sure that you use a white towel. Um, when you do this, what you're going to do is you're going to buff this off using some pressure to create friction. Again, you have to be really careful when you're using these because they'll actually polish the surface. So, if this is in the middle of the door or something like that, you're going to want to tape off very carefully around just the dent or the ding, fill it in, polish it off, then pull the tape.
Touching Up a Stained Cabinet Door
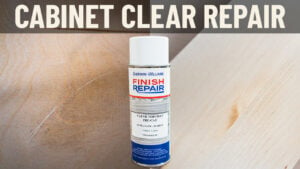
When using a touch-up kit on a stained application, it'll be very similar to when you're using it with paint. On this one that we have here, uh, this is the back of a drawer front. That's why you see the holes. I made a little mark with the gouge here. I'm going to be using the wax pen. And as you create heat, it will actually melt a little bit and fill that space. So let's just see—get used here.
Now taking a paper towel. I'm using the wax here because it was just a little bit bigger of a gouge, and it's not a perfect match by any means, but it is as close as they are able to get. You can see it filled out good where it doesn't catch the eye anymore as you're driving past. If you look closely, you can still see it, but it gets rid of that distracting gouge that was there previously.
So, now we're going to use the stain pen. The stain pen is better for just scratches or little dinks on the corner, not gouges, ’cause that's when we want to use the wax. So, let's use this stain pen real quick.
You can see it did a pretty good job. I rubbed that off pretty quick. I didn't want it to saturate too much into the wood, uh, but that is looking really good. So that is using the stain pen.
The Finished Product & Things to Keep in Mind
Any final things to note about the touch-up kits?
Yeah, you know, they're not like an end-all, be-all. They may not be the fix, but they work really good in most situations. Um, especially if you're trying to move the job along and you do end up ordering a replacement or something like this, this will buy you the time, and you can have it installed until you get that replacement. Probably the most important thing is to remember that this is a wax filler, and that just like a car, the more you polish it, the more it's going to shine. Our paint finishes are like a 10% sheen, and you don't want a bunch of shiny spots all over the faces of the cabinet. So, you have to be strategic in where you use these. And probably the other most important part is to use a white, lint-free cloth. Being a wax, it'll stick. So, if you have something like a blue rag with fibers in it, they'll just stick right into the wax. Especially if you're touching up white, you don't want blue fibers in your white wax. But yeah, that's really the key things with this. Just test it in the spot first before you put it out in the visual area.
Well, Josh, thank you. And I want to note too, don't throw these away once you're done with your cabinets, because chances are throughout the lifetime of your cabinet something's going to hit it at some point, and you're going to have a little scratch. So keep these in a safe spot where you know they're going to be, in your garage or in a drawer somewhere. That way, when that does inevitably happen, you can just patch it right up and no one will ever know.
So, if you have any questions on your touch-up kits or how to use them, you can reach out to your cabinet coach or you can call us at 888-211-6482. Thank you for watching. Have a great day.