If you find yourself in a situation where you have a scratched or damaged cabinet wall or door and you don’t want to wait for a replacement, it is possible to quickly repair your cabinet at home! Using sanding paper, topcoat, and a bit of patience, you can make your cabinet look like new. Please feel free to reach out to your Cabinet Coach with questions, and enjoy your cabinets!
Video Transcript
[Music] Hey everybody Brian from Cabinet Joint here to talk to you about how to repair scratched parts that you may receive.
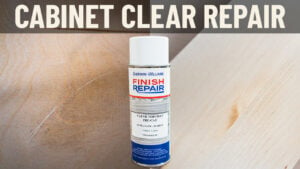
You may be asking why is it your responsibility to repair scratched parts. It's not. If they come damaged and scratched you're owed new parts. BUT. With cabinet parts especially, and even drawer boxes and other things, they take a little bit of time to come in, even on a replacement, up to a week. If there's a finished side on a cabinet side it can be a little longer than that. Some customers want to just keep the project moving - they have relatives in for the weekend, they want to finish the assembly and get their cabinets going. In which case we can put the power back in your hands by sending you aerosol cans of top coat. You can also do this for painted product. We can send you aerosol cans of top coat that allow you to lightly sand down the damaged area and reshoot it with the top coat, and you're off and running again. So I want to demonstrate that.
This is just an old drawer box we have on a sample cabinet here in our shop. So it's not a customer project - you might be like hey it's kind of dirty. But anyway, you'll see a close-up of the scratch I'm going to be repairing - you should see that on your screen now. Alll we do is take some 320 sandpaper - I like to use an orbital sander because it keeps me from burying in too far in one area; keeps a nice even surface so I can kind of sand the whole area evenly. So I like the palm sander, but you can do it with hand sandpaper if need be. I like a grit like 320. Don't go any coarser than 320, like to a 220. It's going to create too much scratch pattern. It's going to be too angry and you’ll have to go back at it with a softer softer grit anyway to kind of get the fibers to stand back down. You will be potentially cutting through to raw wood on something like a drawer box in that injured area. The rest of the area you shouldn't even go below the top coat, the original top coat. You'll just be cutting through some of the top coat but not all the way through.
What we want to do is sand the entire area, not just right here, because that will give it like a little concave effect where you sand it too hard in that one area. We want to kind of sand the whole area nice and flat. So I'll show you how I do that now, and then we just get a rag or wipe off the excess top coat that we powdered up and hit it with a top coat. So let me show you how that goes
[Music]
Okay I'll get my rag, but I sanded until I couldn't see the scratch anymore. And that's the objective - to try to sand smoothly and evenly to get that scratch to go away without it possible without cutting all the way through the top coat. If you happen to get through the solid wood, it's okay. You're putting clear right back over it. So I'm going to get a rag off camera, here, with some solvent on it. The light solvent, like mineral spirits or naphtha, just clean up the the debris. I'll call it the powdered up top coat. And then we'll shoot the aerosol can.
Okay so we're all wiped down. I used a naphtha which is just lighter fluid. So if you haven't got any solvent around, even lighter fluid would work fine. Again, you wait for that to flash off a little bit. You don't want to go over it when it's soaking wet. Make sure your rattle can is nicely shaken. There's a ball bearing in there you'll want to make sure that thing's moving around real good. I would shake it. I've already shaken this for a while, but I would say a minute or so if you're using a fresh can. You should do it. And now we want to start about 14 inches away from the surface. You don't want to be right up on it - you're going to get puddles and like defined edges. You'll want to kind of fog this on.
I'm going to fog on the entire area that I sanded, not just the scratch. So we just kind of little misting spritzes of it. You don't have to go heavy because you're going to come back and do this a couple times. And that's my first coat.
So we're going to come back and do probably another coat after this. That coat depends on how it looks, but that coat I may scuff sand really quick, very quickly with like a light grit, like an 800, just to give it a scratch pattern and knock down any fibers that stood up or whatever. And then I'll put that final coat on.
Now one point I do want to make is if you have a very superficial scratch and it hasn't really made a too much of a depression in the top coat, you don't even need to sand it. You can just go right over it with the aerosol can. Generally the scratch pattern is nice to give it a mechanical adhesion as well as a chemical one so it's got that little microscopic scratch pattern. It gives something that new top coat to grab onto. So even if you just lightly scuff it with a 320 before you hit it, you don't get into it the way I did to make that scratch go away.
Okay, wrapping up our clear repair, here. Let's summarize the steps. I happen to sand this one with the orbital sander - you don't always have the sand; you can fry your repair without sanding first, maybe a light sanding with a light grit sandpaper just to give you a scratch pattern, but you don't have to really pour into it. I did to get this deeper scratch to go away. I did two coats of clear on this before the final coat of clear. I did a light sanding so it's clear. Light sanding clear and I'm fogging the whole area here, not just a spot that I I scratched. So that gives you an idea on how you can make, even on a drawer box side, you can make a pretty heinous scratch that was pretty deep - I had to go almost to raw wood to get it to go away - you can get those to disappear pretty well.
If you have any questions or you need a can of this aerosol, just give your sales rep or cabinet coach, as we call them, a call 888-211-6482
Thanks again for watching.