Video Transcript
[Music] Hey everybody! Brian, here, from The Cabinet Joint. Today we're talking about paint repair. So Conestoga has 15 or 16 - the time I'm talking right now I think it's around 16 - standard colors. They're called color tone - standard colors. And this frame in front of me exhibits a frosty white standard color. With these standard colors you can repair many things yourself. So if you have an installer or an assembler who cracked a frame on a cabinet while they were trying to build it or something, rather than ordering a pricey replacement you can just go ahead and repair that using some of these aerosol cans that Conestoga sells. There's also situations where something may come damaged in shipping, and oftentimes customers who are handy DIY customers tell us if I had a way to repair that, I would just keep on going - I don't need a new frame it's very inconspicuous; can't you just help me repair this? These aerosol cans help you do that So we're going to show you how to go about doing such a repair on your own. This frame is an old frame from a job we built here in our Gettysburg shop. We replaced the frame through Conestoga since it was a customer's job, but the frame has cracks in all four corners. And we want to show you how we're going to repair one corner. So before we get started, I want to show you the materials you're going to need, and then we'll zoom in and get some close-ups of the issue, and how I go about repairing that. And then at the end of this we'll show you the final product in terms of the repair. Out of all these colors I would say, up to 16 colors, I would say 14 of them have near exact matches. The other ones will make a little off, like a half a shade off, but most of them are dead on matches, and you won't even be able to see the repair. And it's the same exact catalyzed conversion varnish just to pre-catalyzed conversion varnish in a can. So you're not going to have any issues with, you know, it yellows at a different rate or whatever it's literally the same material.
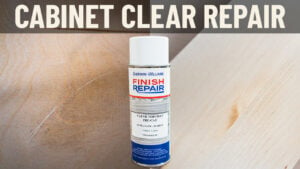
So getting started, what you're going to need is a palm sander, or a piece of sandpaper is fine, but you'll want a pretty light grit. You don't want to be going at this with a 180 or 220. You'll want something like a 320 or a 400 would be a good one. And that's to create, first of all, to get rid of any rises where the wood is a little higher where the crack is - you're gonna have some glue that squeezes out when we get done gluing - you'll want to sand all that so it's nice and smooth. You just don't want to make aggressive scratches. But a 320 to a 400 grit will give you enough of a scratch pattern that you get not just a chemical bond, but you get a mechanical bond where there's actually some microscopic scratches for the material to grab onto. It gives you better adhesion. You're going to need some wood glue. And what you're going to want to do is just get a little cup - and I just have a little drinking glass here - just get a little cup and put the glue on there and add a couple dashes of water and mix it up till it's thinner. And what that does is, when we spread the crack, it allows us to press that thinner wood glue down in and get it to penetrate into that small fissure. Now if you just use normal wood glue it's so viscous and so heavy it's going to sit up on top and not really penetrate. We have two cans of aerosol - one is the frosty white color tone ordered from Conestoga. We keep them here at our shop, but you can order one with your job. And then we have the clear coat. So this would be the first step - two to three coats of the clear of the color, rather and then two coats of the clear at the end once all is sanded and dried and we'll show you all those steps. And then of course I have a clamp, because once I put my glue in here and I clamp this, I want to get this nice and tight so the glue actually squeezes out. And then I wait half an hour or more for that to set up before I do anything else.
Okay so let's change camera angles to zooming in here and showing you what we're doing!
Okay, so let's get started with the gluing process. What we're going to be doing here is flexing this open and then putting the glue in and letting it flex back shut and clamping it. You're going to want a second set of hands so I've asked my shop guy here, Jeffrey, to help me out. So you'll see four hands on screen - that's okay. The reason is you're going to want to get a little bit of a torque or a flex on that frame to open the joint up, to crack up as much as possible. You don't want to go so far you fracture the whole thing. But you can see the joint actually open. And we want to get it open until I force this watery glue in there. So Jeffrey come on screen. Let's show the folks how to do this. So you can see the crack right in here, and Jeffrey's going to open that thing up as best he can. And I'm going to dump a little bit of glue on there - and I say dump because that's what I'm doing; I don't want to squeeze it. I'm going to push it into the crack. And you can see it's very watery. Push that into the crack - have a little crack over there -I'm going to push this in as best we can. Flex it as hard as you can, Jeffrey. Okay,well now I got some glue in the joint. I’ve got a piece of wood fiber for my stirrer stick. We can let it go. And now what we're going to do is clamp it. First I got to wipe all this excess glue off - we don't want to have that on there. We'll have to just sand it off later. And now I'm going to go ahead and run the clamp from here to here, and pinch that frame as best I can until I get some glue to squeeze out. If I don't see glue squeeze out, I'll probably have to redo the process till I get enough forced in there to actually create a bond. So I'm going to do that off screen and come back and show you the frame clamped together. And then we're going to wait 20 to 30 minutes minimum for that glue to set up. I would say longer if you're not in any rush. Just give it half a day while you build some other cabinets. And then we start the sanding and painting process. So let's get this frame clamped up and we'll come back on camera.
Okay, so we took our clamp off and the first thing I wanted to do, and I already did this, was test the joint. So I wanted to flex this to make sure my joint doesn't open back up. It's not, so that means my glue took. And I'm ready to take the next step which is to sand it. So I've got my orbital sander 320 paper. I want to keep the sandpaper pretty flat. I don't want to do any of this kind of thing. What I don't want to create is little undulations in the finish because you will see that under low angle light. So we try to keep it flat just sand this area until this raised area here. There's another little one here, which isn't an open crack. That's really just a joint of the frame where we have a paint split, there, because the frame was flexed. That's the actual joint of these two pieces of wood. I'm going to sand this whole area down to reshoot from about here to here, fogging it in really nice so it blends well. So I'm going to sand this area very well trying to keep it flat. So I'm going to get started on that. We'll show you the finished product in a minute.
All right all right so I'm done sanding, doing some field checks in here. There's no texture. I got that nice and smooth. You can see you're going to cut through a little bit and get some raw wood. It's okay. You're putting the same paint back over it. That's all going to get covered. You try not to get down to raw wood, but when you're not in the middle of a flat area and you do have edges, it's not uncommon for the sander. You don't want to just bite through even with that 320 paper. So I'm just going to wipe that down. I got some very light grade solvent on there to wipe all that down and when that dries up. In a minute we'll come back and show you how the fogging on process goes for coat one. And I want to stress when you're putting on these coats, you don't want to try to get full coverage on the first coat. You want to sneak up on this, and it might take two three four coats of this very light fogging on before you finally get the final one. At that point you're just going to do a scuff sand with a very fine sandpaper, and then put your top coat on. So let's give this about 30 seconds or a minute for that solvent to flash off. We'll come back and finish it up.
Okay so I've got my Frosty white aerosol can here. Again, we shook the can really really well - want to make sure we mix the contents up real good. Starting about 12 to 14 inches away - don't get right up on it - 12 to 14 inches away just going to feather it on. Don't keep a constant spray with your finger on the button, or you're going to get lots of build and drips and runs well you just kind of want to fog it on so. You're going to see me kind of little presses of the button here and there. And that's enough for coat one. All we're trying to do is get a base. You can already see that bare area went away. You can almost not see the crack now. I get two more coats on this. It's going to be good to go. And then we'll again at the very final stage of this, I want to have a zoom in on the crack to show you where it was and you won't be able to see it. So we'll come back after we give this an hour or so to set up and keep going,
Okay my final step, I put two coats down. I'm satisfied with this. You could do a third if you wanted to. Remember with paint, too much is not always better. Heavy build is not always better. It can crack and do some other things on you. But I've got two coats of good coverage, even the area where I sanded through it had bare wood, it's completely covered. Can't see my crack anymore at all. My final step before I put the top coat on is to use like a 1500 or an 800 grit paper. And I'm just I already did, but I'm just going to sand that down real quick. And all that is to cut any like stand up, or if there was any kind of texture to the top coat when you laid it down, we want it to be as smooth as the factory coating. And it's nice and smooth now. That's what I care about. So just kind of lightly scuff. And I'm not talking minutes, I'm talking eight seconds just to cut all that down. And now once your surface is all cleaned off we're just going to take our rattle can of top coat - it's the exact same process. We're just going to make sure we're 14 - 12 to 14 inches - away, and just fog on some top coat. It's okay if it spreads out on the places you didn't finish, because we want that feathered in effect. So I'll let that sit for a few minutes, and we'll show you the finished product. If you get any texture on that, you can always cut it down with that same sandpaper 800 or 1500 grit, and then hit it again. Your final coat should be just about as smooth as the factory finish. We're going to try to show you on camera how blended in that repair is. If we had sent this frame out to the customer, or if you did it at your own project, you would never see the difference. The repair is literally invisible. So we'll be right back.
Okay we're wrapping up here. Just to summarize what we've done - we only have two coats of white on here. That's all we needed. Two coats of the frosty white; two coats of the clear, and the final after the final coat of the white, we did a light sand before we put the clear down. And after the first coat of clear, we scuffed it and put the second coat of clear down. So our final clear and our final paint are always over a lightly sanded - with a very light grit paper.
So again, you have any questions you're always welcome to call your Cabinet Coach and let them know what you're needing. We have people wholesale use these to color posts. Say you bought a post from an aftermarket supplier - not Conestoga - you want to get it to match? You can order the top coats and the paints to match your post to the rest of your kitchen. These have a lot, a lot of uses. If you're trying to do more than just touch up, these are great for that, as well as for repairs like we've shown here. So as you can see, this is a great repair. You can't see the crack at all. Does a perfect job of blending with the rest of the frame. I would put this in my kitchen no problem at all. A little bit of work. Would have been easier for you as a customer to order the frame from Conestoga, but it's a whole lot less money if the damage is on your end and not from shipping. So again have any questions give us a call! Thanks for watching. Thank you.


