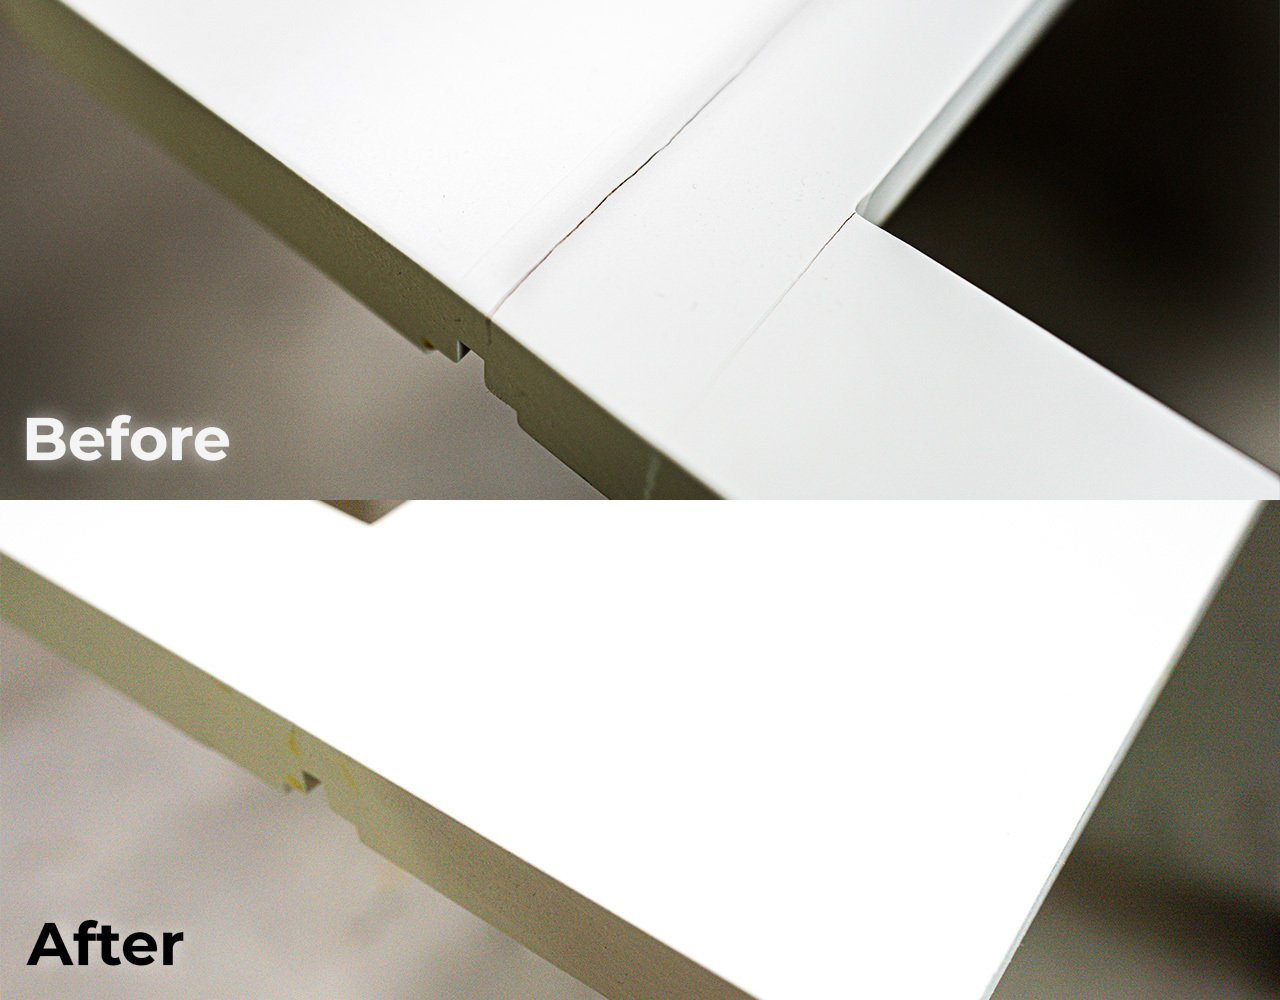
A Repair Guide: How to Fix a Cracked Face Frame

Cracks in Cabinet Frames Happen
Sometimes while you’re installing your new cabinetry, a front frame can become cracked. Maybe something arrived to you damaged in shipping. Not to fret! Cabinet Joint sells aerosol cans that are color-matched to Conestoga finish options, making repairs a snap. Note that of the 14 colors of aerosol options Conestoga offers, almost all are exact matches and made of the same pre-catalyzed conversion varnish material as the cabinet finish, so they will not yellow or age at disparate rates. By following this guide, any imperfections will be buffed out and your cabinet finish will return to its original state.
- Glue the cracked front frame
- Water down the wood glue so it may better penetrate and mend the fissure.
- While one person flexes the split open, push the watered-down wood glue into the crack using your finger.
- Pinch the fissure by using a clamp on the frame.
- Using a damp cloth, wipe off any excess wood glue that squeezes from the fracture. Note that if no glue squeezes out, you likely need to repeat steps 1b-1c until enough glue is forced in to actually repair the crack.
- Let the glue dry for half an hour at minimum, and preferably longer.
- Sand the affected area
- With fine 320-400 grit sandpaper, lightly sand down the affected and surrounding area.
- Moisten a towel with a very light-grade solvent to wipe down the newly-sanded patch and remove any dust.
- Apply first coat of aerosol paint
- Once the can has been thoroughly shaken up, use light, quick burst sprays 12-14 inches away from the affected area.
- Feather over existing prefinished surfaces to blend the paint evenly. Note that multiple light coats will be better than fewer heavy coats.
- Let the paint dry for about an hour or so before moving onto the next coat.
- Apply more aerosol paint as needed
- Repeat step 3 as needed, enough to fully cover the repair but not so much that the paint becomes tacky or textured. Usually 2-3 coats is enough to completely cover a repair.
- Sand the new paint
- Using a sheet of 800-1500 grit sandpaper, gently even out any texture from the newly painted surface.
- Wipe away any dust with a dampened cloth.
- Apply first coat of aerosol topcoat
- Once the can has been thoroughly shaken up, use light, quick burst sprays 12-14 inches away from the affected area.
- Feather on the topcoat lightly over existing prefinished surfaces to blend well. Note that multiple light coats are preferable to fewer heavy coats.
- Sand first coat of topcoat and apply second topcoat
- If after you have applied the topcoat, the texture is even and matches the rest of the frame, your work is done! However, if the surface of your face frame has become textured after applying your topcoat, use your sheet of 800-1500 grit sandpaper and repeat steps 5 and 6.
Watch Our Tips on How to Repair A Cracked Face Frame
And that’s it! You’ve evened out the surface, repaired the paint, and matched the topcoat to the rest of the face frame. In any light, your frame looks as good as new, and any crack that used to be there is now undetectable. The only thing that remains of the fissure that used to be is the pride you feel from making it disappear. Let us know in the comments if you find this guide helpful and what you’d like to learn next!

I have us cabinet depot shaker white with similar cracks and was wondering if your repair paint would help. Cracks are now glued and only minimally noticeable with full overlay doors. Do you sell the paint or recommend where to get it? Great instructional video.
Thanks
Dave
David – we can not speak to other manufactures products. We recommend visiting your local paint supply store (Sherwin Williams, etc.) with a cracked sample and talk to them about possible solutions.