Video Transcript
Introduction
It's a glorious day here at Cabinet Joint. I'm Justin, and in today's video, we are going to go over how to install our standard trash pullout systems.
Now, in this video, the boxes are already assembled. This is not going to cover those. If you need more help and instruction on assembling boxes, we have separate videos in our description for that.
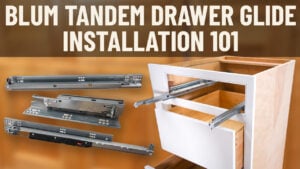
We are just going to go over how to install the trash pullouts. This is a Rev-A-Shelf system, and the reason we like it so much is because it comes with Blum undermount slides and all the adjustability that comes with them.
We are going to talk about inset and overlay, and I want to encourage you—these are incredibly easy to install. If you can install a drawer box, you can install these trash pullout systems.
These systems here are for 18-inch cabinets, but there also is a version for 24-inch cabinets, and the installation is completely the same. The 24-inch cabinet looks a little bit different. It essentially looks the exact same as these, but then has an extra 6 inches of storage, so you can put your trash bags and other things in there. But the installation is the exact same.
These trash pullouts, like I said, are designed for an 18-inch cabinet, but you aren't limited to that. It can be a 19-inch cabinet, 20-inch cabinet, or whatever other size fits you. It can't be smaller than an 18-inch.
When you go bigger, the actual trash pullout does not widen with it. It stays at the same width. So, that being said, if you're going to install it in a wider cabinet, what you will do is screw your glide down to the floor of the cabinet, making sure that your glides are parallel to each other using the spacing on the bottom of these pullouts.
With all that being said, these are incredibly easy to install. So, let's get into what you would find when you receive the job and what comes in that Rev-A-Shelf box.
Tools, Supplies, & Preparation
The benefit of using this system particularly is that it utilizes Blum’s undermount hinges. So, it installs the exact same as any other drawer box, and it has all the adjustability that comes with a Blum drawer.
The first thing you'll notice is that with your job, you'll receive a Rev-A-Shelf box. It's a pretty large box, and in that box you will receive these Blum undermount hinges, these couple of screw packets, these clips for your trash pullout, as well as two trash cans—one with a recycling lid—and then this actual box in itself.
A little life hack: I like to substitute the Blum standard clips that come with the rest of your job for the ones that come with your trash pullout. Reason being, these offer more adjustability. So, I like to try to use these in pullout trays or something else that doesn't need the same amount of adjustability as your typical box. But if you don't have extra of these, no worries—these work great.
Coming to our cabinet box that we have here, it's already assembled. This video is not covering the assembly of this cabinet at all. You can find videos on how to assemble a cabinet like this in our catalog.
All we are going to show is how to install this trash pullout system. So, we are looking at an inset cabinet here. And just like with any other drawer in your inset cabinet, we have already installed these brown Tentex brackets as well as the back brackets there.
With overlay, it is almost all of the exact same steps—except without these brown brackets. And essentially, this is installing a drawer box. All of the exact same steps, except it's a little bit bigger.
So, if you need help on getting this far, we have videos linked in the description on how to assemble cabinets and how to install your inset hardware.
Lastly, I'll just get into tools. You're going to need your standard number two Phillips bit. You're going to need a drill with a 3/32 bit, as well as a screwdriver, a tape measure, and a pencil.
Let's get into installing this trash pullout.
Bottom Mount Trash Can Pull-Out Installation | Inset
We are going to be starting out with the inset cabinet, and all of our hardware was installed during the assembly process. For more information on that, we have a video link in our description.
Just like a drawer box, it requires all of the same inset hardware. And once that's installed, you can go and put your glide into that back bracket. Then, taking the machine screw, you can screw your glide onto that brown Tentex bracket, screwing it using the second hole from the front and then having your front line up just with the edge of that opening there in the middle—like you would with any other drawer box.
After that, you can then go to your trash pullout, and you can install those clips. Like I said earlier in the video, a little hack that I like to use is using those wider clips that come with your other drawers and swapping those out with a different cabinet. That way, you have more adjustability.
Now that those clips are installed, real quick, I'm just going to put it in the cabinet and out to make sure everything fits great. Now that I see that everything fits great, taking the drawer box to the side, I'm going to drill holes through the front of it. That will then be to attach it to the door. I'm going to do so in all four corners, making sure I'm avoiding those metal brackets there in the front.
I am going to take our door or our drawer front, and I am going to measure a half-inch from the bottom on both sides. With holes drilled, I am ready to install it onto the front. And to do so, I'm going to take the front, put it on its face, measure a half-inch back on both sides, and then center it up side to side—just using my eyeball.
Now that I have the door and the box where I want it, I'm going to be using inch and one-quarter cabinet screws, like you would with any other drawer, to attach the box to the front.
With the front attached, I am now going to install it back into the cabinet. Now, I'm looking at all of the margins around the front, and I'm going to take it back out and adjust it to my liking to make sure all those margins are perfect.
Now that I've installed my box, I can now go ahead and install my trash bins. And just like that, your inset trash pullout system is complete.
Like I said earlier, it's as easy as installing any other drawer.
Bottom Mount Trash Can Pull-Out Installation | Overlay
Moving on to overlay. The process is nearly identical, but there are some key differences. Those are what we're going to highlight on—without going through the entire process.
The first difference: there is no Tentex bracket. So, you're going to install the drawer glide flush with the bottom of your face frame and 3/16 back. Then, you can go drill and screw your glide into your stile.
Then, you are going to install your clip. Just like with inset, once again, you can use the smaller clips—they both work great. The bigger ones we prefer just for a little bit more adjustability.
The other real key difference is how you attach your box to your door.
The first step is, on your box, you are going to want to loosen the screw and the bolt so that you can spread those metal strips. You don't want those metal strips to go past your door, but you can essentially spread them as much as you want until it gets to that point.
One thing you want to watch out for is if you have a skinny shaker style like this door, you want to maximize and have those metal strips out as far as you can, because you're always wanting to bite the rail with the screw. You never want to go into the panel—just for expansion and contraction purposes.
The measurements are going to be different for an overlay application. You are going to want to measure 2 inches from the bottom. And then you will want to center your box.
So, I am measuring the box here, and then I'm measuring the door, and then I'm going to split the difference. I'm going to center and install the door on those lines that we just marked.
Then I'm going to install by drilling and screwing into the door through those holes on the metal strips. And then, if I need to adjust, the way to do so with these metal strips is to loosen the screw and the bolt, and then you have left-to-right adjustment.
Using this bolt and this screw, you can move your cabinet in or out. And then, moving the cabinet—any adjustability left or right—you also do so by loosening these, going left or right, and then tightening them back down.
Over time, as your trash cans get fuller and fuller, they might want to tip backwards. And this is how you can push that door further to counteract that.
With all of your screws installed, you are now good to go ahead and put your trash pullout back into your cabinet.
And then you can look for any adjustment that you might need to do. In this case, I'm really happy with it.
And just like that, you've installed your overlay trash pullout.
The Finished Product & Summary
I hope this has helped you install your trash pullout system. As you can see, they're really easy to install with those minor differences between overlay and inset.
If you have any questions, you can reach out to your cabinet coach or call us at 888-211-6482.
Thanks for watching. Have a great day.