Video Transcript
Chapter 1: Introduction
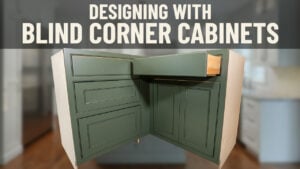
It's a glorious day here at Cabinet Joint. I'm Justin, and in today's video, we are going to be talking about wall blind corner cabinets. Now, a blind corner does a great job in a wall cabinet because it creates fluency with your run of cabinets, as well as maximizes available space here behind your perpendicular run of cabinets. And in today's video, I'm going to be showing you how to assemble your wall blind corner cabinet.
Chapter 2: Tools & Supplies
The tools and supplies you are going to need will be a clamp because this is a flush end. I'm using Titebond 2 as my wood glue, a drill and a driver with a number two Phillips head with a ¹⁄₁₆" bit and then a ³⁄₃₂" bit. I have my rubber mallet, both of my Cabinet Joint inset jigs and an 18-gauge stapler with inch-long staples. I have my posy drive, Blum screwdriver, and a pencil.
Because this is an inset cabinet, first off, we are going to be drilling and installing our brackets for the door hinges. I'm using the Cabinet Joint inset hinge jig, making sure you're drilling at an angle. And then, if you notice that stopper on my drill, you can use painters tape as well.
Once all of my brackets are installed, I can start gluing the grooves, and I'm gluing the inside shoulder of the sides of the cabinet and then the outer edge of the top and bottom of the cabinet. Once I have glued all around the cabinet, I'm going to install my sides first. Starting off with this flush end and then going on to the other side.
Chapter 3: Wall Blind Corner Cabinet Assembly
Now, I'm going to glue up the dovetail grooves halfway. That way, as I push down my top and bottom, the glue will just get pushed down along with it. And once everything's glued up, I can install then my top and my bottom.
It's important to note, if you have a short wall blind corner cabinet, you may need to add your shelf in prior to installing the back panel onto your cabinet. Reason being, you won't be able to angle it and fit it into your opening. So, if you have a short one, install your shelf first.
With all those pieces together, I can now go ahead and glue both the back of the top and the bottom and then the sides of the shoulder of the sides of the cabinet. Meaning, applying glue to where raw wood will be touching raw wood. In doing so, I'm going to make sure it's a strong connection.
Once everything's glued, I can apply the back panel, making sure that all my grooves are lined up. And then, using a mallet to make sure everything is set down all the way in place.
With my back panel where it's supposed to be, I'm going to take my 18-gauge stapler and, using inch-long staples, I'm going to be putting a staple on either side of the guide holes that are on the back panel. Stapling both the top and the bottom.
I'm now going to move over to the side, and using my Cabinet Joint inset jig, I will use the cabinet side scribe line and take my pencil and make a line all the way. This will be showing me the exact center of my back panel.
And then, taking my stapler once again, I will staple the side into the back panel about every 6 to 10". And then on the other side, because it is a flush end, I can't staple through the side. So, what I'll be doing is toenailing, angling my stapler, and connecting the back panel into the flush end.
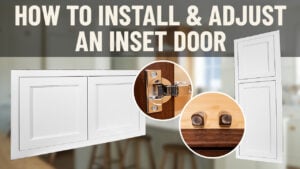
Now that everything is stapled, we can go ahead and move into installing doors. The hinges in this video are already installed. But if you need more information regarding your door hinges, you can check out the links in our description.
Now that these doors are installed, I am going to install the bumpers. And once again, using my Cabinet Joint inset jig, I am lining up one of the doors with the center carrot on that jig. And then drilling both sides of that hole.
I'm going to do the exact same process on the top. Closing that door, lining up the carrot in my jig with the edge of one of the doors, drilling both holes, and then I'm going to come back with the door stops and screw those using the ½" screws that will come with your hinge packets.
Now that all four of my door stops are installed, I can adjust the door to make sure all my reveals are perfect. We're looking for a ³⁄₃₂" reveal all the way around. So, these doors needed some adjustment. I needed to move it up, left, right.
Once again, if you need more information on how to adjust your doors, we have links to those videos in our description.
Finally, because this is a flush end, I recommend using clamps to attach your front frame onto that cabinet side just because you want to make sure you have a nice tight joint all the way up your cabinet side. Then we will usually let this sit around 2 hours for that glue to dry.
And now your wall blind corner cabinet is complete.
Chapter 4: The Finished Product & Summary
And as you can see, it is not too much different from any other standard cabinet assembly that we have in our catalog. And that's all there is to assembling in this cabinet. This is a pretty straightforward one.
This cabinet will also come with two shelves. I don't have them installed here, but they will come along with your job. So, if you have any other questions regarding the design, regarding the construction, feel free to reach out to your cabinet coach or you can call us at 888-211-6482.
Thank you for watching. Have a great day.