Video Transcript
[Music]
Hey everybody, Brian from The Cabinet Joint, here.
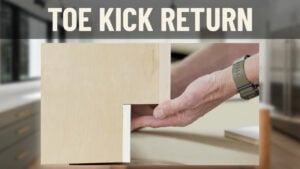
With tall cabinets, particularly, sometimes you'll run into situations where you have a 96 inch ceiling and a 95 inch high cabinet, and you're going to put a very small molding at the top and you can't tip that cabinet up. Your cabinet coach is going to advise you to use what we call the loose toe platform option. And what that means is your normal base and tall cabinets come with a toe kick, like this. So your cabinet frame stops four inches off the ground, and you have this recessed toe notch. Sometimes you'll have a flush toe that goes to the ground, but the point is this whole cavity down here, this four inch cavity down here, is your toe area.
What we want to do is remove that for you. So this would actually, your cabinet side, would come straight across. And when you build the cabinet separately, you'll build a toe box, which is what I have before me, here. You'll build a toe box, and then when you stand the cabinet up, you've got four, five, six inches of clearance. You then shove the cabinet to the ceiling, and then tuck this toe box underneath, and set the cabinet back down on top of it. So what I want to do is show you how this goes together, and then how it works with an assembled cabinet. So this is just to show you what a normal toe kick area comes like.
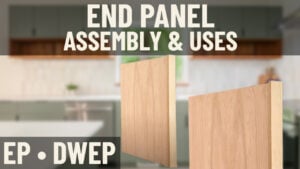
What you're going to get - this is white it's for a different cabinet on a different job, so this is not going to match - if you have white cabinets or you know, cherry with a stain, your pieces are going to match on the outside because you may have a finished end here; and then you have these pieces that go across that are unfinished because your toe kick will go across.
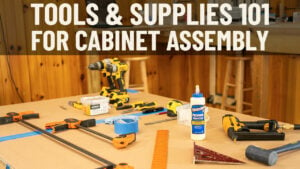
So what we do is, you can see these have a shoulder, this little L-shaped shoulder and your cabinet side nests in there. So we're going to set these like this, and then all it is is sliding these dovetail pieces in and gluing them in place and clamping them. You don't want to pin them because if you have a finished end, you're pinning through that finish. If it's not a finished end, you're welcome to pin through and hold that dovetail together. But let's assume it's a finished end. Get our type One-Two, and we just run our glue line in there. Easiest cabinet you'll ever build! And then you can work one side at a time. Just stand up one of the cabinets. I want to try to keep the finish side out if I can. Just slide that in. Slide that in same on this side, and now you have this toe box that's, you know, fairly movable right now.
You can grab your clamp and just clamp it together. If you want to throw a square to the inside and here to make sure you’re square, not a bad idea. That way you can make sure you're gluing it up square. And I'll do that after the the shot, but that gives you the idea. Now this thing is able to be moved around. You get it all squared up and clamp it.
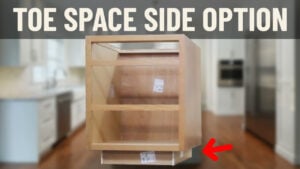
Now, pretend this was all done and dried and you're going to install your cabinet. What I want to show, here, is how this works. This little L is meant to catch a normal half inch cabinet side as I've got here. Just a normal half inch cabinet side. And this would set in like that. So let me turn this sideways so you can see this would set in sideways. And now you've created a toe box. And this is the side of the cabinet that either another cabinet is going to go against, or in the case of the finished end, it's going to be white to match.
Okay, now here's a trick you have to be aware of. This little L is only meant to catch half inch cabinet sides. if you're doing a flush side or a side with a skin on it, a cabinet skin on it, what you're going to have to do is, before you even assemble these parts, you're going to want to take your table saw and rip this piece off. So all you have is a three-quarter thick piece of wood and set the cabinet straight down on top of it. And then what you're going to have is a look more like this, where it's going to set right on top. And you'll have a cabinet seam there.
Okay, the reason that's necessary is we want to make sure we're capturing the cabinet size on a half inch. But this is going to get in the way on a three-quarter thick side because the side is now thicker. So it's not a big deal to run through the table saw. Just cut that right off and set your cabinet sides down on top of it, Again you have a situation with a finished end. Be careful with your pinning. Make sure your pieces come finished. That kind of a thing but literally it's as easy as lifting the cabinet up and sliding this in until it goes all the way to the wall. And its sized so that your cabinet front will stick out three inches past the front of this box.
And now you can treat this like a normal cabinet side going to the ground. When you're putting your finished toe kick on if you have any questions, your cabinet coaches can guide you on this. It's a pretty simple procedure. This usually should come packed with the cabinet it goes with. It should not be in a separate box, so it should be easy to find, super easy to assemble.
We hope this helped! if you have any questions give us a call 888-211-6482. Thanks for watching!