Video Transcript
[Music] Hey, Brian here from The Cabinet Joint. Today we're talking about letter file slots. We're going to show you the assembly of one of these. There's about five permutations or different versions of this. They start from 24 inches wide and go up to 48. And as you go through the range with the five different models, the configuration of these compartments change. Sometimes you have two of these and then two of these, and then they add this third one over here as you're getting larger. So, look at the catalog to see which one is going to be your configuration for the size range you want. In other words, you can't get a 24-inch wide one that has this configuration. This is reserved for the longer ones. So anyway, take a look at the catalog.
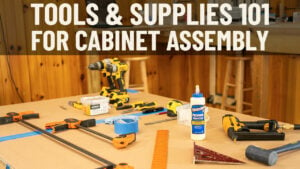
The way we're going to assemble this, it's all variations on a theme. They all go together very similarly. The heights and widths of these, the widths are variable and you can look at that in the catalog. The heights are fixed. You can't change that. You're going to want to be able to fit things like reams of paper and letters and stuff. So the heights are fixed, and this uses what we call panelized construction, almost like a 32mm or frameless cabinet. There is no front frame on here. This is all dowel peg and dowel assembly. So you're going to glue up these dowel pins, and there's, I think, 42 dowels on this cabinet alone. So depending on what size you get and what your configuration is, there's going to be fewer or more dowels. But it's a lot of dowels. They have to be all lined up. So the assembly on this is a little fussy. You'll watch us bring in a second guy on this, probably. But in the end, as long as you have clamps and a second guy, you can get these put together pretty easily. So let's get started on the assembly.
Okay, as we get started on the letter file slot assembly, I want to quickly state there's various configurations. These letter file slots range from 24 to 48 inches wide. And as you go through that range, there's four opening, five opening, six opening, and they all kind of go together a little bit differently. This one's a 36-inch one, so it's variations on a theme. As you watch what I'm doing and how I build it, it's going to work similarly for all the different configurations. Alright, so first of all, let's look at our inventory of parts. This particular one has a top and a bottom, a left and right side, obviously three vertical partitions, and then these are the horizontals on the left and right side. So these are full height, and these outer ones are two smaller, shorter bins for reams of paper, that kind of thing. And then we have a back. So we have all the parts here, as well as pegs. What are those? I put in a little cup, but you should have enough pegs. You've got to count out your holes to make sure you have enough, and I'll show you how that works in a minute. But these are just fluted wooden pegs we're going to put a dollop of glue on each hole that receives a peg and tap them in with a mallet.
So, the way this one's going to go together, I'll show you how the panelization works. Then I'm going to go off-camera and start putting all my pegs in and then come back for the assembly. But basically, the way this works is we're going to put a peg in each of these holes. The end is going to go on first, and then we put in this partition, and this one goes in, and then that vertical here. Then this vertical, same thing on the end. Then we cap it. Then we slide the back down into the back slot. So, this back will just kind of slide down into this slot on the back. Then the top one will set on. Okay, you kind of have to integrate the ends in at the same time you set the top on, and then kind of squeeze these end pegs in. But a little bit of a trick. You might want to have a second set of hands because you're trying to line up all these different pegs. The normal cabinet assemblies we do are far easier than these. These are just fussy. So, I'm going to go ahead and start putting pegs in all my holes with a dollop of glue. We'll show you kind of a side shot of how that works, but I'm going to go through and do that. It's probably going to take me 10 minutes. Then we'll come back and do the assembly.
[Music]
Okay, so we put glue in all of our holes, we put pegs in all the holes that needed them, and I'll show you where we're at. Now we started by putting this end cap on, and I simply stood the cabinet up and pushed this down onto it. You can use your mallet to tap it. Then I put this panel into the three holes that were here. And then using this one, I can bend this one out, work this one in, and got these three holes into the side panel while also putting this one down onto the three pegs that are on the bottom and snap that in. These two just went in vertically. You can use your mallet to tap the pegs in. Be very careful because if you overdrive the pegs, it's going to want to split that plywood. So just tap it in until they're seated. You will notice that there's a little bit of peg in the half-inch panel. Had a lot of peg going into the denser part of the long way of these panels. So, don't be disturbed if you see that they're sticking way out. That's okay.
So now, finish panel facing forward, I'm going to take the whole assembly and stand it upright. Now, we're going to line our holes up, finish forward, and line those holes up. Okay, and now you can try to press this on. Here's where I would use this clamp again to try to squeeze them on. It's a good thing it's tight, but it's a bad thing that it's tight because you really have to work them hard to get them to seat. Okay, there, now I'm going to run a long clamp. You've got to have clamps for this cabinet, guys. You cannot do it without it. There, now you can see she pops in. Okay, now you're going to have to work this top panel in and the back. So I'm going to spin this over. We have a cabinet back. This is going to slide in finish forward into the little trough at the bottom. Okay, there she goes. So that sets in the trough at the bottom and kind of creates your finished back.
Okay, as we were putting this back in, I want to call your attention to a mistake I made. I'm not afraid to admit mistakes. We had the pegs inserted here with the long part sticking out. Much easier if you put the long part in the top panel because you're going to have to spread these outer panels out and then wedge this in to have these three pegs hit here and these three in there. And then we can close the gap. If you have the big part sticking out, you really got to spread those panels. Doesn't work. So now what I'm going to do is call my friend Jeffrey over here. He's going to work the left end, I'm going to work the right end, and we're going to try to get this back in. This is probably the hardest panel to work. So he's going to take care of that one. We have to line up all these pegs.
Okay, we have this cabinet together. We like to be real on these videos. This one was a tough one to put together, as I warned you in the beginning. You're trying to line all these pegs up. You saw us fighting with this partition. The issue was the cabinet back was just not going all the way into the groove at the top and bottom. And once we tapped it with a hammer back here, it just kind of popped together. And we clamped the heck out of this. And as I did this cabinet, I kind of realized you need more than two or three. I guess you could do it, and if you got it all together tight, you could do two this way and two this way, maybe. But you're going to need at least four clamps to hold this together. And it really needs to be held together until the glue and all those dowels set. So once you're done, it's a fine-looking cabinet, but boy, it can be a real... I think I would prefer Lazy Susan over this cabinet. There are other cabinets in the repertoire that we sell that are this peg and dowel kind of assembly. U, the wine storage units, these. So be aware. If you have any of these non-front frame cabinets that are pegged together, you really have to have a second set of hands and a little bit of patience. And again, it's just clamps and tapping, and you can get it to go together. So if you have any questions, give your cabinet coach a call. We hope this helped, even though it was not my favorite cabinet to put together and show you all. I hope this helped you out. Give us a call. Thanks. [Music]