Video Transcript
[Music] Hey everybody, Brian from Cabinet Joint here. Today we're talking about the desk drawer cabinet. It's an easy cabinet to assemble, but there are some nuances I want to talk to you about. First of all, this one's showing a leg on the left-hand side. You can get that with a leg on the right-hand side as well. That is not standard with the cabinet. It normally comes with just a left and right side and is meant to suspend between adjacent cabinets. We wanted to show you the leg option because what that does is it replaces the normal side. When you order the cabinet, you're going to get a left and right side that's 4 and 1/2 inches high. Then you order the desk drawer support leg, left or right, and that will get you a separate leg, and you have to toss the side you're not using. So that's very critical to understand. The leg will not come with the cabinet. If you need a support leg, the support leg is really only needed if the desk drawer is at the end of a run of cabinets and needs that support. Otherwise, the normal 4 and 1/2-inch high sides would just mount to your adjacent cabinets, and the lap drawer would sit between your adjacent cabinets, carrying it to the floor. So again, not necessary, but a nice option to show.
The cabinet itself is super easy. There's no bottom to it. That is the bottom of the drawer box I'm poking right there. And that's so that when the top of this is finished at 30 1/2 inches, the cabinet itself would finish at 29 1/2 inches with a 1-inch thick top or inch and a quarter top. You're going to be 30 1/2 or 31 inches somewhere in there. That's a normal desk height to work at without having to do something funny with your chair, and your legs should easily slide underneath this and give you some room. And then you have this little drawer that can act as a pencil drawer. You can lay your keyboard in there if you want. So it's a pretty functional drawer for particularly office spaces. There is no modification for height. You're always going to get this 4 and 1/2-inch high. We can't do it shorter or taller. So bear that in mind. The widths are 18 inches wide up to 36 inches wide, and you can do that in 16th-inch increments. And the depths are 18, 21, and 24 inches deep. So that's kind of your limitations. If you get the narrower ones like 18 and 21, remember, you have to fit you and your arms of your chair and all that into that opening. So an 18-inch wide is virtually unusable. I can see maybe a makeup station in a bathroom you could use that. But you're going to want to keep it 24 inches or up. Don't get into designing these even though it's available in those really narrow sizes like 18 or 21.
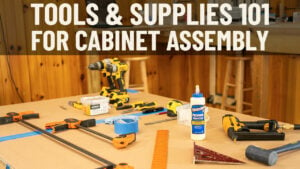
Aside from that, let's just get into the assembly and show you how this goes together. It's really easy. It's like building a base cabinet without a bottom. But we'll show you how this goes with the leg being assembled as part of it. Okay, so let's get started on our desk drawer cabinet. Again, part of this assembly is going to show you the optional desk drawer leg, the left or right desk drawer leg, which is this finished piece here. That's not going to come as part of your normal cabinet. What comes standard is the front frame, and this front frame is only a U-shaped, upside-down U-shaped front frame. You do not get a bottom piece. The reason is this is meant to be a lap drawer. If they were to put the front frame piece on the bottom and give you room for your drawer in here, the bottom front frame would actually touch your legs. So they do it as a three-sided frame, and your drawer sits in here. And so you end up with two cabinet sides and no bottom. You've got two cabinet sides, a little teeny cabinet back. It's only got one dado because you only have a top. So the way that's all going to integrate is you have a cabinet top, a left and right side. What makes this assembly a little unique is we want to show you how the desk leg goes in. This replaces one of your sides. If you did a desk drawer right, which is a desk drawer side leg left or right, if you did the right, that leg is going to be on the right side. If you did an L, it's going to replace your left-hand side panel. So you'll see one of these is not going to get used. So let's get started with the assembly. As normal, we have our normal tools. There's nothing special required for this cabinet. We've got our staple gun with inch and a quarter or 1-inch staples. Either one will work fine. We have Tight Bond 2 glue. Some folks opt for Tight Bond 3. That's fine as well. It's whatever your preference is. A wet rag to wipe away our excess glue, a pencil to mark any scribe lines, and that's about it. It's all you're going to need. It's a pretty straightforward cabinet. So as it always does, our assemblies always start with glue. So I'm going to put a little glue on these shoulders on the left and right side and one bead of glue all the way across the cabinet frame at the top where that top panel is going to slide in. So remember, I mentioned we're going to use a different side. This is going to be, instead of our top, it's going to go in here. This is going to be my left side. So this is going to nest in that way. I'll show you that in a minute. So I'm going to use my side here and slide it in. Now, normally, if you didn't have this big desk leg, I would slide the other cabinet side in and then my top because that's going to be hanging in the breeze. I'm going to do the top first to show you how this works. I'm going to glue this up. The glue starts halfway down, and we spread it up. And then when I slide this panel in, it'll smear that glue out. Okay, lock that in place, and now this will stand upright for me. Now I can come over here and start at the bottom and go up because I'm going to push this panel down onto that one. We can spread the glue out vertically. Okay, this is the painted side. It's a little tighter. Okay, and this is where our rubber mallet is good. I did not show that as part of our tools, but I'm going to grab my rubber mallet and tap that side down. You can use a dead blow or just a little $5 rubber mallet from Lowe's or Home Depot. We just want to make sure everything's set. So now you can see here's kind of how that cabinet's going to set in position, and all I have to do now is put my back on. So the cabinet back, remember I'm not using the side. I use that desk leg instead. Cabinet back is just a bead of glue on
that dado, lay it in place, tap it in with your mallet, make sure it's nice and seated and all along the back here. On any cabinet back about every 5 inches, you're going to see a little perforation, a little hole that marks the center of that cabinet top or bottom. And all we're going to do is put a staple on either side of that. Those holes get one right up in the corner here. And then I'm not going to do anything with my finished side, but if I really wanted to, I can take my pencil and mark the center of this cabinet back. Mark the center of it on the cabinet side with my pencil and just put a couple of staples in there. We do that with every wall or base cabinet. This one is so small you're not getting much holding power there, but it certainly helps. Now, as with every cabinet, we want to make sure the front frame is seated and it's flush with the top of the cabinet box. So I'm going to go ahead and make sure that the front frame is down on tight and lined up, and it really needs to go there. We want to make sure we have good contact everywhere along the frame. And then I'm nice and flush here. Still not quite there. There we go. Okay, grab my glue rag, make sure my frame is all wiped down, no glue inside the cabinet where it might have smeared out. This one was pretty clean. There's not a whole lot going on in there, and that becomes your finished cabinet. Now, one thing I didn't do, we do it often times in a lot of our videos. If you look way inside here, there's a couple little pilot holes. This is for your L-shaped brackets to carry your drawer glides. Could put them on very easily. This isn't like a normal base cabinet where you have to reach way inside, but we'll just put those L brackets on and then come back and show you the finished cabinet all done with the drawer box in. Okay, so there's your assembled desk drawer cabinet with a leg on the left side. You can put the leg on the right, as I mentioned in the video. Remember, you're not stapling into the cabinet side on your finish side. We want that to be, if it's going to be seen, you want that to be nice and painted. This cabinet side here is 3/4-inch material, not 3/4 with a banded front edge. So that whole thing is edge banded with a real wood veneer and then all painted or stained to match. So we hope this helps, super easy cabinet to assemble, but this should give you some ideas on the nuances of how to use it in your design as well as how to assemble it. If you have any questions, give your cabinet coach a call. Thanks for watching. [Music]


