Video Transcript
[Music] Hey everybody, Brian from Cabinet Joint. What I have in front of me here is a utensil pullout from Rev-a-Shelf. It goes in a base full-o cabinet, or in this case, we've designed a combo cabinet. They come in 11 and 14 inches wide, which is really ideal for a 12 or 15-inch opening, so try to stick with that. They are available for inset and overlay. The instructions for inset are poultry, if not even there. All the instructions I could find that came with the unit were for overlay, so we'll walk you through inset, which is what this one is. There are some differences with overlay, some different anti-rub devices, that kind of thing, but for the most part, you can watch this video whether you're inset or overlay and get a gist for what's going on.
There is a template involved; you get a lot of parts and pieces with this. It's not quite as straightforward as some of the other pullout things we have, like the trash pullouts. So stick with us, we'll try to walk you through it as best we can. Okay, let's get started installing this utensil pullout.
First, I want to walk you through what comes in the box and how it gets used, and then I want to walk you through some of the tools you're going to need to supply yourself. Let's start with the actual kit itself. You get the rack with the little six aluminum-looking baskets that hold your utensils. Okay, so that's the one main component that actually comes last in the install. We have the carriage, the soft-closed carriage down here, that comes with it to run your pullout in and out. That's the first thing we're going to install.
Then it comes with these funny-looking orange Blum clips. These are not the same clips as you see being supplied with our cabinets necessarily; ours are a little bit different. This is a unique application, so you're going to use the orange clips that come with this kit. I'll show you how to install them in a minute. There's a little pack of screws that get used to hold these on. There's a screw hole in each one of these, you know, times two, so we need four screws. We have these four screws that are a little longer; they're used to hold, if you're doing overlay, these little anti-rub devices. If you were doing overlay, the carriage would run between here, your door is going to lay over, and this lined up with that rail will keep the rack from shifting back and forth. So you get a little set for inch and a half front frames and another one for inch and three-quarter thick front frames. Make sure you're using the right ones.
We are doing an install of inset today, so we're not going to use necessarily all these parts. I'll talk through a little bit how to install them, but you'll have to follow the directions if you're overlay. So you get those as well as the screws to install them. Then I have this little package with a wrench in it, with some little anti-rub devices here with felt on them. These have a little plunger; you use an 11/32 drill bit to drill a hole in the frame, again for overlay. You drive this little grommet in there; they're threaded grommets, and then thread your felt pad on, and you can adjust it in and out to close or open the opening, again lining it up with this. We'll talk about all that. We won't use these in an inset application and will not use those by drilling a hole in the front frame. So we'll talk about that later. You will need this little pack of hardware.
I've got four door bumpers, which if you're overlay, you'll use one bumper for each corner of your door because the door is going to contact the front frame. In inset, we will not use those. We do have some 3/4 thick rounded screws that will be used to hold the carriage to the floor. We're going to use those for sure, and then you've got screws in here to actually hold the door to the front of the carriage on the sliding brackets. We'll get into all that later. You're definitely going to use that pack of hardware, though, no matter what you're doing.
And then perhaps the most important thing that comes with it is the template. There are two sides to the template. One side has if you're doing an 11-inch install, which is what we're doing in a 12-inch opening, so we're going to use this side. You've got perforations running on the side or dotted lines to act as a cut line. So this is the side we're going to use. But you may also have a 14-inch. Make sure you're looking at the correct side because you want to cut the right one. If you're looking at the 11-inch side and you cut this, you just cut part of your template off with the 14-inch. So make sure you know which you're doing. We're going to operate on the 11-inch side.
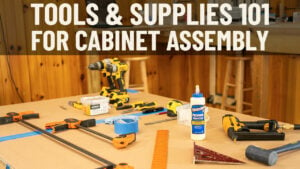
Okay, so I'm going to set this down for a moment. We'll come back to that. For tools, I'm going to need a pair of scissors to cut my template, a utility knife on a table, anything that will cut that template to size will work. I've got a drill gun with a bit in it for pre-drilling my little holes for the floor carriage to go on the floor and so forth. Then I have my 11/32 if I was doing overlay to drill my hole in the front frame for the little brackets that have the little pound-in grommets. I have a wrench. We're going to need, I think, a 3/8 inch wrench or, in this case, we're using an adjustable, and that's to loosen up to get the brackets to slide in and out that I'm going to mount my door to, and you tighten them back up. So you need a 3/8 wrench or an adjustable. Of course, a marking pencil, got to have a marking pencil, tape measure, and then a Phillips head bit in my other impact gun. And over here I have the door that's going to go on here. You're going to need to find the door in your package of doors. In a kitchen, it could be 50 doors. You got to find the right one and make sure it goes in that opening. If it's inset or overlay, make sure you got the right door. It's going to have no hinge boards on it. That might be a dead giveaway for you.
Okay, let's get started. The first thing I'm going to do is cut my template down. So again, because I'm doing the 11-inch side, I'm going to follow these perforations and cut both sides of the template off, and I'm going to cut it so I can put it all the way into the cabinet and have it not hit the rear wall. I'm going to cut it right above the back of the marked lines for the slot. What this is marking is where this goes. Okay, so it's going to mark kind of like that. I'm just going to cut the top off so I can slide the whole template into the cabinet. I'll be right back.
Okay, so let's talk about how we're going to locate our carriage in here. This beautiful template they give you has a center line. They give you these marking holes with the dark outlines. We don't like those. The rear ones are accessible even if you pull the track in and out. I can't get at this front one, so we've been using the elongated holes here. They're ovalized, which allows you to shift the track left and right. So we've been using the ovalized holes front and back. Now, if you're overlay, you're going to lay the template in and line the front of this up directly with the front of your front frame. What's going to happen when you lay the track in is the back of the track is set back from the front edge of the glide. So this is actually kind of butted up against the back of the front frame for all intents and purposes, and this part of the glide is kind of hanging out here, and your door lays over the front. So it says front edge of paper to front of cabinet, so you're going to lay it like that.
We're doing inset. Okay, so I have to push this back. Logic might say I'm just going to run this right up against the back of the frame because my door is 3/4 of an inch thick. That would be a problem because the front of the actual wood part that goes in and out has these metal brackets that attach to the door to hold the door onto it, and those brackets are about an eighth of an inch thick. So what we found is you actually want to have it about 7/8 of an inch back. So really, if I pull this out again, if that's the back of the frame, this is the front of my frame on overlay, and that's the back of the frame, I'm really an eighth of an inch beyond that. So I can take this, push it into the cabinet, and then an extra eighth of an inch, that's where it's going to end up. So what we've got to do now is find our center line. So I'm going to take my tape measure, measure my opening. My opening is 12 inches, so I'm going to find my center at 6 inches and make a line. Come back and show you that in a second.
All right, so I've made a line here. I'm halfway, the halfway distance of my 12-inch opening, so it's 6 inches. Your line, if you're overlay, is going to be a little bit further out because you got to be able to see that. Your template's going to lay over this line, so you want to make your line out here. I'm going to line my dotted center line they give me on the template, I'm going to line that up with my actual center line
, and then I'm going to slide it back that eighth of an inch from the front of the frame. So, I got it 7/8 of an inch back.
Okay, I'm back 7/8 of an inch, I'm centered on my line. I'm going to mark my holes. So, I'm going to mark these slots here, one there, and one there. Then I'm going to go to the back. I'm going to mark the two back ones here, two back ones there. Now I'm going to take my bit, I'm going to pre-drill my holes and we'll come back and lay this in here. Okay, so I've got the holes drilled. I'm going to take my carriage and I'm going to lay it down in here. Again, I'm using the elongated holes, and the back two holes.
Before I screw anything down, I want to make sure it's all going to move okay. That seems to be working, so we're good. We can screw it down. Okay, so we've got it all laid in. We're going to put the screws in, so we're going to use the supplied 3/4 inch screws that came in the pack. They have a bigger head on them. We'll screw the two front ones down first. Okay, now that those are down, we're going to slide this out and do the two rear ones. All right, so we're going to slide the track all the way forward, do the two rear ones now.
Now the next thing we're going to do is put the actual rack into the slides. Okay, so this is the carriage. This is the part that's going to hold your utensils. We've got to get this in here. First thing we're going to do is put it on an angle like this. It's got to be kind of a weird way, and then rotate it down. Then we're going to slide it back.
So now the next thing is to get this mounted in here and to make sure everything is square. We're going to put our brackets on. We've got two sets of these brackets. We've got two screws here that hold these in, and we've got the orange clips. So these orange clips come with a couple of screws in them. They mount right into these pre-drilled holes on the door. They line up with those holes. The clips snap in. Then we're going to use these little screws to hold them down.
The first thing we do is line the bracket up with the door. Make sure it's square. Then we're going to screw these in with the supplied screws. We're going to use the short 1/2 inch screws, not the long ones. Once the clips are screwed in, we'll mount the door to the carriage. Line the orange clips up with the metal brackets, and snap it in. Then adjust it if needed to make sure it's level and even. Use the 3/8 wrench to tighten it down.
Okay, so we’re going to put it back in, close it, and we’re done! Enjoy your new utensil pullout!


