Video Transcript
One of the questions that we get asked quite often is, how do you finish off cabinet ends and island backs, or peninsula backs, to make them look like furniture? We're going to talk you through a couple, three options that can help you really make your kitchen stand out, or you can keep it simple and inexpensive.
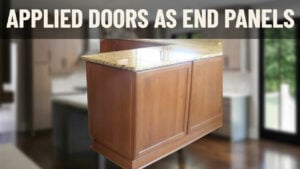
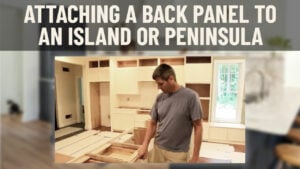
I drop down here and show you an actual island that's done with Conestoga product. This customer chose to go with an actual matching door panel; it's a real door panel with bead-board in it. This whole panel extends from here all the way to the wall. You order the panel whatever width you want, and it just stands up against the back of the island. You can also see that you can dictate the size of the bottom rail on the panel, so that the bottom of this panel lines up with your operable doors. We'll step over here and show you what that looks like.
You can see, in this case, that same panel was used on the side of the end of the cabinet right here. You, as a customer, have to cut out the toe notch, but it's got this wide bottom rail, and that bottom edge there lines up with the operable door, here. That's all at the same elevation. We can dictate this height, and help you determine how that's going to line up based on the overlay you choose. If you use a half-inch overlay, or a door with a wide frame, this is going to be higher or lower. We can dictate that for you.
Stepping back over here to our island, that's the door panel option. The other option you can use for your island or peninsula backs is plywood panel. We can sell you sheet goods, cut to size, of either quarter-inch or three-quarter-inch plywood, and you can veneer the back of the island with that plywood. Keep in mind, if you get to a long length, 96 inches or up, you’re going to have a seam somewhere, so you have to figure out where you want that seam, cover that seam with some batten molding, that we also sell, and you're going to have a cut edge on the end where that plywood meets the end or the edge of the cabinet. You're going to want to put a corner molding; our number 12 outside corner molding would go right there.
Those are some common options for island backs and peninsula backs. We want to now talk to you, we're going to step up here, and show you an option for cabinet sides. Here's a sample cabinet; it doesn't have a finished end, so forgive us for that. We didn't have one with a finished end on it to show, but one option for doing ends of cabinetry is to order a door panel this size, just like one of the operable doors.
If your base cabinet is 24 inches deep, and you're doing inch-and-a-quarter full overlay, that would leave a quarter of an inch heel here, and a quarter inch here. You'd want to order a 23-and-a-half-inch wide door. That door would simply get mounted on the cabinet side, so that you have the same half inch above it, and you have the same quarter of an inch here. You would screw that door panel on from inside the cabinet. Same edge profile as you have on the actual door. Of course, this is not a match; we're just showing this for illustrative purposes.
You would match the edge profile to match your face doors. That way it would be like an overlay panel, where it almost looks like you could put a knob on the door, it would open; but, of course, it's a fixed panel for decoration only. To make that happen, you would order the door panel - we'll help you size that - but the cabinet end would have to be ordered as finished, preferably the flush end option or, or at least the exposed end option.
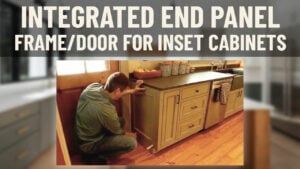
I'm stepping over here; we have one final option. It's a little more invasive, a little more difficult for both you and I, and that is to actually order a custom face frame three-quarters of an inch wider, and then an actual door panel that would tuck up behind that face frame. You can see you'll have a seam here, but the door panel is literally tucking up behind the face frame. It's not an overlay panel like we just showed you; it's a physical, integrated panel. That's a little more difficult, because we have to do custom face frames on all those cabinets, but it does give you a nice, clean look.
The last point to make is, if you're doing inset cabinets, whenever you're doing these ends or cabinet backs or island backs, you'd actually order a frame with the door panel set in it so that ends of your cabinets, and the backs of your islands and so forth, are also inset-looking. You don't want to just stick a door panel on, because it won't line up or look anything like the face of the cabinets. If you want inset, faces are inset, your panels on the sides are inset.
If you have any questions on doing wainscot panels or island backs or peninsula backs, we can certainly talk you through those. There is a section on our website that talks about it, but we just wanted to show you in real life how these options are used, and walk you through them.


