Video Transcript
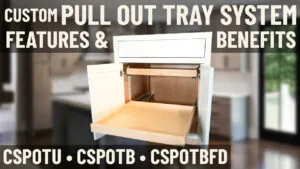
It’s a glorious day here at Cabinet Joint. I'm Justin, and in today’s video, I’m going to be showing you how to install our brand-new pullout tray system. Now, this new pullout tray system is easier to install, and more versatile, and much more flexible on dimensions and sizes and things like that—all amazing things. And this still utilizes the Blum Soft-Close drawer glides, which you know and love.
And you can see around the door hinges there's clearance. When you go ahead and close these doors, it doesn’t rub or anything like that.
Now, I will say this is an installation video only for the pullout tray system. This is not an assembly video on how to build this cabinet, because this system can be installed in multiple different types of cabinets. It could be tall cabinets—you can use this system in, think like big pantry cabinets, in a single drawer butt-door cabinet like this base full door. There are multiple options where you can use this system, but the installation of it will be the exact same in all of those different scenarios. So, you can use this video as your guide.
With that being said, let’s get into how to install the new pullout tray system.
Tools, Supplies, & Prep
So, the tools that you’re going to need to install the new pullout tray system are a tape measure, a screwdriver with a #2 Phillips head, and then your drill driver with a Phillips head, and then also a T15 bit for your cabinet screws.
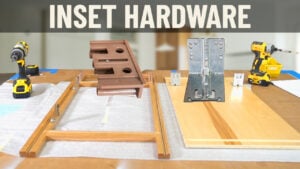
You will also need to provide two 1 1/4-inch cabinet head screws. They might be hard to find at your local shop, so there are plenty of options on Amazon where you can find them. And you’re only going to need the 2 1/4 for inset applications. If you have an overlay cabinet, you only need to provide 1-inch cabinet head screws to install the cleats.
Going into the supplies that you’ll be receiving with your Cabinet Joint, you’re going to be getting the trays, you’re going to be getting the drawer glides, you’re going to be getting this template piece, as well as these little clips for the glides—your standard Blum undermount drawer clips—and then these cleats that will be coming with it.
And then, for an inset job, I went ahead and cut these little blocks, and that will make more sense later in the video.
So let’s get into the installation.
Custom Pullout Tray System – Installation
This template piece of wood will be provided with your pullout trays. And because this is an inset job, it has these brackets in here. And so, as you can see, we can’t quite butt this all the way to the back of the face frame.
Now, if this was an overlay job, you can use this—just butt it to the back of the face frame and then you’re good to go. But in our scenario, because it’s an inset job, I went ahead and cut these 3-inch blocks the same width as the template that they provide.
So, I’m going to take these blocks that I cut, and now I can fit these around our brackets that we have in here. And then you’re going to take your cleat and just butt it in with the metal of the inside—the groove here—you’re gonna want that facing inside of the cabinet.
Now, you have a choice here. You can either leave the metal pins showing towards the front of the cabinet, or you can also go ahead and just have it flipped over. It’s a cleaner look flipped over, but then it’s easier to move your trays and stuff later when you can actually see what you’re attaching to.
So, in this scenario, I’m just going to keep the pins facing the front. And so then, once you have it butted up against those pieces that I made or your template, you go ahead and take your 2 1/4-inch screws—and you can see they have pilot holes already for you to stick your screws into.
And then once we have that screwed in, we can go ahead and take out those blocks that we made. And once you have that screwed in, you go ahead and take your template as your spacer—which is provided with your pullout trays—and then go ahead, butt it into the cabinet side, and then butt it into the back of our cleat here.
Then you can take your other cleat and butt it into the side of your spacer. And then you can go ahead and screw the bottom in first. Move that spacer up to the top to make sure all the spacing is even, make sure everything’s parallel, and then go ahead and put in those middle screws.
And now just like that, the left side is complete, and we are going to do the exact same steps on the other side.
So now, as you can see, using that template, you have spaced out your cleats perfectly to where now your glides—using the hooks—can clip right in.
So in order to achieve the spacing on the glides, you’re going to take your hooks. And first of all, make sure that you have the right hook for the right side—it has an “R” and an “L” on your hook, and that indicates your left or your right side.
So once you have that figured out, on the furthest back pair of holes that you see—these two holes all the way on the back—you’ll take your hook, and then the peg here will be going into the bottom hole. And that hook then should be oriented up.
So then on the front, you’ll see that there are four holes here. You’re going to go to the back pair of holes, and once again, you’ll do the same exact thing—put your peg in with your hook facing up, and then using your very small little machine screw, come through the inside of that glide and then fasten the hook to your glide.
So, as you can see, all of the spacing is perfect and it’s super easy to install. All you need to do is lean that hook in and then it’ll click right in.
And then you can see why I decided to put the dots here on the front—so you can see where those rungs are on your cleat. Just makes it a little bit easier as you go to install your glides.
So now, because I have two trays, I’m going to go repeat that step and I’ll be right back.
Now all of our glides are installed, and I just picked a random rung to put them on. Just make sure they’re even height-wise—otherwise, your tray will not fit.
And then the next step that we have is to put our undermount clips onto our trays, just like any other drawer box. So let’s go ahead and install those.
Now I have the clips installed, and I can go ahead and install the trays on the glide. And just like all of our drawers with the Blum system, it is soft close and it is super adjustable.
Once again, you have basically every single one of these rungs you can put your tray at—including where the door hinge is—it’s not going to interfere with your door hinge at all.
So, now with all that being said, I’m going to go ahead and install the drawer and install the doors.
The Finished Product & Summary
And I’ll be right back with you.
And that’s all there is to our new pullout tray system. As you can see, it is super easy to install, as well as extremely versatile.
So, I hope this is the right system for you. If you want more information on it, you can either contact your cabinet coach or you can call us at 888-21-6482.
Thank you for watching. Have a great day.


