Video Transcript
Introduction
It's a glorious day here at Cabinet Joint. My name's Justin, and in today's video, I'm going to be showing you how to assemble your base angle end cabinet.
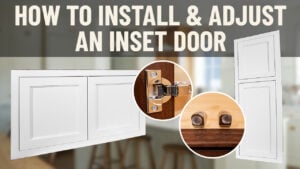
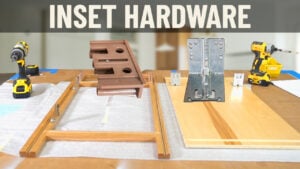
Now, what you're seeing here is an overlay application, but the same instructions will apply to your inset cabinet as well. Just make sure you are installing your inset hardware first, like you would any other cabinet.
This cabinet does assemble just a little bit differently than your typical square cabinet, with it being angled. So, make sure that you pay attention to all of the instructions that I'll be giving you.
Tools & Supplies
Make sure you have all your tools ready. The tools that you'll need are here on the screen.
Now, I just want to stress the importance of having clamps. It helps you as you are attaching your face frame, as well as making sure all of your cabinet components are fitting nice and tight together.
So once we have everything ready, we can get right into the assembly.
Base Angle End Cabinet Assembly
So it's important that we orient our sides correctly. If you look here on your left side, this cabinet has your normal dovetail groove, like you would on a cabinet side. If you see the end there, versus then when we come to this other side, it has a rabbet groove here in the back. And then this is just a straight dado cut, as well as having these pilot holes like you would on your cabinet back.
So make sure you know which side is which before you start building your cabinet.
So once I have my cabinet sides distinguished, I'm going to start with the side that has the dovetailed grooves. And I'm going to apply glue halfway into both the top and bottom groove there.
And then, taking my cabinet top and bottom, I'm going to make sure I orient those correctly as well, making sure the finished side is facing the interior of the cabinet. And I want then my splines to be facing away from the back corner. So you don't want your splines going into either of your cabinet sides. So make sure you have it oriented correctly.
And then, using that sliding dovetail, I'm gonna put the top and bottom into place. So once those are split into place, I'm going to be taking my other cabinet side, and I'm going to glue the grooves as well as the back rabbet on there.
Once I have that glued, I'm going to rest the rabbet on the back of your dovetailed side there. And I'm going to line up the grooving. And I'm going to use a clamp to help stabilize and hold everything together.
And then I am making sure that my grooves are lining up with my cabinet top and bottom, and making sure that everything is fitted nice and tight into the proper space.
Once everything's lined up and fit correctly, I'm going to take my stapler, using a 1" 18-gauge staple, and staple down those pilot holes that they give us. I'm putting one staple next to each pilot hole, but you can put one on both sides, too. Just be careful you're not shooting at an angle and potentially shooting into the interior of your cabinet.
With that stapled, I'm going to stand my cabinet up. And I'm using a speed square to mark a ¼" line down the side of that rabbet. This is different spacing than your typical cabinet side to your cabinet back. So, unfortunately, you can't use your Cabinet Joint inset jig for this.
Once I have that line drawn, I can then staple all the way down. Once that's stapled, the box is all ready to receive the face frame.
If you have an inset job, this will be your time to install your inset hinge brackets to do so before putting it onto your cabinet box.
So, moving on over to our front frame, we need to make sure we are orienting this correctly as well. So, the side that has your adjustable shelf pin holes, that will be the side that you attach then to the other.
So, take both your sides, see those shelf pin holes, and then that is where they will attach.
In the occasion that you don't have splines for these, you can just simply take one off of another cabinet. Take one off. Just try not to take too many off of one specific area, but it is perfectly fine if you need to borrow a spline or two from another cabinet.
I recommend using three splines, putting one at the top, middle, and bottom. And then I'm just going to put a small bead of glue. You don't want to overdo this, but just a small bead of glue down both the front and the back of that groove.
Then, taking the other half of your face frame, I am going to just attach it. And once you lock it into place with these splines, it is going to be hard to take it apart. So, make sure once again everything's ready to go and that everything is oriented correctly.
Now, we can go ahead and glue the back of the face frame. So, I'm gluing the bottom, and then I'm gluing both the shoulders of the three-part groove. You don't need to glue the deepest middle part. That's where the spline goes.
I'm going to glue the outer part of the top groove. Do the same thing on the other side. You can glue both the top and the bottom part of that top and bottom groove. I like to just do the outside. That way, I don't get glue inside my cabinet.
And then I'm doing the sides once again. And then back to the bottom.
Now, with the face frame attached, we are ready to put it onto our cabinet box that we just built.
So, standing up my cabinet box, I found it easiest to put the cabinet box on its side. And then from there, to apply the face frame, I'm just lining up all the grooves as well as all the splines and working my way down.
And I recommend starting at the top, working on one side, and then working your way down, and then starting back at the other side and working your way down once again.
Now, if you notice any gapping in that center joint of your face frame, or any gapping where your face frame is meeting your cabinet box, you can go ahead and just stick a clamp on it, and then that will close everything up.
Then once everything's clamped up, you can take a damp rag and clean up all your wood glue squeeze-out.
Now it's time to put on the doors. If you have an inset application, this is where you can just attach it to those brackets that you already have in place.
But for me, I have overlay, and you can attach the doors either on those center stiles or on the sides. With overlay, I find it easiest just to put the cabinet down on its side.
Then, using a ⁹⁄₆₄" self-centering drill bit, drill and screw the hinges onto the frame. I'm going to do the same thing here with the middle stile. In this case scenario, the customer wanted it hinged the same direction.
Once those are in place, I can use Blum's six-way adjustment to make sure my door is adjusted properly with all of the proper margins.
The Finished Product & Summary
And once I have the doors where I like them and all the glue is dried, this cabinet is ready to be installed in your kitchen or any other room that you have.
And that's all there is to assembling your base angle end cabinet. I just want to re-emphasize that it is so incredibly important to make sure you are orienting all of your cabinet parts correctly because with this cabinet, it can be easy to mix that up a little bit.
If you have any questions, as always, feel free to reach out to your cabinet coach, or you can call us at 888-211-6482.
Thank you for watching. Have a great day.