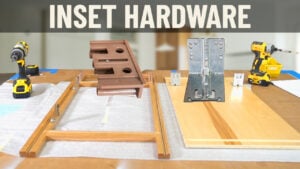
Custom species – that is, anything other than cherry, standard red oak, maple, or painted finishes – are sent with an end skin that is to be applied onto finished ends after assembly. This tutorial illustrates the process of adhering an end skin onto finished RTA cabinets to simplify the process for anyone ordering custom colors or custom woods. Don’t hesitate to use the links below for more information or contact your Cabinet Coach with any questions.
Video Transcript
[Music] Hey, Brian here from the Cabinet Joint. We are doing more and more what we call custom species. These are odd species that are anything other than cherry, red oak, standard red oak, maple, or painted. So when we get into things like quarter-sawn or rifts, which is what this job is, or we get into pine or red birch or walnut, we have to do end skins on our finished end because we do not stock plywoods in those odd species.
So we happen to have a quarter-sawn or might be a rift in red oak job going through our shop right now, and I wanted to use this as an opportunity to show you how to actually apply these end skins because we do not do it here in the shop. And if you buy the cabinets from us and have them shipped directly to you, the skins are not applied. They come loose, and the way they are applied is after the cabinet box is built, like I have here. You'll then apply the end skin in the field. That is not something we or our vendor do for you, so this is a task you're going to have to learn how to do. It's not hard. A lot of people ask questions about it. It's not very difficult.
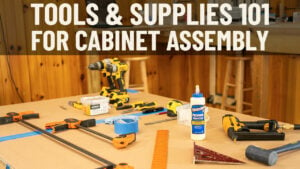
What you're going to need is, of course, the pre-cut end skin. These come sized already, ready to go on the side of the cabinet that they are part of. So we have our end skin, and then we also have this high-strength 90. It's available at Lowe's or Home Depot in the glues and adhesive section. Just comes in these cans. I think it's about $13 or $14. It might be a little more now with the post-COVID inflation, but one can should do three or four end skins. If you have a big refrigerator or utility cabinet, you might want to buy a couple of these cans. They go a long way, and it's not, it doesn't spray out as you'll see in a second. It doesn't spray out like spray paint. It comes out really viscous, easy to control the spray because it's so thick and gummy. It's almost like countertop adhesive. So you're going to want a can or two of that, some blue tape to protect the front frame so it doesn't get glue on it in case you do get some overspray. And then you're probably wondering why we have a sander. I'll explain that in a moment.
So let me get started by laying the cabinet down. The way I like to do it is lay the cabinet down so that I can pull that leading edge as tight as I can get it into the front frame using my body as a brace. So the first thing I'm going to do is tape off my front frame for the glue side. Oops, sorry, I do have a hinge issue. I want the hinge on this particular cabinet. I want the hinge on the finished end side. So I'm just going to run some tape down the side to protect this. And you'll peel this off afterwards, obviously.
And now what we do is we grab our Stay Put or they call it high-strength 90. Going to give the can a shake. And what we're going to do is coat both sides, oh, I should say each side, this side and the back of this both get coated. And then we wait four minutes. And you want to make sure you have the sprayer right up along the edges. That's the most important because that's where it's going to want to peel off. Get that out of the way. Make sure you shake it up. You can see how that's coming out really thick. And it almost dries in the air. And now we're just going to coat the rest of that panel. Make sure you got a good amount on there. Do the same thing here.
Okay, I'm going to wait for that to set up, make sure I got good coverage on that edge. I'm going to wait for that to set up. But one thing I wanted to comment on with the sander was when I go to pull this panel in tight to the frame, there is a chance that you may have a little bit of a belly to the frame if you didn't get it strapped tight to the box. And it doesn't take much to be off just a 16th of an inch and you're going to get a gap here or here. It might hit here and here. You got a gap in the middle. We'll use the belt sander to just take that high spot off on the edge of that panel and get it to match up to the back of the frame.
So I'm going to go ahead and wait four minutes for my glues to set up, and then we'll show you how to actually apply this and press it into place.
Okay, so we've got our panel glued; we waited our 4 minutes. I do have a little bit of an edge I kissed here, so I want it with a sander. I want to make sure I get that properly oriented, going to make sure I have it lined up at the end, and what I'm going to do is use my body to pull this panel as tight as I can get it and then lay it down in place. And now we can use our palm to press everything out. And you want to make sure you press it with all your body weight you can muster. Some people use a J roller; that's fine. But you want to make sure you use a lot of weight to make sure you have no bubbles, especially around the edges. If you have any extra glue squeeze out, you can use, like, Naphtha, which is basically lighter fluid or some very low-grade solvent to wipe any glue off. I don't have any here, but just a little bit of glue might squeeze out, or you might have gotten some overspray. You can get that off pretty easy. Set that cabinet off to the side. And now I have a flush end, basically frame is pretty much flush with the side of the cabinet, just as a standard cabinet would come with a flush end.
So remember, any custom color, any custom wood is all going to come with skins, and we have no other option for you. You'll have to apply them in the field. Hope this helped. Give your cabinet coach a call with any questions. Thanks. [Music]


