Justin shows you how to mark out your staple or brad nailer lines in order to staple or nail your cabinet together. We go through three methods – using a pencil, a speed square, or the Cabinet Joint Inset Scribe Jig. This is a crucial step in almost every cabinet assembly for base, wall, tall, and custom cabinets for your kitchen, bathroom, or home office!
Video Transcript
Introduction
It's a glorious day here at Cabinet Joint! I'm Justin, and in this video, I'm going to be showing you how to mark out your lines in order to staple your cabinet together. I'll be demonstrating three different methods and showing you how to mark out both the side and the back of the cabinet.
Method 1 - Using Your Finger as a Guide (Cabinet Side)
The first method is simple: using a pencil and your finger as a guide. To do this, bring your pencil to the side, use your finger as a guide, and estimate the center of your cabinet back. Then, simply run your pencil across the side to create the marking.
Method 2 - Using Your Speed Square (Cabinet Side)
The second method involves using a speed square. If you look at your speed square, you'll see divots that function as scribe lines. Place the speed square on the cabinet side, locate the 1/2-inch mark, and run your pencil in that groove as you move across the cabinet side.
Method 3 - Using the Cabinet Joint Scribe Jig (Cabinet Side)
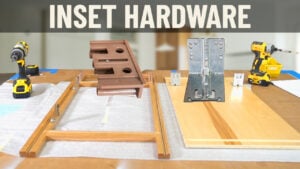
The third method utilizes our Cabinet Joint Inset Scribe Jig. While an overlay version is coming soon, this inset jig works for both overlay and inset applications. The back of the jig has a small shoulder that you can rest against the cabinet side. Using the first line of holes, insert your pencil into the first hole and slide it along as you mark the side. Once marked, you can proceed with stapling the cabinet side together.
Marking the Cabinet Back
Our cabinet backs come pre-manufactured with holes where the groove is, aligning with where the top or bottom of the cabinet meets the back. This means you likely won’t need to mark out for staples. However, in the rare case that you do, you can use the same three methods:
Finger as a Guide – Run your pencil down the edge while using your finger as a guide.
Speed Square – This time, place your pencil in the 1 1/4-inch groove while marking.
Cabinet Joint Scribe Jig – Instead of using the first set of holes, use the second set to mark your lines.
With these lines marked, you can now staple the cabinet back onto the top and bottom.
Summary
This is how you mark out your cabinet back and sides for stapling. These marks guide you to the center of the adjacent piece—marks on the cabinet side align with the center of the back, while marks on the back align with the center of the top and bottom.
It's important to staple straight into the cabinet piece rather than at an angle, as improper stapling could cause the staples to penetrate into the finished interior of your cabinet. Following these guidelines will ensure a clean and secure assembly.
If you have any questions or concerns, feel free to reach out to your cabinet coach or call us at 888-211-6482.
Thank you for watching!


