Video Transcript
Introduction
It's a glorious day here at Cabinet Joint.
I'm Justin, and in today's video, we're going to do a complete walkthrough on how to:
Install inset doors
Adjust the hinges so that you can get perfect reveals and ensure your door remains in perfect plane with the front frame.
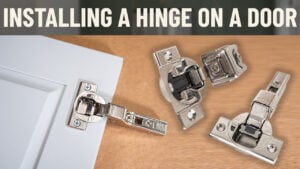
This video is not going to show you how to install the hinges onto the door or how to install the brackets onto the front frame—those are covered in other videos.
Also, to address the elephant in the room—I hurt my finger. But don't worry, it wasn't from building cabinets, so we're all good!
Now, let's go see what tools we're going to need.
Tools & Preparation
These are all the tools that you are going to need to install and adjust inset doors:
A drill with a 7/64 bit
An impact driver with a Phillips head bit
Two ways of installing the door stops (one of which is using our new Cabinet Joint Inset Jig)
Your door stops and the screws that go with them
A pencil
A special screwdriver that Blum makes (similar to a Phillips head but slightly different) for adjusting the door hinges
A regular Phillips bit screwdriver
A measuring tape
Two sets of pliers (for bending the stops in a very specific situation, which I'll show you later in the video)
Now, let's get into installing the doors!
Installing an Inset Door
At this point in your cabinet build, we have already assembled the inside of the cabinet and attached the brackets during the assembly process, just as we recommend.
On our doors, the hinges have already been installed. If you want to know how we built the cabinet, installed the brackets, or installed the hinges, we have separate videos on those topics that you can check out.
One of the reasons we love using the Blum hinge system is that it has three levels of adjustability:
Up and down
Left and right
In and out of the cabinet
Another reason is that it is super easy to install and also easy to remove if needed during the installation process.
Take a look here—you have these brackets already placed in the cabinet, and then you have these hinges. If you look at the hinges, you’ll see a little bar and a small tab that bends.
As you go to install it, you're going to catch it on the cleat inside, squeeze the tab, and it will simply click into place—just like this.
Now, just like that, you have an installed door!
You'll notice that I have a little tab here. You can use painter’s tape for this—just avoid green tape as it will leave a mark on your finish. Use blue or yellow tape instead.
Now, as I close the door, you can see that if I just let it go, the cabinet door falls back into the cabinet. That happens because we haven’t installed the door stopper yet, which is an important step.
Typically, installing the door stopper is the first step before installing the door, but for example’s sake, I wanted to install the door first.
Now, I’ll show you how easy it is to remove the door—just pinch those little tabs, and it comes right off.
Installing Door Stoppers - Single Door Cabinets
Now, we’re going to install the door stoppers. I’m using our Inset Scribe Jig, which makes this process super easy.
Line up the edge of the jig with the inner edge of the stile.
Line up the bottom of the jig with the back of the face frame.
Mark the drilling points with your pencil.
Now, you have exactly where you need to drill to install your door stopper.
To do the same thing on the other side, simply flip your jig over and repeat the process.
Manual Measurements (Without the Jig):
5/16" into the cabinet from the back of the face frame
9/16" over from the inside edge of the stile
Now that you have your marks, go ahead and drill using a 7/64 bit. You can use a bit slightly smaller than 1/8"—it doesn’t have to be exactly 7/64".
Be mindful while drilling; although it's not a big deal if you drill through the top since no one will see it, try to avoid unnecessary holes.
Next, install the stopper using the elongated hole, which allows for adjustability—loosening the screw lets you move the door forward or backward slightly if needed.
Now that the stoppers are in place, we can install our door again.
When I close it, you can see that the stoppers do their job—they stop the door.
For an inset door, the goal is for it to sit flush with the face frame.
Checking Alignment:
To check, you can place a level on the door, but honestly, you don’t always need to. Just get it to where it looks good to your eye.
Looking at this door, it is dead-on—completely flat and flush with the face frame—so I know I don’t need to adjust the door stop.
However, for two-tiered cabinets or sink cabinets, you’ll sometimes run into a problem where you don’t have a flat surface to mount the door stop. Now, I’ll show you a workaround for that.
Installing Upper Door Stoppers Without a Flat Surface
When you don’t have a flush top surface to mount your door stop, here’s the fix:
Take two pairs of pliers and bend the door stop so it ends up straight.
Mount the door stop on the back of the rail instead.
Use the same measurements as before but shifted:
5/16" down from the top of the shelf
9/16" over from the edge of the stile
Using the Jig for This Method:
If your cabinet has a shelf, place the bottom of the jig against it, aligning the edge with the inside of the stile. This marks the drilling spot for the stopper.
If your cabinet does not have a shelf, line up the bottom rail with the two larger holes on the jig. Then, mark and drill the hole for your door stopper.
After installing the upper stopper, reinstall the door—and it works perfectly!
Adjusting Inset Doors
Now, let’s talk about adjusting the inset doors.
As you can see, this top door is completely misaligned—this is exaggerated for demonstration, but I want to show how to fix it.
Hinge Adjustments:
Blum hinges have three screws for adjustment:
Furthest back screw: Adjusts in and out (how far the door sits in the cabinet).
Middle screw: Adjusts up and down (for even reveals).
Closest screw to the face frame: Adjusts left and right (to square the door).
Now, I’ll make adjustments:
The top right corner is sticking out, so I’ll turn the furthest back screw to bring it in.
The door is racked in the opening, so I’ll adjust the closest screw to shift it back into alignment.
To even out the top and bottom reveals, I’ll turn the middle screw slightly.
Now, all the reveals are even, and the door is perfectly flush!
Changing the Speed of Your Soft-Close Doors
Blum hinges have soft-close toggles to adjust closing speed.
Both toggles out: Fast closing
One toggle in, one out: Medium speed
Both toggles in: Very slow closing
Simply press the toggles in or out, cycle the door once, and adjust to your preference.
Final Thoughts
This cabinet is now ready for installation!
Over time, due to wood movement, slight adjustments may be needed—but as I’ve shown, it’s a quick and easy process.
If you have questions about inset doors, hinges, or adjustments, feel free to call your cabinet coach or reach out to us at 888-211-6482.