Video Transcript
Introduction
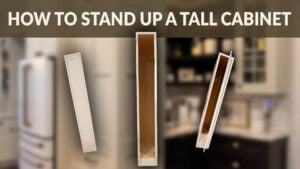
It's a glorious day here at Cabinet Joint. I'm Justin, and in today's video, I'm going to show you how to assemble a tall cabinet in an upright position.
Now, you will need to do this in an instance where your tall cabinet is very close to your ceiling height. The reason being is if you built it on the floor flat like you normally do, as you go to tip it up, it will end up hitting your ceiling and it won't fit.
To work around that, we can assemble it upright. If you want to assemble it flat, you'll need at least 4" to 6" of clearance between your tall cabinet and your ceiling. And if you have a really deep cabinet, you will need at least 6" to 7" of clearance between them. Otherwise, you should assemble it upright like this.
If you really want to be particular, you can measure what the diagonal of your cabinet would be from the front corner to the top opposite corner. You can figure out your hypotenuse that way to see if it would fit. But as a general rule of thumb, just say you'll need at least 6"+ of clearance.
Now, in this video, as you can see, I don't have an 8' ceiling above me. So, we're going to have to imagine just a little bit, but that's okay. The process will be the exact same.
The other thing you'll want to do before you start assembly is, if you need to install any crown backer, do that now because once we get the cabinet assembled, we won't be able to reach a nail gun in there. So, if you need to install any backer, do that now.
Be aware, if crown is wrapping around the side, then you'll also need to put some backer on the side of your cabinet.
With all that being said, these are the tools and supplies that you'll need.
Once you have all those tools and supplies ready, we can get right into the assembly.
Assembly
The very first thing I'm doing is taking some cardboard and painters tape and attaching the cardboard to the wall because, just like you would on your worktable, you want to give a bit of a padded surface. That way, your front frame won't get potentially damaged or nicked up by a harder surface.
I'm just applying the painters tape so it sticks and I don't need to be fighting it.
Then, as I'm building my cabinet, I'm going to be placing a second piece of cardboard on top. I'm simply using the cardboard that came in with my cabinet shipment, but if you have any other cardboard laying around, feel free to use that as well. This is what we have lying around the shop.
Once I have my cardboard in place, I'm going to stand up my front frame. I'm also going to apply some painters tape there to hold the frame up.
If you have a second person, which I highly recommend for this process, it'll be a lot easier. But I'm trying to do it by myself, and I find it helpful to put on that painters tape. That way, it holds the front frame up against the wall and I don't need to worry about it falling as I'm trying to apply the sides and the tops and the bottoms.
It's also helpful to have a ladder at this point because you are dealing with a tall cabinet. Unless any of you are giants, you will need a ladder for this process.
I am going to take a rasp to the dovetails because I want to make sure that this will be as easy of an assembly as it can possibly be. By doing this, you are ensuring that those dovetails will slide in because you don't have a lot of leverage as you will be sliding those in.
Just like you would on the floor, I'm going to be applying wood glue along those grooves. Make sure you do so carefully so that you don't get wood glue all over.
I also put a little piece of cardboard underneath the front frame. That way, if any wood glue seeps down or I spill or drip any, it won't land on your nice floor.
So, I'm going to go ahead and glue all the grooves like you would on any other cabinet.
I'm actually just going to glue one side for now. That way, as I am applying the cabinet side, the glue that would be on the other side doesn't just seep down.
Other than that, it is the exact same gluing process that you would normally do.
Now I'm going to take my cabinet side, making sure I have the correct one and don't have it flipped upside down.
I will then apply the cabinet side like you would on the floor. Make sure those splines are all aligned and then apply pressure in order to click everything in.
I'm also going to take a rubber mallet just to ensure, once again, that everything is nice and tight.
This is why it's so important to have that cardboard on your walls because you want to make sure, as you're pounding it, it is on a nice soft surface and won't get scratched up at all.
After I have the one side in, I will then apply glue to the grooving on the other side as well.
I'm also going to apply glue along the top and the bottom, and I'm going to smear it. That way, it doesn't just drip down. It won't affect the strength at all. It'll just make it a little more sticky and stay on the frame longer as I'm trying to put all the pieces in.
I'm doing this now because once I put on the other side, it'll be hard to reach with this skinny of a cabinet.
Now, with everything glued, I am going to stick the other side in place just like I did the first side, making sure everything is lined up with the grooving on the front frame and making sure those splines are in and everything is connected tightly.
Once again, taking my mallet to ensure a nice, tight fit.
Because this is a flush end, I can easily just look down the side to see whether or not it is tight to the front frame.
Now I'm going to take the glue and apply it to those dovetail joints.
This could be something you could do earlier in the process as well. Looking back, it may have been easier to do it earlier because this is such a skinny cabinet, but I waited until after, and that worked totally fine too.
This is where it is nice to have shaved down those dovetails with the rasp because, as I said, you don't really have any leverage when you're trying to slide them in.
I had to use a mallet here to get them in, but as you can see, they are sliding in just fine.
After just a little bit of influence, it is all the way in and tight to the front frame as well.
As you're doing this, it might be easy to knock the front frame off the side. So, take a second look and make sure your side is still lined up perfectly.
I had to once again give my side a little bit more influence, as you're seeing here, just to make sure everything is tight.
Now I'm moving over to my top, and I'll be doing the same exact thing—putting glue in those dovetail grooves.
I'll then take my cabinet top, make sure it's oriented correctly with the finished side toward the interior of the cabinet, and then slide it in.
Now I can go and glue the cabinet sides as well as the cabinet top and bottom so that we can go ahead and apply the cabinet back.
Taking my cabinet back and making sure, once again, it's oriented correctly, it's just a matter of lining up those dados with the cabinet top and bottom and then getting them lined up.
I'm just using the mallet once again to make sure everything fits nicely into place.
Moving over to the bottom, I'm doing the exact same thing.
You will be able to know when it is fully in place when it no longer sounds hollow as you are using the mallet.
Once everything's seated correctly, I can take my nail gun. Where those holes are drilled out, that is telling me where the center of my cabinet top or bottom is.
I'll just follow the line and place a staple on either side of those dots.
I will do the exact same thing on the top as I did on the bottom.
Because these are both flush ends, I can't staple from the sides into the back. So, what I'll do is toenail the cabinet back into the cabinet sides.
Each staple gun is going to be a little bit different. For me, I have to take off my tip and then angle it in.
I'm also using a clamp to make sure everything is nice and tight as I'm doing this.
Now my cabinet is built, and I'm going to flip it around and make sure that there's no glue or anything on the inside.
Be careful if you have flush ends when dragging it on the floor because dragging flush ends or a flush toe has the potential to chip the paint on the bottom.
Be very, very careful and mindful of that as you're doing it.
I'm checking for wood glue here, and then taking a wet rag, I can clean up any wood glue that made its way into the interior of the cabinet. It wipes away nice and easy.
Taking off that tape that we used earlier to hold it along the wall.
Because this is a flush end, it is critical that the front frame joint to the cabinet sides is tight.
I'm going to be using some clamps to make sure that is the case.
If you don't have a flush end, you still want to make sure that it is nice and straight and attached well to your cabinet side because later on, as you go to attach your cabinet to another one, if one front frame is bowed one way and the other is bowed another way, you're going to run into a more difficult installation.
So, clamping all of your front frames is a good practice just to make sure everything is nice and straight.
As you can see, assembling upright is not difficult at all. It is essentially the same as it would be if you were assembling flat.
The main thing is to make sure you have a padded surface that you're building against.
Summary and Outro
Another thing to note: if you're building a fridge cabinet, you're going to have the stretcher across the bottom that is stapled to the bottom of both stiles. Remove that stretcher and the staples first before you start building because otherwise it'll be difficult to remove those staples and not scratch up your floor as you're moving the cabinet.
So, if you have any other questions, you can reach out to your cabinet coach or you can call us at 888-211-6482.
Thank you for watching. Have a great day.