Toe Kick Options
An overview of some of our toe kick options including standard toe, flush toe, arched valance toe and furniture feet.
Video Transcript
In this video we're going to talk you through some of our toe box options. Whenever you're doing a cabinet for a kitchen or a bathroom or even entertainment areas there's different options available to you for the toe area where you're feet are going to bang up against the cabinet.For the first we want to show you the standard toe box. Whenever you order Conestoga cabinets of any kind except office cabinets - office cabinets come started with a 2-1/2"-high flush toe. There's no recess. But all the other cabinets for vanities, kitchen cabinets and so forth, the toe box is 4" high and 3" deep. You'll then face that toe box with the 1/2" plywood toe strips that we would send you that match the finish of the cabinetry. That’s you're standard toe box. When you're standing at the kitchen your toes will go up underneath that.
In some cases you'll want to dress that kitchen up a little bit, make it look more like furniture, in which case we can sell you the flush toe option. That is illustrated best on this cabinet here where the customer has chosen to do a flush toe. What that means is the front frame that the doors are sitting on doesn't stop here and then recess back. The front frame goes all the way to the floor, solid wood all the way to the floor. That allows the customer to then wrap that cabinet with a decorative base molding. That's really ideal for media or entertainment areas. Islands, we do that quite often with islands because you don't want islands necessarily to look like kitchen cabinets. You'd really rather have it look like furniture. The flush toe option is great in that regard.
One option, cannot show it here but one option that is quite popular is to strip off the standard front frame from the cabinet. Then we can do a custom one where the cabinet toe kick where the front frame at the bottom is actually arched like a Roman arch to give it a decorative furniture look. It's not necessarily a listed option on the website but it is very doable. We simply order the cabinet with no front frame, and then separately we order a custom front frame to snap right on to that cabinet with a toe cutout of your choice. We have different arch styles. You can pick any one of them you like.
Another option you can do for toe boxes - again, I can't it here but we can show you kind of how it would work, is in this area in this recess you could put a bun foot or a French foot or a Rochelle foot. There's all sorts of feet options you can find under the accessories and refacing section of the site. The foot of your choice would just sit under through and look like it's supporting the cabinet but it's really not. It's just decorative; it's faux. A great look for things like vanities or stand-alone pieces.
Lastly, what some folks will ask for is how do I make a cabinet supported by feet. I don't want to have any cabinet touching the ground. I want it open to the wall. What we suggest in that case is order your standard cabinet, but when you get it you're going to cut the cabinet side that touches the ground, you're going to cut off the bottom 4", so now you have a cabinet that's not sitting on the ground.
You would then take a piece of plywood with an edge band on it or a piece of solid wood with a profile on it and make that platform a little wider and a little deeper than the cabinet you're putting it under, and set the whole cabinet on top of that platform. Then support the platform on all four corners with a foot of your choice. That way if you've got or three cabinets creating a 72" wide vanity, it's fully supported by that 73-1/2" wide panel. Then the feet are on the bottom of that. That gives you a free-standing furniture look that's very well supported, and all that weight is being born by the four feet. We get that question quite often but we can talk you through that option. Just give us a call. The toll free is 888-211-6482.
If you get a flush toe end for the base cabinet how do you finish the corner with molding so that you don’t see the toe kick end? And without using a faux foot?
If you order a flush toe, there is no toe notch in the cabinet side, the side of the cabinet goes to floor as well.
Hi. My name is Denine. I had a Island from Home Depot but my contractor built a wall behind it and it messed with wrapping my mullion door cabinet end caps being wrapped now at my end caps of the island there are toe kick areas and I hate it. He already laid the vinyl flooring and he wrapped a quarter round floor molding under there (toe kick area). I like the idea that you have in your video of putting decorative feet under there to dress it up. Can you please help me. Thank you.
Hey Denine, thank you for your message! We do have many wood feet that you could use for this application. I realized that the previous PDF on our site for this was incorrect, it can now be found here: https://www.cabinetjoint.com/cabinet-accessories-refacing/decorative-feet/ – Feel free to email or call our sales team and we’d be happy to assist you moving forward. Have a great day!
Hi – I’ve got a floor cabinet that doesn’t entirely cover over the air register, there’s still half the air register exposed when the cabinet is placed. Is there a particular way to address this?
Best bet is to either order the cabinets deeper, order them with a flush toe kick and then put the register in the flush toe or move the duct backward into the footprint of a standard base cabinet.
Hi, we installed our island and our floor slopes. We made the island level but now that we are putting the toe kick on it looks a bit awkward as we needed to cut it where to flooring is higher. The difference in height from one side to the other is 1/4 of an inch. Do you have any advice to help make it look better or do we need to ignore it and move on?
I cant seem to locate an order from you with us and without knowing the details of your cabinets I cannot answer with complete certainty, but it sure seems you could use some simple shoe molding. I would contact who you purchased from with this question.
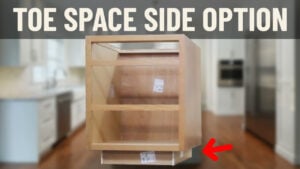
Any advice on how to install the pieces that make up a side toe kick? I understand they’re meant to make a box beneath the cabinet that’s located (side to side) by a pair of dovetail grooves, but what method can you recommend to locate this box front to back and secure it in position?
There are a few routes you can take to secure this. It is meant to be set 3″ from the side and front, back. So you can flip the cabinet and mark and install in that manner. Using blocking on the inside of the toe kick box so you can fasten the hidden scrap blocking up into the cabinet floor, with short screws so they do not penetrate into the cabinet, and then through the face of the toekick box to fasten to the blocking.