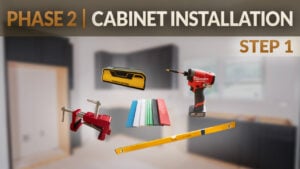
Getting all of your cabinet face frames perfectly in plane is key to a professional installation. In this video, we demonstrate the pro method of using a string line across the face frames to reveal any wall bulges or inconsistencies. From there, we show how to place and secure shims behind the cabinets to correct those differences. This technique helps ensure your entire cabinet run stays straight, aligned, and ready for the next steps.
Video Transcript
Justin:
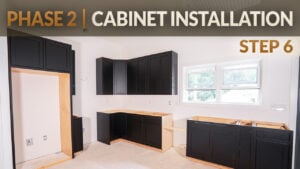
It's a glorious day here at Cabinet Joint. I'm Justin. Today I'm here with Josh. And Josh, we just got all of our face frames connected, and we did that for all of the base cabinets. And now I see we have gone and screwed it into the wall. We also have this string line. So Josh, talk to me through the process of how we got here.
Josh:
Yeah. So, after we got all of our face frames connected, we've got our sacrificial spacers here to kind of control our appliance width—24" for the dishwasher, 30" down there for the range. And what this string here is, is a control line. We want to make sure that our whole cabinet run is running parallel and not curving or telegraphing whatever the wall is doing behind it.
Essentially, what we're doing is we're clamping a shim—both are the same size, roughly a ¼" shim—one at each end of the run. Then we look at how far the spacing is from the face frame, whether it's close or far away, and we adjust that spacing by the shim size that we put behind the cabinet.
Justin:
And what screws are we using to fasten these to the wall?
Josh:
So yeah, these are GRK 2½" screws. We want to make sure we're using a cabinet screw with a washer head. We want to actually pull the cabinet tight to the framing. We don't want to pull through the cabinet back, so we wouldn't use a finish-type screw. We want something with a good substantial head.
All of these shims are varying in size—some are ½", some are ¼", whatever it takes—so that we have the exact same distance from the face frame to the string all the way down the run.
The string line is always going to be straight. This is essentially a giant level. Since we don't have a level that's 13–14 ft long, the string acts as that level. So this is our reference point. And that's why it was so critical yesterday when we went and found the farthest projection.
Justin:
Yes, exactly. Why we did that. We wanted to find out what part of the wall was bulging out the most and basically make sure we work ahead of that point and on.
Justin:
And Josh, I noticed there's no string line over here on this wall. You got a level. What are you using that for?
Josh:
Yeah. So, we can check that the face frames are in plane and that they're all in a straight line with each other with a level or a straight edge of any type. I prefer that. In that case, that's too long of a run to use a straight edge. So here, it's really simple to just take that level, bring it to the front of the cabinets, and make sure that we're flush everywhere we need to be in line. That way, we know we're not twisting and turning down the wall.
Justin:
Well, thank you, Josh, for showing us how to make sure all of our cabinets are straight. And if you guys have any questions as you are installing your cabinets, you can reach out to your cabinet coach or call us at 888-211-6482.
Thank you for watching. Have a great day.