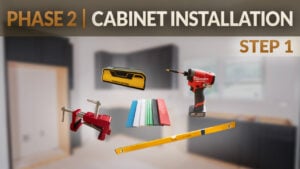
Video Transcript
Introduction
Justin:
It's a glorious day here at Cabinet Joint. I'm Justin, and today I'm here with Josh, and we're back inside of a house in the second part of our install series. Yesterday we just got done with all of the prep work that needs to happen pre-install. We we got all of our measurements. We got our layouts. We figured out what's the highest point is, all the things. Make sure you watch that video before getting to this point because that is crucial. Don't just skip ahead to now where we're putting in cabinets. Make sure you do all the work beforehand because then it will make this process so much easier.
Choosing Which Cabinet to Install First & Why
Justin:
So now we are getting into the actual install itself. And Josh, I see we have a corner pie cut cabinet here. Why do we have this one first?
Josh:
Yeah. So first I'll touch on why we're doing lowers instead of uppers first. Probably a very argued topic, but in this situation when you have walls that may not be straight or plumb, you may have, you know, a sag in a wall or something like that. If you just go off of your drawings and you measure what the drawing says, say 48" to the end of your your wall cabinet, but you're not considering a bulge or a void in the wall, now you're fixing that to the wall in a position to where it may be wrong at the end of the day when you come around with your base cabinets.
So, I like to actually use my base cabinets as a gauge for where to line my wall cabinets with because the base cabinets once they're fixed in place, they're going to give you a straight line. So here we'll have the range and the range hood. We'll have a straight line to reference off of from our base to where our wall cabinet should begin.
Justin:
So why the the corner cabinet, not like the the sink cabinet?
Josh:
Well, that's a good question. Typically, we want to make sure that our sinks are centered on the window. Part of our preparation yesterday was we ran around with a tape measure. We considered the walls being in and out a little bit and we accounted for that and we checked and we verified that this center line is exactly where it needs to be in reference to our design plans.
So really, we're just trying to do a little mental math backwards. And we know that the corner cabinet can fit there. The next run of cabinets will fit. When our sink cabinet goes in, it should land right exactly where it's supposed to be. If you started with the sink cabinet first, you might get into a pinch where if you were just ever so slightly off, as you work down, you might not even be able to get that corner cabinet into place. You may have run out of room. We needed 36" down there. And if we ended up with 35¾" or 35⅞", we would not be able to fit that corner cabinet. We'd find ourselves taking all this loose and going right back to where we're starting right now, which is the corner cabinet.
Justin:
So, is there ever a situation where you're starting with anything but the corner?
Josh:
Yeah. You know, so a lot of kitchens don't have corner cabinets. They may be a a start and a stop on a wall and then there's a second wall in the house. Most of the time, we want to use, you know, like a window as a center line. If we have a corner cabinet, I generally like to always use a corner cabinet first because you only have so much given space there and we want to make sure that that's going to fit the first time.
Using Shims to Elevate the Cabinet if Necessary
Justin:
Looking at this cabinet here, I see you've attached some some blocking here on the bottom. What's that for?
Josh:
Yeah. So, on this particular job, we have a wood subfloor and it's going to get a floating floor. The floating floor needs room to expand and contract. The other thing that's happening is we're technically working off of an inaccurate elevation. We're going to build this floor up the thickness of the flooring, which in this case was 5⁄16". So, we've attached little 5⁄16" shims be a nail gun or stapler to the foot of each cabinet. So, now we've already adjusted for the new height of the floor so that when the fridge cabinet goes in, when the dishwasher slides in, when the refrigerator goes in, everything is on the proper elevation of the finished floor.
Justin:
I see. That's smart. And now just looking at our cabinet here once again, I know yesterday we laid out where the cabinets are going to land. I see we're we're not hitting our mark here in the corner.
Josh:
Yeah. So all of our cabinets, unless it comes with a flush end, we'll have a small extended style that hangs past the sidewall of the cabinet. In this situation, it's a 5⁄16" extended style. Basically, our mark is referencing the front of our cabinet, which is where all of our measurements come from. They come from the width of the face frame. That is the total width of a cabinet. So a 36" cabinet would actually have a 35½" box roughly. But the face frame is what we're actually working off with our design. So this is simply just a reference point from the face frame.
Using Shims to Level the Cabinet
Justin:
So then from there, are you good to just put the cabinet in and install, or what other things you need to do?
Josh:
No, we actually need to shim this thing level and we established yesterday that this was actually the highest point of the room here. So, this worked out really well that our first cabinet is also the highest point of the room. So, basically what we're going to do is we're going to set up our laser here at the high point and this is our gauge for where to run the elevation of every cabinet for the rest of this job.
So, Justin just turned on our laser. You see it bounces a little bit. We happen to be on a a wood subfloor. So, there's a little bit of you can see here a little flex here. If you're on concrete slab, this won't be an issue, but you definitely want to give it time to settle. It's just part of the gig.
So, you see here we have our laser all set up. We're actually very good on the back already. We had to go around and I use just a flat block of wood, something that's, you know, plain, easy to see. And I just make sure that our laser is right at the top edge of all of our cabinets.
Here at the front, we are actually low roughly about ¹⁄₁₆" here. But if you look down at the bottom, I've already put in ¹⁄₁₆" shims. So now we've got a perfect perfectly level cabinet on all edges.
Justin:
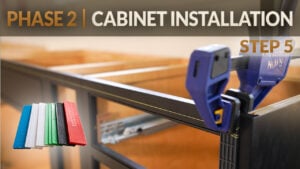
I see we have these like green plastic shims here. Why why use those instead of taper shims?
Josh:
Oh yeah. So I like to share shims. I know that there's another cabinet going here. We have a small cabinet going here. And the floor elevation is not going to change a lot over an inch or two. So if you use a tapered shim, one end of the shim is always thicker than the other. And if I stuck a shim in this way, this cabinet would be right, but this one would now when set would end up too high. I like to use a flat shim. And I like to share the shim. I put about half of it under the first cabinet. The next cabinet will sit on the other half.
Do Not Screw Your Cabinet into the Wall!
Justin:
That's genius. So now, are we good to go and and just start screwing into the wall?
Josh:
And no, we will not screw it to the wall just yet. What I like to do is I like to actually continue my run until the end and I like to take a pull string or you can use like a long 8 ft level, you know, if the run's not beyond that. But a pull string is essentially like an infinite straight edge. So we'll come here from the start and we'll pull it all the way down to the end of the run. And we want to make sure all face frames are in perfectly in line. If you just bolt this to the wall, the cabinets will do what the wall does. It will just telegraph any wave in the wall through the face frame of the cabinets all the way down your run. And that's not what you want.
So, we'll continue our run. We'll get it all pulled with a straight line and then we'll shim accordingly in the back.
Justin:
That sounds great. So, if you have any questions about choosing which cabinet to install first or how we got to this point, make sure you reach out to your cabinet coach, or you can call us at 888-211-6482.
Thank you for watching. Have a great day.