Video Transcript
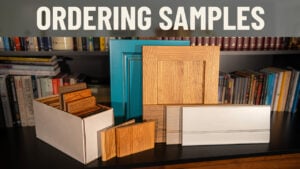
It's a glorious day at Cabinet Joint. I'm Justin, and in today's video I'm going to be showing you how to install paneling. Now, as you buy paneling from us, the benefit is you are able to get all of the same finishes as you would with our cabinetry, meaning you can match perfectly to the rest of your cabinets in your kitchen or your laundry room or wherever else.
This is a decorative item that provides a nice accent to your wall. As well as the finishes, you can also have all of the different profiles as you would with any other cabinet door. This is essentially just a big five-piece cabinet door. And sizing-wise, you can have these up to 8 ft by 8 ft or potentially even larger. You can talk to your cabinet coach about that.
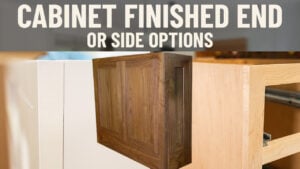
Now, I will say be careful with your sizing because, one, you're going to have to handle it and if it's too large, it's going to be very heavy. And two, remember, just like a door, the larger you get, the less stable that wood will want to be. If you have installed an end panel on your cabinet, it's very similar, except we no longer have access from within the cabinet because obviously we're dealing with a wall here.
So, in today's video, we're going to be showing how to install paneling. I have a run of four panels here, and we will be talking throughout the layout, throughout cutting outlets, as well as touching on scribing in today's video. So, let's get into it.
Now, looking at the tools for this install, I know it may look like a lot, but trust me, the majority of these are things that any homeowner has lying around. I have some clamps. I have a laser level as well as a level. I'm going to be using both in this video. If you don't have a laser, it makes the process so much easier, but you are able to get by with just a level. Painter’s tape, a pencil, Phillips head screwdriver, measuring tape, stud finder, and then I have a 5-in-1. You can use a putty knife—I'm just going to use this for some scraping.
A caulk gun, as well as some construction adhesive. Now, I will advise straying away from something like liquid nails. I would look for construction adhesive that is a polyurethane base. That's just because it's a little more flexible and doesn't get rock hard and allows for these panels to move with the seasons. A wax stick that comes with your project will be sent through Cabinet Joint, so you don't need to worry about providing that yourself. Spacer blocks here that'll be used for scribing and spacing.
An 18-gauge nail gun with 2" brad nails. A drill with a ⅝" drill bit. If you don't have a ⅝" drill bit, you can manage with ½". It's just to be able to fit my jigsaw blade. Then I have a jigsaw here. And then lastly, I have a mallet and some scrap wood here. This is just going to be a block to hit the paneling with.
Then you'll see we're going to be using a track saw in the video. If you don't have a track saw, you can just use a circular saw. I'd recommend getting some sort of level or straight edge to make sure that cut is nice and straight. And we're also going to be using a miter saw, but if you don't have a miter saw, you can also use a circular saw.
With all that being said, let's get into the installation. We are going to be starting off with this panel here in this corner. And as you can see, there's a lot that needs to be done to it yet. We have an outlet that we'll need to cut out, as well as we'll need to scribe it to the floor and shrink the height. In the back here, you'll see some other panels. Those have already been cut. Those have had the outlet already cut out for it as well. So those will be ready to be installed once I have this all good to go.
The same process that I'm doing for this panel applies to those as well. And then the installation process itself will all be the same. And then we also have this cap molding. There are multiple profiles, so you can reach out to your cabinet coach to see what all of those options are, but this is the profile that we will be using today.
In terms of the process, it's very similar to installing cabinets. There's going to be some pre-work that you want to do before you start nailing or before you start screwing or cutting anything. That's why we have our laser set up today.
First things first, I had to determine my height. And the way I did that is I knew I wanted it to fit underneath this window. And I knew I had that cap that needed to fit underneath the window as well. So I took the thickness of the cap, gave myself a ¹⁄₁₆" of play underneath this window. That way everything for the installation goes smoothly.
So determine your height, whether that's using a window or something else in your house. Set your laser level up, or you can use your level if you don't have a laser. From there, I measured out my panels just to make sure everything is going to fit, as well as looking at where the outlets will land in the panels.
If you are doing new construction, I highly recommend thinking this process through—where those outlets will end up landing. The main reason is aesthetics. You don't want one outlet being midway through one panel and then only maybe ¼" of the way through on the other one. Personally, I prefer it to be located somewhere in the center floating panel.
Lastly, I'm marking out studs. I took my stud finder with my laser and pre-marked all the studs in the room. And then, once again like a cabinet install, I have my level here with blue tape telling me where the floor is going to be high and where it's going to be low. I made a quick story pole so I can use this to go throughout the room and check on the height.
Over here, I'm checking. With cabinets, you have to check front and back. Here, you only need to check the back because the panel is only ¾" thick. And then over here, you can see I'm sitting almost like ¼" back. So you need to take into account all of these things.
If you are running a base molding on top of your panels, you don't need to worry about scribing it at all. You can just lay them level and then you'll have your base or even a shoe mold that will cover any gap. Here, we are not going to have any base, so it depends on your stylistic preference. That means we need to scribe everything tight to the floor.
If you have any big mud buildup on your wall, you can just go ahead and scrape that off. You don't want anything sticking out—you want as flat of a surface as possible to work with.
With the laser set up, I am going to put the panel where I want it. There are many ways you can scribe, but for this scenario, what I'm able to do is flip the panel over. I'm making sure I'm not twisting it at all—just now the bottom is the top and top is the bottom. I'm looking at the back and marking with a pencil where the laser is hitting. This will give me the exact cut and slope that I need in order to have a level, tight fit to the floor.
Once I have that marked, I'll measure for the outlet. I'm measuring from fixed points—off the casing of the door and off of the laser line. Getting both sides, top, and bottom. Making sure my cut will be tight enough so the outlet wings can catch and screw into the panel.
Then I bring the panel to my work table and transfer those lines. Using a track saw, I line up my track and cut at about a 20° angle. When scribing, it's best to use a slight back cut. If you don't have a track saw, you can use a straight edge and a circular saw.
Now I cut out for the outlet. I drill two holes in the corners, then use a jigsaw to cut out the rectangle. This cut doesn't need to be perfect because the cover plate will hide it.
I bring it back into the room, check the fit—it looks great—and now I can install. I use construction adhesive (polyurethane-based) on the back, focusing on the rails and styles, not the floating panel. Then I pull the outlet through and nail at the top and bottom—top near the rail (covered by the cap), bottom into the base plate.
Then I install the second and third panels the same way. Use minimal nails, but enough for stability. The adhesive does the real holding. I clamp the styles together to keep joints tight.
For the last panel, I test fit it—no scribing needed. If it was needed, I would adjust accordingly. Then glue, install, and nail. Afterward, I fill nail holes with the wax crayon.
Next, I install the outlets using ½" screws, then add the cover plates.
Now it's time for the cap. I cut a return on the edge for a clean look. For the scarf joint, I cut at 22½°, then cut the second piece to length. Once fit is good, I nail through the top into the studs and fill those holes.
And just like that, you have all of your panels and cap installed. It's not too bad of a process. The main thing is measuring from consistent fixed points, ensuring proper orientation, and getting clean scribe cuts. If you're adding base molding, you don’t need to worry about floor gaps.
Make sure everything is level, set your height, and you should be good to go. If you have any questions, you can reach out to your cabinet coach or call us at 888-211-6482.
Thank you for watching. Have a great day.