Video Transcript
Conestoga has some standard crowns. They don't take inserts. There's nothing fancy about them. Just typical ogee crowns. They also have some frieze moldings, which are meant to cover the gap between the top of your cabinet and the ceiling, which may be 6 inches but the crowns are obviously not 6 inches. How do you fill that space? We're going to talk through that a little bit.
The crowns are kind of broken down into the simple ogee versions and then some shaker, arts and crafts style crowns. I'm going to cover the simple crowns first. Starting at the small end, we got a really dainty, typical ogee crowns. Got a little scoop on this end and a belly on that end. This is the number 33 small crown. This is going to cover a little gap. If your cabinets are almost tight to the ceiling, you just want a little bit of detail, that's the molding for you.
Next biggest one is the number 6 crown. This one is again an ogee. It's got the little scoop on this end and the belly. That's what we call an ogee. This is a very traditional crown. You see it all over the place. This one measures, I think it's about 2 inches tall on the rise. Next one up is a 6-19 crown. Getting a little bit bigger, going to cover about 2 and a half inches when it's installed like that. Again, an ogee crown.
The biggest one we offer, it's a standard crown. It is the number 24. We typically do this one in most kitchens. It just gives you a nice balance on a 36 or 42 inch tall upper cabinet. Then it doesn't get lost. If you start using really small crowns, unless your design taste is very simple, the crown almost gets lost. This one gives you a little bit of oomph for the top of the tall cabinets.
If you're doing 30 inch upper cabinets, your real short cabinets, and an 8 foot ceiling, you might want to stick with one of these because that's going to look too big. Again, that's the number 24 crown molding. I believe the installed rise, installed dimension, is 3 and 7/16 tall.
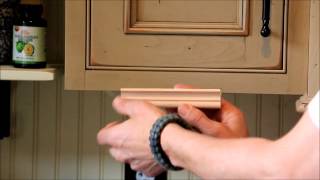
They have one crown that has a cleat. This is called the 801. It's basically the 6-19 crown with an integrated, pre-mounted mounting cleat. This is meant to sit on top of the cabinet. The cabinet front frame is here. You can kind of push and pull this molding in and out over the front of the cabinet face. Let's say you have a door. You want the cabinet door to come up right underneath the crown molding, or you can have the door set back, however you want to do it, but you're going to pin down or screw down through this cleat into the top of the front frame of the cabinet. It's a nice molding to be able to use if you have access to get over the top and pin that down into the cabinet top with the 801 molding.
On the simple end, we've got a, just a cove crown, simple scoop, cove crown. That one's the number 15-24. Don't know what the install rise on that one is. I think it's about the same as the 24. It's about 3 and a quarter, 3 and 7/16, something like that.
We have another crown with a cleat on it. It's a simple, smooth-face shaker crown, with that same installation cleat for you to come down the top of. Then, we have a reversible shaker crown. This one has a bead on one side and no bead on the other, so you can hang it with the bead not showing, or you can hang it with the bead showing. Top or bottom. We've got this decorative racing stripe going around the kitchen. Either one works fine. If the crown moldings are not with this cleat, you have to figure out how to mount that. I want to talk you through that installation issue now.
If you're going to face mount your crown on the cabinet face, let's say you're doing full overlay, inch and a quarter overlay, there's only a half an inch of cabinet showing at the top, with the door hanging over that opening and the door stopping a half inch short of the top of the cabinet.
There's not a lot of room to actually hold your crown molding up and tack to. Couple different options. One option is use Conestoga’s custom top reveal option wheel. They will actually size the door shorter to give you a bigger reveal, and therefore, more cabinet top to tack the crown molding to. That's a custom top reveal option you can specify that all the way up to an inch and a quarter. That would give you an inch and a quarter of wood to nail to.
That may not help you if you are trying to use let's say this crown molding has a 2, 2 and a quarter inch rise, but your 3 and a half inches from the ceiling. What are you going to do in that situation? This is probably the handiest molding trick I can give you. That is use 345 reversible frieze molding or any base molding that we offer. Let's just say you want a nice decorative, delicate bead at the bottom. This is our number 381 beaded base.
This would get mounted at the top of the cabinet, so your cabinet face is here. The door is kind of hanging below. You're going to mount this, pin through the groove. You're going to nail that to the top of the cabinet. Then, you're just going to take the crown molding and slide it up the face until it contacts the ceiling. Then, tack it right there along the perimeter of the kitchen. It depends on where the ceiling is, but this will slide up and down the face of that frieze molding or that base molding until the top of the crown is touching the ceiling. It gives you a lot of flexibility, as well as an added decorative element here at the bottom.
It's a very powerful tool to use in your installation. It does add some money because now you have to buy that extra crown frieze molding, the soften molding. You've got to buy that and you or your installer have to do two courses of molding. First the softened molding and then the crown, but it makes it very flexible, very easy to put in your crown and cover those unsightly gaps.
Think about this. If you have an older home and you're ceiling is not dead level, your ceiling is doing this, maybe it's running towards the cabinets or running away, and your cabinets are dead level, they've been leveled with a level, you can have a gap that starts at 2 inches at one end and ends up at 3 and a half at the other end. If you're trying to put the crown molding directly on the cabinet face, it might be tight to the ceiling on one end, but as you move across the course of the cabinets, you're going to gap at the other.
Your only alternative is to put this on first, and then, that frieze molding might have a gradual angle as it runs down the course of the cabinets, but you really won't see that very much. What you would see is a 1 inch gap above the crown molding, so you can use this frieze trim to slide that crown up and make sure it's always contacting the ceiling all the way across. If you have un-level ceilings, this is your friend. You want to make sure you use some kind of a soffit molding. If you have any questions, give us a call.