Video Transcript
Introduction
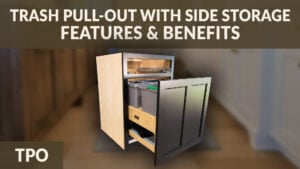
It's a glorious day here at Cabinet Joint. My name is Justin, and in today's video, I'm going to show you how to install a trash pull-out with side storage.
Here we have the double 35Q, but the 50Q, you don't have this drawer above. It takes up the entire cabinet. This video also will apply to the 50Q. The install goes exactly the same.
This is an overlay application, but this video will show you how to install it for an inset application as well.
If you have just a regular trash pull-out without the side storage, we have a separate video for that showing you how to install that system. That link will be in our description.
Tools & Supplies
For this install, you'll need everything that comes in this Rev-A-Shelf box.
As well as that, you will need to supply all the following tools and supplies.
Once you have all those ready, we can get right into the installation.
Trash Pull-Out Unit with Side Storage Installation
First things first, you will get your Rev-A-Shelf box and take your knife and open it all up, getting all the goodies from the inside.
Once you have everything taken out, you can organize it. I'm going to put the trash cans to the side because we won't use those during the installation. Then I'm going to put the actual drawer box to the side as well and open up the bags that have the drawer glide components in them.
Once I have everything organized, I'm going to take these plastic gray triangles and install them onto my glides like so. Make sure you are orienting it as the video shows. That way, you don't end up putting your glides in backwards.
To install those, you just line up the pegs with the holes, apply some pressure, and then it should click into place and lock in.
Then once you have all four of those triangles installed, you can take that metal rod, and I did it to where the lettering on it was facing down. That way, you'll never see it. And I installed them into those triangles, as you're seeing in front of you. And I went ahead and did that on both sides.
So now with my glides and my rods in the middle all put together, I'm going to then transfer that into the cabinet. And I'm going to line up the plastic piece to the front of the face frame. And then for overlay, I'm just going to bump it back ⅛" from the back of the front frame. I'm eyeballing it here. You can use a tape measure if you'd like.
If this was an inset application, I would be bumping it back ⅞". And there is some adjustability with the drawer front that allows you to push it further back or further in depending on your needs.
Once I have everything lined up, I'm going to be using the longer screws that came in your Rev-A-Shelf box, and I'm going to be installing a screw in each of the four corners. Later on, we'll be adding more screws to give it extra strength.
Then, going back to our actual drawer box itself, or the trash pull-out, I'm going to place it upside down.
It's also worth mentioning this is reversible. If you want to have your side storage on the right side, you can install the clips on the other side and then take out those metal strips that connect the box to the front and then put those on the other side as well.
And then, taking the orange clips, I'm going to be installing them using the small little screws that came in with your Rev-A-Shelf box.
So once I have those orange clips installed, I'm just going to test it and make sure everything fits right. Once you hear that click, you know it's installed properly.
Now that the box is in and I know that everything fits properly, I'm going to take some measurements so that way I know how to align my door and attach it to the front of the TPO.
So, my measurement was 2⅞". If you have inset, you will want to measure from the top of the bottom rail. But because it's overlay, I will want my door to line up with the bottom of the cabinet. So, that's where I'm going to be measuring to.
And I'm going to then take foam, put it on my table, and then put the door face down.
And then I'm going to take my trash pull-out system. I'm going to take it out from the glides, removing it.
Taking a ⅜" socket, I'm going to loosen the nut that is on the bolts for those metal connectors. That way, I can pull them out and adjust them as needed.
And then mark 2⅞" from the bottom of the door. And I'm going to place it on the back of the door and line everything up, both centered left to right. And then vertically, I'm going to line the bottom of the box with the pencil marks I just made.
So, for me, it was an inch and a half on either side. And then, like I said, 2⅞" where we made that mark earlier.
Then, using the small screws that you can find inside one of your trash cans, using those adjustable metal strips that connect, I'm going to use a ⁷⁄₆₄" self-centering drill bit and drill into the back of my door.
I'm going to connect the metal to the door itself. I'm going to complete that step on the other side as well.
So now with my door attached to the box itself, I'm going to stick it in the cabinet and see how I did with my measurements.
Thankfully, everything came out perfectly the first try. And now all I need to do is adjust left to right. And I can do that just by having those nuts on the back of the box loosened. And then I'm able to adjust left and right.
Once I have it right where I want it and it's evenly spaced in the center of my cabinet, I'm then going to tighten those nuts, and that locks it into place.
If I needed to adjust it vertically, because this is a Blum undermount drawer glide system, I can use those clips like you would any other drawer box and lift that up.
With everything locked in place, I'm going to put on these rubber door bumpers. With it being overlay, if it was inset, I would also probably put a door stop as well. That way, it catches it.
Now that we know that everything's a perfect fit, we're going to take the box out one last time so we can install all of our final screws to give this the extra strength that it needs.
Because this is such a large system and it can hold so much, we want to give it added strength so that way we can guarantee that it'll never fail over its lifetime.
For the front metal railing, I'm just going to install two more of those longer screws that came with the Rev-A-Shelf box.
Then we're going to tip the cabinet on its back, and I'm going to take a 1¼" cabinet screw and install it in that metal railing that goes across on both sides. I'm going to take them both out.
Then on the bottom of my cabinet, I'm going to take a 2x4, and I cut mine at 18". Using the holes we just made as a guide, I'm going to then apply the 2x4 and install those 1¼" screws once again from that metal railing into the 2x4.
This will give it added reinforcement and give it added strength necessary to ensure that this system works properly throughout its entire lifetime.
The Finished Product & Summary
Now, with that extra reinforcement, I can put my cabinet upright once again and install the trash pull-out system.
I can put the trash cans into it. And you can see here me utilizing the side storage with the added trash bags.
You can store cleaners, trash bags, paper towels, or whatever else you may want to put in there.
And just like that, that's all there is to installing your trash pull-out with side storage.
As you can see, this is a pretty straightforward and easy install. I know it might seem like an extra step to put in that 2x4 on the bottom, but trust me, in the long run, that will be able to hold a lot more weight than those screws would otherwise.
If you have any questions, you can reach out to your cabinet coach or you can call us at 888-211-6482.
Thank you for watching. Have a great day.