Video Transcript
Chapter 1: Introduction
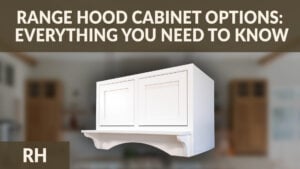
It's a glorious day here at Cabinet Joint. I'm Justin, and in today's video, I'm going to be showing you how to build a range hood cabinet. Now, this is a range hood center stile, but this video also does apply to your range hood butt door cabinets. And this customer opted to go with the shelf option, and this is going to be installed on site.
So, that is why you see some clamps here holding it together, because I was not able to assemble it here in the shop. But this video will cover how to do that. If you didn't get the shelf option, this also will apply to you. But if you did get the shelf option, we will cover how to install that.
With all that being said, let's see what tools you'll need for this assembly.
Chapter 2: Tools & Supplies
Clamps, especially if you have flush ends, but they're helpful to have; an 18-gauge stapler with 1" long staples.
Titebond 2 wood glue, a drill and a driver with a number two Phillips head, as well as a ¹⁄₁₆" drill bit and a ³⁄₃₂" drill bit. My Cabinet Joint inset jigs, a pencil for marking out. I have a posy drive screwdriver. You can also just have a number two Phillips head screwdriver, a rubber mallet, and then, if you are installing the shelf, it's also good to have an 18-gauge brad nailer, as well as 1¼" cabinet screws to attach your corbels.
So, let's get into the assembly. Because this is an inset application, the first thing we're going to do is pre-drill and install our hinge brackets. If this is an overlay cabinet that you are working on, you can go ahead and just skip this step.
Chapter 3: Range Hood Cabinet Assembly
But using our Cabinet Joint inset hinge jig, we are pre-drilling all of our holes, making sure that you are drilling in at an angle. If you want more information on how to use this jig, we have a video linked in the description with more information on that.
Once all those holes are drilled, we will then install the brackets. And a little tip as you install these brackets, if you screw from the right side, from the perspective of the inside of the cabinet, it will make your life a little bit easier because the screw will be helping you to keep that bracket tight to the front frame.
But then, putting in those screws in all of my brackets, I can go ahead and start gluing it up. And I am putting glue on the outer edges of the top and the bottom groovings. And then putting glue on both of the side shoulders of the cabinet sides.
There's no need to put glue down that middle grooving because all that it will catch is those splines, and they don't need wood glue.
With everything glued up, I'm going to first put in both of my sides. And then once those are in, I will glue halfway up the dovetail grooving.
So, with those grooves glued up, I can go ahead and put in the top and the bottom. Use a mallet if you need a little extra force, but just make sure you aren't hitting anything too hard where you could potentially damage your cabinet.
Once that my top and bottom are in place, I'll start gluing the back of the top and the bottom, as well as the outside of the shoulder of the sides.
Doing this because you want your wood glue to attach to raw wood to raw wood. With it all glued, I'm then putting the back panel on, lining up my grooves, setting it down, and then taking that mallet and making sure it is seated properly.
Once everything is where I want it, I'm then taking my 18-gauge stapler and taking 1" staples and using the guidelines that are on your cabinet back panel, putting a staple on either side of those little holes all the way down both the top and the bottom.
Because this is a flush end cabinet, I can't staple the back panel from the sides of the cabinet. So, what I'm going to do is toenail it from the back side. And each staple gun or nail gun is going to be a little bit different. But for me, I need to take my tip off, and then I rest my tip on the back, and then it shoots perfectly into the corner.
It's helpful also to have a longer clamp for this process. That way, you can squeeze the sides tight to the back panel as you're stapling them together.
With my box now assembled, I am going to tilt it up and then take a wet rag and remove any excess glue before that dries and hardens.
Once the inside of my cabinet is cleaned out, I am going to install the door stops. Locating the holes to drill by using our Cabinet Joint inset jig. With those holes drilled, I can now install the door stops both on the top and the bottom of the cabinet.
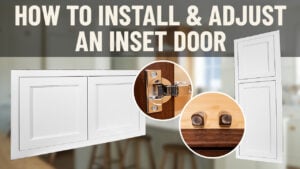
And now I'll go and grab my doors and install them by aligning them and then applying pressure until you hear that click. If you need any more information on our jigs or how to install doors, we have videos linked in our description.
Our doors will need some minor adjustments. So, using the adjustment screws on the hinge, I am making sure I have a perfect ³⁄₃₂" gap all the way around my doors.
Chapter 4: Range Hood Cabinet Shelf Installation
So, now I'm going to show you how to put the shelf option on. If you didn't get the shelf option, you can go ahead and skip ahead in the video, but if you did get the shelf option, what that will come with is two corbels and the shelf itself.
This is going to be installed finally on site, so I can't do it here in the shop. That's why I have clamps.
How I would go about assembling this is, first of all, mocking up where you want it left to right on your cabinet, as well as up and down. And then once you figure out where you like it, making sure you're using a square and then carefully laying out.
I would drill from the inside of your cabinet. Attach this here. Drill then a little bit more to make sure this won't crack.
And then attach it with a cabinet screw from the inside of your cabinet into this corbel. But I can't do that here, like I said, on site. So, I'm just going to use a clamp.
So, pretend I've now drilled from the inside and I've attached it. Then you'll take your shelf and simply lay it on top.
Have it centered with your cabinet. And then you can take an 18-gauge brad nailer, shoot two brad nails down into the corbel on both sides, and then take your touch-up kit and cover up those holes.
That is all there is to installing your shelf. As far as assembly goes, this cabinet is as about as easy as it gets. Don't let the arch bottom scare you because this will not affect the assembly in any way, and it'll still be simple and smooth.
Chapter 5: The Finished Product & Summary
And that's all there is to your assembly. I hope you found this video helpful. As always, if you have any other questions regarding maybe door hinges or colors or anything like that, we have videos linked in our description.
And as always, you can reach out to your cabinet coach if you have any questions, or you can call us at 888-211-6482.
Thank you for watching. Have a great day.