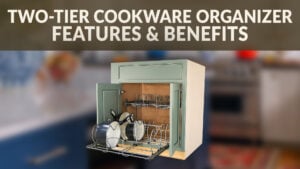
Make better use of your kitchen cabinet space with a two-tier cookware organizer. In this video, Justin from Cabinet Joint walks through the installation process, from assembling and securing the racks to adding the adjustable dividers.
The adjustable dividers make it easy to customize storage for pots, pans, and handles while the two-tier design makes better use of vertical cabinet space. Have questions about our adjustable dividers? Reach out to your Cabinet Coach or give us a call at 888-211-6482.
Video Transcript
Introduction
It's a glorious day here at Cabinet Joint. I'm Justin and in today's video, I'm going to be showing you how to install our two-tiered cookware organizer. As you can see right here, this is what it looks like. And where this stems from is the issue that it's hard to store your pots and pans efficiently inside your kitchen. So, this helps with that issue. This install is incredibly easy. In fact, so easy.
Tools & Supplies
The only tools that you're going to need is a Phillips head screwdriver, Phillips head on your driver, and a tape measure. All of the screws and the hardware will be provided and will come in a rubbish shop box for you. With all of that being said, let's just hop right into the install.
First things first, you are going to take all of your items out of your box. You should have a top tray, bottom tray, the uprights, and three bags of screws, as well as some instructions and just a little Rev-A-Shelf magazine.
We're going to start putting this together. I'm going to put both the uprights on their side. Then we're going to take that bottom rack, and it's a little hard to find those screw holes, but you're going to want to locate and install those uprights on the front and the middle screw hole for your racks.
Make sure your rack is oriented correctly with that hook in the front. Then, using the machine screws that came with your set, you are going to install those machine screws with the upright. And then I'm going to flip it over on the other side and then install those screws as well.
Once again, making sure that I'm putting them in the correct screw holes. And then from there, I am going to place it in my cabinet, and I am going to bump it all the way to the back and then center side by side.
Once I have it centered, I'm going to take the four longer screws that came in the bag, and I'm going to install the uprights down to the floor of the cabinet.
Once that is installed, I'm going to install that upper rack. So then, with those same machine screws, I am installing them on the upright. You have three holes here. That is just an adjustable height, so you can set it to whatever you will need.
Looking back, it might be easier for you if you're by yourself to just install the top rack on the uprights while it's out of the cabinet and on its side. But we were doing it inside the cabinet just to make sure everything was spaced correctly.
As I screwed those four in and made sure everything was good, everything still operated correctly. I went ahead and took those shorter wood screws, and I installed the bracket that's on the back of that top rack and screwed it into the back of my cabinet.
That adds some rigidity, some sturdiness, and I'm just going to make sure everything is still operating correctly, which it is.
And then once I have all those screws set, I'm just going to go back and install the second set of machine screws on that top rack and get everything nice and secure.
Then I'm going to take some of the dividers that come with these wire dividers and install them. I'm not going to install all of them. I'm going to leave that for the customer with her pots and pans needs, but I'm just going to install some just make sure everything fits well, as well as show you guys how they are installed.
So, with the dividers, you'll have two kinds. You'll have one that kind of looks like a lily pad and then other one that is more perpendicular.
You'll take the lily pad ones, and those will run perpendicular to the front of your cabinet. You'll take the square-looking ones, and you'll have those running parallel with the front of your cabinet.
And you can adjust these. You can have as many or as little as you want in here. But this will give you space to put in your pans and rest the handle then on that horizontal divider.
If you're worried about the uprights not being screwed into the sides, don't worry. There's plenty of rigidity with those four screws in the bottom as well as the top bracket being screwed in. That provides a level of stiffness. Your pots and pans, they're not going to be going anywhere.
Just like that, we're ready to put our door and our drawer back in.
The Finished Product & Summary
For inset cabinets, you need to make sure your opening is wide enough. And now you can see why. Because of those inset brackets, as I open, those don't interfere with each other at all. And that's why it is spaced inside the cabinet more than it would be maybe for an overlay setting.
So, there we go. Our pull out is spaced out, right? Installed right.
I can't stress enough how easy of an install this was, and I'm really excited for the customer to get their hands on it, be able to store their pots and pans efficiently, and excited to see the finished pictures.
As far as pull outs go, that install is about as easy as it's going to get.
If you would like to learn more about the two-tiered cookware organizer, you can talk to your cabinet coach or you can call us at 888-211-6482.
Thank you for watching. Have a great day.