Video Transcript
Chapter 1: Introduction
Justin:
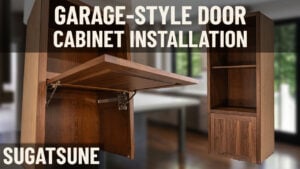
It's a glorious day here at Cabinet Joint. I'm Justin, and in today's video I'm going to be showing you how to install the Aventos HK lift hinges, which are what you see right here. Now, this is going to be overlay in the video that you're watching, but I'm also going to explain how you would install these on an inset cabinet as well.
One quick thing to note, if you haven't built your cabinet already, as you go to build the cabinet, leave the back off. In this video, I'm not going to show you how to build the cabinet itself. We're just focusing on the hinges. But, it's important to leave the back off. Or if you have an open bottom like this cabinet here, you can go ahead and put the back on. If you already built it, back's on, no worries. There's a couple workarounds. It's just easier this way.
With all that being said, these are going to be the tools and supplies you need for this install.
Chapter 2: Tools
Justin:
Once you have all those ready, we can go ahead and get into the install.
So, first things first, I'm installing ¾" blocking. This can be made with any ¾" material, and I made my blocking 4½" × 7". Now, this had a fixed floor kit, so it made the spacing a little different, but that's fine. I'm using 1⅛" screws because this is ¾" material plus ¼". And I want to make sure my screws aren't coming out on the other side of the cabinet.
Chapter 3: Assembly
Justin:
Once those are screwed into place, I'm going to measure down 1⁷⁄₁₆" from the bottom of that rail that is above here. And then I'm going to take my speed square and I'm going to create a square line going back onto my blocking.
And then this is where the measurements can be different with overlay and inset, so listen carefully.
For overlay, you are then going to measure 1¼" back and then 5¹⁄₃₂" back. For inset, you will be measuring 2⅛" back and then 5²⁹⁄₃₂" back from the front of the face frame. Both of those measurements are from the front of the face frame.
Once you have those carefully marked out, you are going to use a ³⁄₁₆" drill bit at those locations. You're going to be drilling both the front and the back mark that you made. And you are going to be doing that on both sides.
With those drilled out, you are going to take your mechanism and you're going to find that there are two Euro screws. And these are reversible. So you can see here that they pop out on either side. So those have a number two Phillips head. And then you can install them like you would any other screw with your impact, lining them up with those pre-drilled holes that you already made. That's why it's crucial you have a ³⁄₃₂" bit, is for those Euro screws here.
So, I'm then using my number, once again, my number two Phillips head and installing both screws on those holes that are already pre-drilled. This is overlay. So, if you have inset, that will be back another ¾" if it looks a little bit differently than yours does.
At the moment, I'm going to be screwing both sides in. It might take a little while to find that hole, but once you do, just go ahead and send that screw. Make sure both sides are tight.
And now you can install the door connector onto your mechanism. So to install the door connector, just rest it where the hook lines up with the bar by the orange piece and then rotate it down and apply some pressure and then it will click right into place.
Now I'm going to be tilting the cabinet on its back. So overlay or inset. This is also where it would be helpful to then have the back off. If you have the back off your cabinet, you can simply just place it face down and then put your door wherever it needs to be.
So this is overlay. So I'm looking to have a ¼" on both sides as well as then an ⅛" gap from the bottom, and that way it doesn't interact with the countertop at all as it swings. And then once my door is lined up, I'm going to take my pencil and mark out where the connector will be applied to the door.
Now, if you have inset, same process. Get your door spaced where you want it. That's where it's easiest to have it face down. And then just mark out where your connectors will be once your door is spaced correctly in the opening.
Then I'm taking my speed square to get those lines more boldened and so I can see them better. And then I'm just placing to make sure I place the connectors on the right section.
To remove the connectors, all you need to do is take your screwdriver, stick it in that opening like you see on the screen, and then pry it out and then it should pop up right out.
Then using a self-centering bit, I am lining up those connectors with the door and then drilling holes and then using the screws provided to connect the connector to the door. I'm going to do the exact same thing on the other side. Line it up with my marks. Take that self-centering bit. And this is a ⁷⁄₃₂" self-centering bit. Drilling those holes out. And then taking it's just a little ½" screw.
Then that will be needed to install the connector onto the back of your door.
Then I'm going to open the mechanism. Take those arms out. And I find it easiest to install the door is to more or less line both of them up, but then try to focus on one at a time. So once again, that hook will line up with the bar and then just apply some pressure and you'll hear a click and that's how you know it's in the right spot.
So, I'm lining it up and then just applying pressure, squeezing it, and then it will click. And now we are all connected to our opening mechanism.
Now, there are four adjustments on these mechanisms. The first screw that's on your right side here, that will be using a T20 bit, and that will adjust your door front to back on your cabinet. And then second is a Phillips head, actually posy drive, but you can just use a number two Phillips head. That will adjust your door left and right.
The third screw here is another T20 and that will adjust your door up and down within the opening. And then you have your fourth in the back and that will adjust how open your door goes, what angle it will open to.
So here I'm adjusting the door, making sure all my measurements correct. And then I am adjusting the tension. As you can see here, that little orange line kind of shows you where you are at in the tension.
Then next I'm placing little door bumpers on it. Because this is an overlay job with an inset, you wouldn't need to do this. You'd probably be installing door stoppers instead.
And then I am making sure just everything is lined up perfectly, making any final adjustments that I need to those adjustment screws that I talked about and explained earlier. And now everything is aligned perfectly.
And then the final step is to place the cover plates on each side, removing, you know, the ugliness of the mechanism and give you a nice clean, sleek look.
As far as installs go, this is a pretty easy one. The biggest things to remember is just to make sure you have the correct measurements if you have an inset or overlay cabinet and make sure you're measuring accurately. And if you do that, you will have an easy installation.
Chapter 4: Ending
Justin:
If you have any other questions, you can reach out to your cabinet coach or you can call us at 888-211-6482.
Thank you for watching. Have a great day.