In the final step of our kitchen island installation mini-series, we show how to properly secure your island and attach decorative side panels. Locking the island to the floor helps prevent shifting and keeps everything aligned as the rest of the project moves forward. Justin walks through the best method for installing decorative panels so they fit cleanly and look professional. This step finishes your island installation and ties the whole space together.
Video Transcript
Justin:
It's a glorious day here at Cabinet Joint. I'm Justin and I'm here with Josh. Now Josh, it looks like we have an island that's ready for countertop and is incredibly sturdy. What were those final pieces that you did to get us here?
Josh:
Yeah. So, if you remember, we had our cleats down on the floor before we put these cabinets over those cleats. We got everything level, square, parallel, and once we did that, we put a few screws through the side panels before these decorative panels went on to connect to those cleats. And that's what holds this thing in place. We don't want it to shift or move out of alignment as construction continues. Once we finished that, we applied these decorative frames with their matching decorative doors, both sides of the island.
Justin:
So, we take our frame and then lining it up. We already measured everything, make sure it fit, and then we are lining up the tops and then taking those clamps to apply pressure to make sure everything stays in place. And notice as Josh comes in here to screw it, he's applying pressure towards himself. That way, as he screws in, it's not just pushing it out, but actually sucks it in as well.
We are using 1" long cabinet screws here. And we want to be screwing in an inconspicuous place, but we also want to do it in a place where you are able to reach those screws after in case that end panel would get damaged during the life of the cabinet. That way, it's an easy replacement.
To get the door on once we have the frame screwed in, we are taking ³⁄₃₂" blocks that we had cut and we are using those to make sure we have even spacing all around our panel. So here I'm helping Josh once again applying pressure to make sure that as he screws it gets sucked in tight and doesn't just push it out. And then he is going to measure to the center of the style and he's going to measure from the front of the front frame.
And this is an important step. You want to make sure that your screw does not go penetrating through your floating panel there in the middle. And you also want to make sure you're able to get the most meat possible with your screw. So that's why we're measuring to the center of that style.
We're going to do the same process over here. Again, I want to note in a situation where you have to raise your island due to shimming, this might be a good opportunity to lower your panel lower than the rest of your front frame. Don't have it lined up because say that ⅛" will be hidden more underneath your countertop than it would be on the floor. But that will be up to you. And then once again, we're just using those same ³⁄₃₂" spacers to get the same spacing all the way around. And here it is. It looks great. And that's all there is to installing your end panels.
Josh:
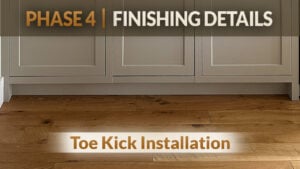
Yeah. Really only thing left here on this job is to install toe kicks. And that'll come after the flooring goes in, but that's pretty simple. They nail onto the front of all the cabinets and they'll drop right down to the new flooring.
Justin:
Wow. So, installing an island seems pretty easy.
Josh:
Yeah, it can be difficult sometimes, but this was a pretty straightforward one. We had a nice floor, minimal shimming, so it went pretty well.
Justin:
Well, thank you, Josh, for teaching and showing us how to install an island. We also have these doors installed and these drawers installed. If you have questions about that, we have other videos showing you how to do that. If you have questions at all about this process or how we installed end panels, how we installed island, anything like that, you can reach out to your cabinet coach or you can call us at 888-211-6482. Thank you guys for watching. Have a great day.