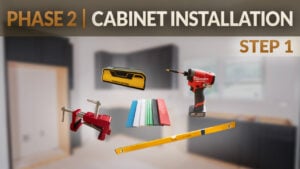
Video Transcript
Justin:
It's a glorious day here at Cabinet Joint. I'm Justin and today I'm here with Josh. And Josh, I see we have some more cabinets installed here. Now, we have a fridge cabinet here. This is a pretty large cabinet. Anything that we need to look out for when we're installing this?
Josh:
Yeah, sometimes we have a gap or a space left over to the wall. Generally, we'll send an extended style so that you can scribe fit to the wall. In this case, it was all measured and really tight. So, we want to check the wall, make sure it's plum, and then we're working off of a plum wall, which was the case here. And then we want to maintain our 36" opening. We want to maintain that.
So, you see down below, we have just a sacrificial cleat that keeps our 36" clearance. As we were putting the last base cabinet in, you can push over left and right and knock this out of plum. So, we need something fixed there to hold that while we're getting that last cabinet in. You'll get this face frame and it'll have a cleat down at the bottom that holds those two legs together for packaging and transport. You definitely need to knock that off and make sure you pull the staples out of the bottom too. If you slide that around on the floor later and forget those staples are there, you'll scratch your—if you have wood floors. There's a thin stick at the bottom; you're going to want to pop that off so you can move forward with the install.
Justin:
So Josh, I noticed that the style isn't touching the floor here. Is that intentional?
Josh:
Yeah. We want to carry the same process through the whole kitchen. We know that we have floating floors coming in here and we're going to have a refrigerator on that floor. We really want this to match a design. We need to maintain our 18" of clearance between the wall cabinets and the countertop.
So, to do that, we just carry the same process over here at the bottom of the styles on the refrigerator. We have the same shims, the flooring thickness, plus whatever shims it takes to maintain the same base level of the cabinet.
Justin:
And did you tack those screws onto the bottom like you did with the rest of the base cabinets?
Josh:
No, actually I did not tack these. I left them loose because we want to be able to slide those out so that the new flooring can slide right under these panels and look nice without having to do any notching or molding.
Justin:
Ah, that's super easy then when you're installing the floor.
Justin:
And then I see we have our first wall cabinet on. Why did you choose this little guy?
Josh:
Yeah, this was easy. I picked this one because this refrigerator cabinet dictates the starting height. Whatever the top of the cabinet height is on this refrigerator, that's the top of the cabinet height for the rest of the wall cabinets here. It's an easy one to pick. Some people may ask, why didn't you start in the corner? In this scenario, we actually have about a ³⁄₁₆" belly in the corner. Had we started there and worked this way, we may have been off our range edge and would have had to redo it. This is a guarantee. We know this is in line with what's below it. Everything's plum.
We get our 30" space here, then we run the cabinets this way. Whatever shims we may need to put behind that corner cabinet, it'll be self-explanatory. We'll see what space is left and shim accordingly.
Justin:
Gotcha. So, the fridge sets the tone then for the rest of the height.
Josh:
Yes.
Justin:
Awesome. And Josh, I noticed there's a wire underneath this cabinet. What's that about?
Josh:
Yeah, they've prepared for under-cabinet lighting. This wire comes through the drywall. We have another one over here on this side of the kitchen. Basically, we just want to locate that wire and bring it through the bottom lip of the cabinet so that it's ready for the electricians to do their under-cabinet lighting.
It's almost similar to a pipe that you're trying to drill out beforehand. You just measure, figure out where it needs to be referenced, drill a hole for it, and then pull it through the cabinet while you're hanging it.
Justin:
And then these wall cabinets obviously aren't sitting on the floor. How do you go about fastening these to the wall?
Josh:
I really like this third-hand. It has a pump adjustment; you can do really fine, minute adjustments. It's nice to have a second person up on a ladder to tell me to go up or down and let me know when that cabinet is at the perfect matching height of the refrigerator cabinet. If you can't find one of these, they're roughly around $20. You can also cut a block of wood about 18" and use that with some shims, or have one person hold it while the other lines it up and sets the cabinet. Both ways work.
Once we have it there, we're ready to mount it to the wall. We already found our stud and pre-drilled holes in reference to where the stud is behind this cabinet. We preset the screws so that all we had to do is tighten with a drill.
Justin:
As you're putting those screws in, do you have to shim it the same way as you do a base?
Josh:
Yes, just like a base. I checked this wall with a level. It was plum top to bottom, so I knew our shim space would be whatever the void was behind the cabinet. We just put the shims in, making sure they are directly behind the back panel of the cabinet so that when you tighten the mounting screw, there's no flex. You're not pulling the back panel out of the joint. We want it to be firm, solid, and stay put. We fill that void with a shim, make sure it's solid, tight, and we're good.
Justin:
Unlike the other base cabinets, I see that these face frames aren't next to each other. How did you fasten these two cabinets together?
Josh:
It's not only mounted to the framing in the wall. We actually took a measurement from here to the center of this face frame and made a few reference points, pre-drilled, and added a few extra fasteners. We also have two in the back of the cabinet and three on the side of the face frame, so it doesn't go anywhere.
Justin:
Then I noticed these cabinets have a space in between. How did you make sure they run parallel?
Josh:
Just like we have a matching shim to keep that gap parallel, we glued with an accelerant glue—a super glue with a spray. It activates the glue and bonds within seconds. We glued a spacer on the other side and up top so that when this goes up against the refrigerator, it's square, not tilting in or out, and we maintain the same spacing all the way through the back.
Justin:
I like that trick with the glue. So now we're all set to continue running the rest of our wall cabinets.
Josh:
We are. Those will all go together similar to the base cabinets.
Justin:
Now we have one side of our hood. We know that we have 30" to the other wall cabinet. So we're going to strike a line, work from there, and finish this up.
Josh:
We're not starting with the corner because this wall has a belly and we don't want to push right against it. We maintain our 30" and shim the corner off as needed.
Now that we have this cabinet in place, we can reference the bottom edge with our laser, set the bottom height, and this gives a nice straight line to work the rest of the wall cabinets off of.
Justin:
Well, Josh, we got all our wall cabinets up and everything looks nice and level. We work really quick in time lapses, don't we?
Josh:
Yeah, we do.
Justin:
What are some final things to look out for as you're installing wall cabinets?
Josh:
This one's pretty simple. The biggest thing is to make sure we're parallel with our bases down here. We have the same space for our range as we do for our hood. We work from there, adding whatever shimming we need because of the belling in the wall. In some cases, it was ³⁸⁄₁₆" of shim to close gaps.
We just make sure our laser line carries over, and everything is plum and level on the sides.
Justin:
Everything looks great, Josh. Thank you for showing us and walking us through installing wall cabinets. If you have any questions, reach out to your cabinet coach or call 888-211-6482.
Thank you for watching. Have a great day.