When installing cabinets, it’s important to plan for appliances, plumbing, and electrical outlets. In this video, we show how to properly account for pipes, outlets, and built-in appliances during your cabinet layout and installation. Learn how to space openings for items like ovens and dishwashers while keeping your cabinet run aligned. We also share tips for functionally cutting and fitting cabinets around pipes and outlets to ensure a clean, functional result.
Video Transcript
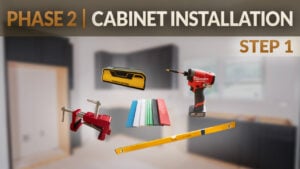
Chapter 1: Accounting for Appliances, Pipes, & Outlets
Justin:
It's a glorious day here at Cabinet Joint. I'm Justin and today I'm here with Josh. Josh, I see we have another cabinet installed. It looks like we've added a couple of steps. So, first of all, I want to ask: what are these pieces of wood here?
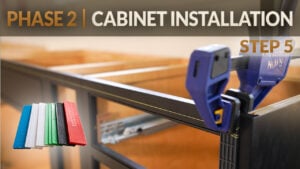
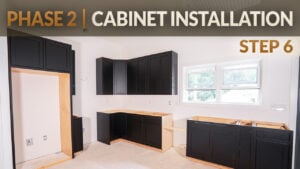
Chapter 2: Spacing Out an Opening for Appliances
Josh:
Yeah, so these are just spacers. Basically, what we want to do is we have a dishwasher going in here. It calls for a 24" opening. We've accounted for the fact that our face frames have about a ¼" overhang past the sides of our boxes on both sides. That's an additional ½". So, our dishwasher opening should be 24". We've made the cleats 24½" each. That's just to hold that spacing while we're doing the install and we don't jump off. It also gives us a point to strike a vertical line for our pipe measurements later.
Justin:
Gotcha. So, you made that mark here on the side where the spacers are. You talked about the pipe fittings
Chapter 3: Fitting Pipes Into Your Cabinets
Justin:
I see you've drilled out here in the cabinet. How did you find those locations?
Josh:
Yeah. So, because everything works off of the elevation of the room, we never want to measure from the floor up for the pipes. We actually want to measure from a constant. And our constant on this job is our level line, our laser line. Basically, what I do is I pull down from the laser line to the center of the pipe. I write the note on the wall so I don't forget it. Then I come over here to the edge of the cabinet where that vertical line you see is, and I'm measuring from there to the center of the drain pipe as well. That's how I locate my center drain pipe.
In this situation, it was not ideal. Typically, you have the water lines and the drain line come out of the same wall. Here, we had two out of the floor, one out of the wall, and the drain line was actually about 4–5" long. There would be no way to maneuver this cabinet in without cutting that pipe.
So, we've trimmed this drain pipe. We left enough to be able to glue on a fitting later. Basically, what we did was we took that same line, that vertical line on the floor, and we measured off the base of the cabinet over here and struck a pencil line parallel with that wall. That way, we can measure from that pencil line to each pipe center for the two water lines. Then we measure off the back wall to the pipe center from our front-to-back measurement. We just reference those holes, bring them into the cabinet, and make our cuts.
One thing I would mention is we want to slightly oversize our holes. Not too big, because we want the discussion rings to cover and look nice at the end. But we also want to be loose enough that if the pipes are installed crooked, we're not stressing the water lines. That could cause a flood a year down the road if we're pushing too hard on these pipes. So, we want some space for them to come through.
I also want to mention that when we do this back hole, we don't want to just plunge through the back of the cabinet with a hole saw because we can get tear-out in the veneer finish. So, I actually mark the back of the cabinet, do a pilot hole, and then finish it from the front with a hole saw.
Justin:
And so, how imperative is it that you nail those measurements?
Josh:
You know, you have drains, a disposal, cleaning products—there's a lot going on here. It's nice when it looks tidy. It's not the end of the world if you were off on your cut; you could always skin it with a new piece of material or order a jumbo-size discussion ring.
Justin:
So all the gap that we see here, that's all going to get covered?
Josh:
Yes, it will all get concealed.
Justin:
This is all great information, Josh. Is there any other time that you'll need to cut out in your cabinet?
Chapter 4: Outlet Cutouts in Your Cabinets
Josh:
Yeah, occasionally you'll have an outlet or two in a base cabinet for the disposal or if you have an air switch for… Well, that is for your disposal as well. But yes, you will have to do outlet cutouts with those.
The only thing to note is that on an outlet, you don't want to oversize the height of a hole because you need the little ears at the top to grab the cabinet back and not suck in completely. So, really, you're just measuring from the top of the screw to the bottom of the screw when you make your cutout height.
And then you're using the same exact technique. You're referencing off the constants—your top laser line and your side profile line of the cabinet.
Justin:
Awesome. This is great information, Josh. Thank you. If you guys have any questions on these topics that we talked about today, you can reach out to your cabinet coach or call us at 888-211-6482.
Thank you for watching. Have a great day.