Video Transcript
Introduction
It’s a glorious day here at Cabinet Joint.
I’m Justin, and in today’s video, I’m going to be showing you how to install the Sugatsune garage door hardware.
This video does not cover the assembly of this cabinet. If you want more information on that, we have other videos in our catalog that you can find. We’re just going to be focusing on the installation of this hardware.
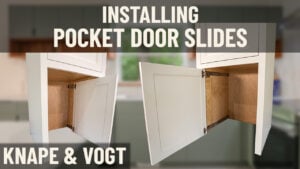
So, garage door hardware essentially allows your door to stay closed, but then instead of opening traditionally to your side, you can pull it up and slide it back in your cabinet.
These have become increasingly more popular, as well as the side pocket doors. The side pocket doors open up to the side, but then they slide back in, and they are both great options. As you’re considering which one would be better for you, just think about the overall height or width of the door compared to the depth of your cabinet.
Right now, this door is sticking out about 7 inches, and that’s because we are dealing with a 14-inch opening and only a 12-inch deep cabinet. So, there is spacing in the back for the mechanism as well, and so it pushes out the door even further.
If you don’t want to have 7 inches sticking out, maybe a side option is better for you. These are all things that you can talk to your cabinet coach about, and they can figure out the best option for you.
But we’re just talking about the top-lift garage door today. These are becoming more popular because it’s nice on your countertop to be able to hide your appliances — your blender, your toaster, your KitchenAid, things like that.
When you want to pull them out, instead of needing to open a door and losing counter space as you open up that door, you can just open up, slide it back in, and pull it out for easy access.
That’s why they’re becoming so popular.
This is going in an office, and we’re going to be putting in a printer, a Wi-Fi router, those types of things. It’s nice to be able to hide those items that you still need to get access to often.
Specifications & Considerations
And just to be clear — you see there’s no bottom on this cabinet. That’s because typically, you find these just directly on top of a countertop.
You can install these hinges elsewhere. I’ve seen them on top of a fridge cabinet, and sometimes just those high openings that are next to your ceiling on a cabinet. You can realistically place them anywhere.
Measurements you need to consider as you are planning for this cabinet:
First of all, what are you going to be putting inside of here?
If you’re putting a blender or KitchenAid, you have to be aware of the height.
Just because your opening is big enough for your KitchenAid to fit doesn’t necessarily mean you can still use this door — because I lose about 2 inches from the opening just so this door can fit and slide back in.
Another thing, like I said earlier, you need to be careful of the door size ratio to the depth of your cabinet. The taller your door is, the more it’s going to stick out as you slide it back.
It is possible to have your door slide all the way back into the cabinet, but you’re just going to need a shorter door or a deeper cabinet in order to accomplish that.
This system comes in 14-inch, 16-inch, 19-inch, and 24-inch depths, depending on the depth of your cabinet. All the measurements stay the same for the installation process, so everything I’m going to be showing you today applies for all of those systems. The only difference is that the slides change in length.
There is no real restriction for the sizing of your door. You can make it as wide as you want and as tall as you want, but there is a restriction with weight — and that’s something you can talk to your cabinet coach about just to make sure you don’t end up with a massive, heavy door that would break the glides.
It’s worth mentioning too — this is only available for inset cabinets, because it would be physically impossible to do with overlay.
It might look complicated, especially as you get the packet and see all the hardware that comes inside. It’s intimidating at first, but trust me — follow along with the process, and it’s a really easy step-by-step.
Tools, Supplies, & Preparation
Tools and supplies that you’re going to need for this install include:
The Sugatsune pack — it will contain all of the mechanisms, screws, and slides.
It comes in several small plastic bags; open them up as we go and install. Keep everything organized and don’t mix it all together.
The pack also includes instructions (in millimeters). These are here if you need them, but if you follow this video, you shouldn’t need them.
You will need blocking for the inside of your cabinet to make it flush with the inside of your face frame. It needs to be 3/4-inch material.
We have a matching interior cabinet, and that means we need matching interior blocking. Talk to your cabinet coach and make sure you’re getting extra material sent. If not, you can use shelves from your project and they’ll send you replacements.
You’ll also need screws to install those. You can use staples or nails, but I’m using screws here. The biggest thing is to make sure that they’re not too long — you don’t want them sticking out the front or side of your cabinet.
Other tools:
A couple different squares for marking,
A Phillips-head screwdriver,
A drill with a 3/32 bit,
An impact with a Phillips-head bit,
A 1-3/8 Forstner bit for hinge cups,
A self-centering bit,
A 3/8 drill bit,
Pliers to bend door stops,
Pencils, tape measure, clamp, and painter’s tape.
These are all the things you’re going to need for the install.
Sugatsune Garage-Style Door Installation
To begin this process, we first need to add some blocking to the inside of our cabinet. We needed to block it out 3/4 inch, and that’s what we did here.
We are screwing it from the outside. If you have a flush end, you can screw it from the inside — it doesn’t matter. This cabinet has a matching interior, so we’re using a shelf with that matching interior.
If yours has just the normal white birch interior, you can use any plywood from your job — just make sure your screws aren’t too long.
In this case, we have 3/4-inch blocking and plywood for the side, so we’re using inch-and-eighth screws.
Once the blocking is installed, we can then install the glides.
We’re going to install the glides by first measuring 2 and 9/16 inches down from the bottom of the rail above, and then 1 and 1/8 inches back. I’m using a square to connect those lines — that’s the first point for our glide.
I’m drilling a hole there now because it’s easier before holding the glide.
Taking the glide from the pack, use the very front hole and set a screw into that hole we just drilled. I’m using the screws that come with the pack.
Once the front screw is in place, I’m using my square to keep the glide straight and parallel with the cabinet, then putting a screw in the back.
Repeat on the other side — it’s the exact same, just mirrored.
Now that the glides are installed, I’m going to install the mechanism.
This mechanism has a right and a left — they’re distinct. The way you can tell which is which is the arm will be pointing toward the front.
Here I have my right side. This comes with machine screws, and you’ll see three holes on the plate. Use the left and right holes first; leave the middle one out for now because those two have front-and-back adjustment. Once you put in that middle screw, you’re locking it in, so we’ll save it for later.
Now, I’m going to install the rollers. Measure 9/16 inch back from the back of the face frame and 1-1/2 inches down from the bottom of the rail. Use a 3/8-inch drill bit and drill deep enough to insert the plastic threaded insert.
It’s a tight fit — I used a clamp to press it in. Then install the roller using the machine screw into that insert.
Next, we’re moving over to the door. You’ll notice there are no pre-bored hinge holes — this takes special locations.
Measure 15/16 inch down from the top of the door and 1-5/8 inches over. That’s the center point. Use your Forstner bit and drill deep enough for the hinge cup, but not through the door.
Install the hinge using a square to ensure it’s straight. Use a self-centering bit to drill pilot holes, then attach the hinge with the screws from the pack.
Before we install the door, we need to apply the strut connectors to the back of the door. Measure 3-3/8 inches down from the top and 1 inch over from the side. Drill a small pilot hole with a 3/32 bit and attach the connector with screws.
Now both hinges and strut connectors are installed, and we can put the door inside the cabinet.
Click the hinges into the inset brackets — hook the front, then press the back until you hear a click.
Pull the struts out all the way to give yourself more room, hook the strut arms onto the connectors, and secure them with the machine screw.
If you follow the instructions, the next step would be installing the guard plates (front and back). I like the look without them, so I’m not using them here — but they help prevent objects from obstructing the glide path.
Test the door by opening and closing it to ensure everything fits. Then, install the door stops (we have a separate video on these). Bend them flat and place one on each corner so the door doesn’t swing too far inside the cabinet.
Now make your final adjustments on the door.
Front screw = up/down
Middle screw = left/right
Back screw = in/out
On the strut, you’ll see a Phillips-head screw — this adjusts the closing tension. Heavier door = higher tension; lighter door = lower.
Once adjustments are complete, go back and install the screws we left out earlier (the middle screw on the glide plate). This locks everything in and adds strength.
The Finished Product & Summary
Now that all adjustments are complete, I love the reveal all the way around the door — a clean 3/32 inch.
This provides access to the inside without any doors swinging out to the side and obstructing access. It’s a clean look, and I’m really happy with how it turned out.
That’s all there is to installing this hardware. Like I said, it’s pretty easy as long as you follow the steps and measurements. Even if you’re slightly off, there’s plenty of adjustability in the mechanism.
This provides a very practical and clean-looking option to utilize your cabinet space — whether in your office or your kitchen.
If you have any more questions about this or installation, talk to your cabinet coach or call us at 888-211-6482.
Thank you for watching. Have a great day.


