Video Transcript
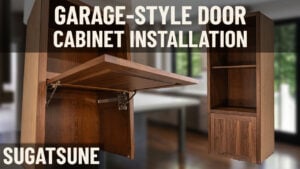
It's a glorious day here at Cabinet Joint. I'm Justin, and in today's video, I'm going to be showing you how to install the Blum Aventos HK lift hinges. These hinges are super nice. Typically, your door opens to the side like this, but these, as you can see here, lift directly up. This comes in handy in a multitude of different ways. Most of the time, you're seeing this on a fridge cabinet and other sorts of taller cabinets where it’s just those upper ones that are hard to reach. This makes it easier to open and also more accessible.
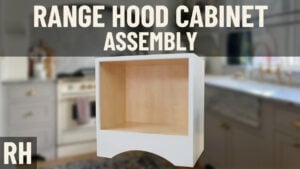
One quick thing to note is that this cabinet is for range hoods. So, you see the extra grooving and stuff that's inside of here—don’t let that distract you. The inside of this cabinet will never be used for storage and really never be seen. It's just to have access to your range hood and to be able to maintain it as needed and clean it out and stuff like that. So, please don't be distracted by the seemingly unfinished inside.
This video does not cover the assembly of this box—it is already assembled as we go into it. It only covers the installation of these hinges. But I will say, as you are assembling, please leave off the back. It will make your job a lot easier because it's then easier to install the door. So, assemble your box and then pick up right where we are in this video, but leave that back off.
Tools, Supplies, & Preparation
For tools and supplies that you're going to need to install your Aventos HK lift hinges, you can start out by getting yourself a drill with a 3/32 drill bit, another impact with a number two Phillips head, and a screwdriver. We have the Blum one here—the Blum one works best—but you can also use just your standard number two Phillips head screwdriver. You’ll also need a pencil, a tape measure, and our Cabinet Joint inset jig.
You will also need your door stops that come with your job. You're going to need some material to block out your cabinet walls, so you’ll need some 3/4-inch material. I also highly recommend that if you have any doors with glass panels in them and you're going to be able to see through, make sure you get a matching interior—but your cabinet coach will take care of all that for you.
Make sure you have your blocking and then screws—just wood screws—to install into your cabinet sides. Make sure you don't get screws that are too long and that are going to poke through that side. I have inch-and-a-quarter screws here because I have 3/4-inch material and a 3/4-inch cabinet side. If you only have a 1/2-inch cabinet side, only use an inch-long screw.
You’ll also need a bit for those screws. You will be getting two boxes with the Blum logo on them, and in those boxes, you’re going to get the actual lift hinges themselves. This is the Aventos HK lift hinge right here. You're going to be getting the hinges, six screws for installation, and a cover plate that covers up all that metal inside and looks really clean.
With all that being said, let’s get into the install.
Blum Aventos HK Lift Hinges Installation
In this video, you will notice that holes have already been drilled in different parts of this cabinet. That's because these hinges were already installed by the time of making this video, but trust me, we did the exact same steps that I’m showing you here.
The first thing we’re going to do is install that blocking. For this, I just used inch-and-a-quarter screws to install a 3/4-inch piece of plywood so that our cabinet side is flush with our face frame. You can go ahead and butt it to the front. I had to move my block down slightly to be able to catch all the screws for this hinge, but if your block's big enough, you don’t need to worry about that.
Now that we have the blocking installed, we can install our hinge. We have three screws that we need to locate where they're going to go. I built a template for this—you don’t need to use a template. On the screen is a picture of my template here. You can just pause the video, use those measurements on your cabinet side, or you can use a piece of cardboard or paper and mark out those measurements.
If you're only building this once for your house, it might not be worth the time, so you can just use those measurements directly on your cabinet side. Worth noting as well: make sure you are using the correct left and right side because those measurements are different.
This is an inset application. For overlay installation, your measurements will just be 3/4-inch less from left to right. These hinges can be installed on either side, but the thing you have to look out for—and the reason we can't just use the same measurements on both sides—is this: on the right side of your cabinet, notice there are two screw holes up here. If you were to install it this way, your screw would go here on the left side where that hole is. But when you flip it over for the left side, that screw is now being installed in the center and the one furthest toward the front frame. That’s why we can’t just use the same measurements for both sides.
Once you’ve pre-drilled those holes, you can screw in your hinges. Then, with those hinges secured, we can install the clips on the hinge.
This is where it’s super helpful not to have the back on your cabinet. Me and my shop helper are going to move the cabinet off to the back. Then, we’re going to put a door face-first onto our table, and then place the box over top of that. Once it’s in the hole, we’re going to adjust the door so that the reveal all the way around is equal. Then, we’ll take a pencil and trace where those clips will go.
Once that’s traced, we can take our cabinet off, put it to the side for now, and looking at our door, you’ll see those marks. Taking the clips off the hinges, you can then place them on the door, line them up with your tracings, pre-drill, and install two screws.
Now, with the clips on the door, we can install the door back onto the hinges. To do so, you just angle it up—those clips have hooks that catch on the hinge—and then you just squeeze them, and they pop right into place.
At this point, your door is on. You’re doing a great job—you’re almost at the end. Just a couple of fine-minute details left. Close the door and check for any adjustment needed to make sure all the reveals are perfectly equal. Once you’ve determined what needs to happen, open your door again and make your adjustments.
To do so, there are three screws: starting from the top, your top screw adjusts in and out (that’s from your face frame—either further into your cabinet or further out). Your middle screw adjusts left to right. Your bottom screw adjusts up and down. Using the combination of those three, you can get your door to have a perfect reveal all the way around and remain in line with your face frame.
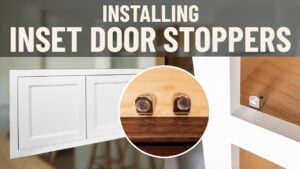
Now that I’m done adjusting and all the reveals are perfect and in line, the last step for the door alignment is to install those door stops. You’ll notice we are using our Cabinet Joint inset jig. You will receive one of these when you order an inset job with us. Using that, we are locating the holes to install our door stops. You’ll notice these door stops are bent. We have an entire video about door stops—you can learn more about that using the link in our description.
Once you have your door stops in place, we’ll focus on the door opening and closing speed. We are going to adjust the power factor, which is located on the back of the hinge. This adjusts your resistance as you open and close the door. There’s a Phillips head screw back there that adjusts a cam, and you can adjust that to give you more or less tension depending on how big and heavy your door is.
I’d recommend using a drill for this because it goes a lot quicker than a hand screwdriver, and I’d recommend getting both sides pretty equal—otherwise, one side will open and close harder than the other.
Now, the door opens and closes at a speed that I like, and all of the reveals around the door are at an equal margin.
The Finished Product & Summary
The last step for this cabinet is to put the back on. Now that this cabinet is fully assembled and the hinges are installed, it is good to go and be installed in the kitchen.
I hope you found this video helpful as you’re installing your Aventos HK lift hinges. Key things to remember are the measurements we talked about, making sure you orient your left and right sides correctly, and then adjusting your door to get all those gaps perfect—adjusting that back screw and keeping the resistance on your door balanced.
You’re going to need more resistance for a heavier door and less resistance for a lighter one. These hinges are a great option to give you more accessibility in tall cabinets or upper cabinets in general.
If you have any more questions, reach out to your cabinet coach or call us at 888-211-6482.
Thanks for watching, and have a great day.


