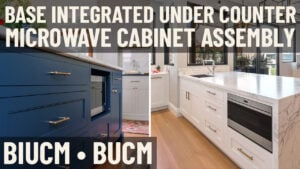
A successful cabinet installation starts with proper assembly. This video walks through the complete assembly process for a wall appliance cabinet, including inset hardware preparation, frame assembly, back installation, and final door adjustments. Whether you’re building a cabinet for a kitchen appliance garage or another storage application, these techniques help ensure a clean, professional result.
Key Takeaways
- How to prepare inset cabinets with hinge bracket drilling
- Proper glue placement for strong wood-to-wood connections
- Installing cabinet sides, tops, and dividers using sliding dovetails
- Techniques for seating and securing the cabinet back
- Using scribe lines and stapling methods correctly
- Cleaning excess glue before final assembly
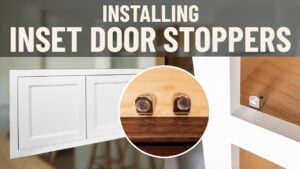
- Installing hinges and door stops
- Adjusting doors to achieve consistent reveals
Whether you’re a DIYer or a professional, these tips will help you achieve a high-quality result. If you have questions about assembly, hardware placement, or door adjustments, reach out to your Cabinet Coach or give us a call at 888-211-6482.
Video Transcript
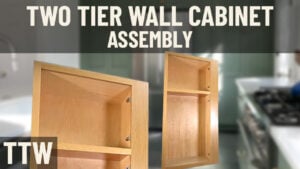
It's a glorious day here at Cabinet Joint. I'm Justin, and in today's video, we are going to be assembling a wall appliance cabinet. These are the tools that you'll need for this assembly.
Tools
Once you have all of that ready to go, we can get right into the assembly. Because this is an inset job, we'll first start off by installing our inset hardware. If you are building an overlay cabinet, you can skip this first step.
Assembly
What I'm doing is using our Cabinet Joint inset hinge jig and going into all four corners of each opening and drilling at an angle, making sure it's at an angle to drill out the holes for our door brackets. I'm going to go ahead and do that on both sides, and then I will install my door brackets.
Once I have all of my hinge brackets in, I will begin gluing the back of my front frame, going down both of the side grooves and then on my top and my middle divider. I'm just going to be putting glue on the outer edge. That way, glue doesn't seep inside my cabinet. But you can do both edges if that makes you feel more comfortable.
So, I'm putting glue on both sides, making sure I am getting that raw wood-to-raw wood connection, not worrying about gluing the center groove because that's where our splines will go.
Once everything is grooved, I'm going to first begin by putting my cabinet side on, and then I'm going to put my other cabinet side. This happens to be a flush end, and I am pressing it all the way down, making sure it's a nice tight fit.
Then I'm going to put a bead of glue halfway up the sliding dovetail. The reason I'm putting it on that upper half is that as I slide down my cabinet top, it'll take that glue with it. So, I am gluing all four of those sliding dovetails, and then I'm going to install my top and my center divider.
With those all the way seated, you might need to use your rubber mallet and give it a little extra influence to make sure it's all the way down. But once everything is seated correctly, I'm then going to take the wood glue and go across the back of both the middle divider as well as the top.
Then I'm going to be going along the sides of the shoulders on the cabinet sides. I'm not going to put it on the bottom of those shoulders because glue will not adhere well to the finished panel. But once again, that raw wood-to-raw wood connection—that's where the strong bond will be.
With all that glued, I'm going to be putting on my cabinet back. Once again, using my rubber mallet to make sure everything's seated. You can tell everything is seated when you look at that joint from the top and see the back is touching the routed edge of the sides.
Once I know everything's seated, I'm ready to start stapling. Using the scribe holes that are provided on the back of your cabinet, I'll follow that line across my back and put a staple on either end of those holes.
I'll be doing this for both the top and the middle divider.
Because this is a flush end, I need to staple my cabinet back to the sides using a toenailing method. Then, with the other side, because it isn't a flush end, I'm going to be taking my Cabinet Joint inset jig and using the cabinet scribe line. I will put my pencil in that hole and run it all the way across.
That will give me the perfect line where I need to shoot staples in from my side into my cabinet back.
Now that this is all stapled together, I am going to flip up the cabinet and, with a wet rag, clean up all of the glue that may have seeped inside.
Next, we are going to install our doors. The first thing I'm going to do, with the hinges already installed, is clip them onto my cabinet.
Because this is inset, we need to use door stops. Then, because this is a butt door, we are going to use the center line on our Cabinet Joint inset jig. I'm going to install one door for now, close it, and then line up one side of the carrot of the jig with the edge of the door. That will give me my center placement.
Then I'm going to drill using a ³⁄₃₂" drill bit on both of those holes on either side of that carrot.
When it comes to the bottom opening, I'm going to be doing the same process, but instead of on the cabinet ceiling or bottom, I'm going to be doing it in the back of the front frame.
Now I can install those stops, which should align my doors perfectly flush with the front frame. Because I'm not installing the stops on a cabinet ceiling or a flush side of the cabinet, I need to bend them so that they're flat.
My last step is to make final adjustments to my doors, making sure that I have a perfect ³⁄₃₂" gap all around each door.
That's all there is to assembly. If you have any questions, you can reach out to your cabinet coach, or you can call us at 888-211-6482.
Thank you for watching. Have a great day.