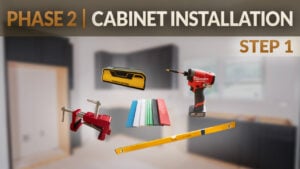
Video Transcript
Chapter 1: Introducing a Second Cabinet to the Run
Justin:
It's a glorious day here at Cabinet Joint. I'm Justin and I'm here with Josh. And Josh, I noticed we have a second cabinet here. And I also see that everything is nice and level. How did you get to that point? Was it the same as the corner for the most part?
Josh:
Basically, the first thing we did was laser at the same elevation. We're going to maintain that through the whole install. We knew that this was the high side of the room. And as we work away from this, the room dives down. It's not bad. Maybe a heavy ¹⁄₈" by the end of the run. We just put the shims down there underneath this cabinet on this side. We use the laser to tell us when we were shimmed just right. So here we are. We're all in the same plane. Everything's ready to go. And the next thing we're going to do is connect these face frames.
Justin:
So with the shims, I noticed that it's not sticking out like you did on the last one. Why are these ones tucked underneath?
Josh:
So we don't need a share of shim on this side. We actually have a dishwasher going here. So, even if we did forget and we hung it out halfway, we could easily trim it off. But that's the reason you're not seeing them on this side.
Justin:
Understood. So now, once it's shimmed and everything's level…
Chapter 2: Clamping & Attaching Face Frames Together
Justin:
Then you said you were connecting the face frames.
Josh:
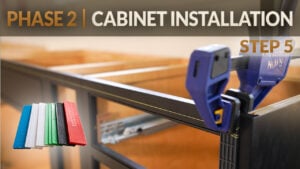
Yeah. So, we did go ahead and connect these face frames. And the way we did that is we used our F-clamps here. We also have these cool face frame clamps. These actually do two operations in one.
What they essentially do is they grip onto the back of the frames and you can tighten them this way and it will pull them together, and then you can tighten this, and what that does is put forward pressure on both face frames to bring them into plane. Our goal here is to close this gap all the way down as tight as we can get it and not add additional length to this design. That would cause us problems in the long run if we create additional length. So, we want these gaps as tight as we can get them.
Since this is inset and you see everything, we really want to spend our time making this flush. And because this is hard maple, hard maple is a stubborn wood. It's very dense and it likes to bow and twist. We sometimes have to coach it with the clamps in multiple spots to get it all to sit in align. Once we have this all clamped up, we'll come through here with a pilot bit and we'll remove a little bit of material. That's about a ³⁄₃₂" pilot bit. It's just enough that it basically matches the shaft of the screw without the threads. We don't want to take all the material out or the threads won't grip. So, we'll do a pilot hole. We want to make sure that we keep it very much parallel to this face. We don't want to go at an angle because when we put that drill bit in or the screw, we can breach the front of the face frame or even if we don't breach it, we can actually create a bulge that you'll see when the light hits it.
We really want to take our time to stay parallel with this frame, centered on the thickness of the frame. Super important part. I typically go one up top, one in the middle, one down at the bottom. And again, sometimes you have to coach it a little bit. It will fight you, but our end goal is to close that up and keep it all in the same plane.
Justin:
Now, what size screws are you using?
Josh:
I prefer a 2" screw. So, here we have 2" and ½" frames coming together, 3" total. This is on the floor. It's not going anywhere. It's not going to drop. When it has 1,000 lbs of countertop on it, there's nowhere for this to go. It's going to stay fixed in place. Our goal here is to hold these together so that they don't spread apart later.
I prefer a GRK series screw. There are cabinet screws for mounting to the wall and there are finish screws with a smaller head. I prefer the finish screw. You can just slightly bury the head. It looks pretty good. If it bothers you, you can always take touch-up putty and fill over the head.
The downside to a longer screw, 2½", is you're getting really close to the opposite end of the frame, and you can actually create a crack here, and we don't want that. We want it to be durable, stay intact, and look good.
I also want to mention, you should be strategic in planning where to put these screws. If you have a drawer base, you'll never see these screws. If you put the screws on the drawer side of the connection, your drawers will conceal all the screw heads. If I put the screws here, you open the door, you'll see the screw heads. I chose to put the screws back here where it's a little harder to visually see.
Justin:
So, you're concealing the screws as much as possible.
Josh:
Yes.
Justin:
Awesome. Well, I think that's everything for attaching the front frame. And while I have you here, I see there's a block of wood in the back.
Chapter 3: Maintaining a Parallel Cabinet Run
Josh:
Once we tighten this connection, we're going to have about, roughly, ⁵⁄₈", maybe a ¹⁄₈" heavy. We want to match this space with just a sacrificial block. And I attach that with a cabinet screw. It's a 1½" cabinet screw down low. It could be done up top. One of the benefits of doing it down low is if this cabinet gets damaged in the future and you need to pull it out and replace it, if you have a countertop here, you're never going to have access to a screw high. So, we put the screw low. We can get to it later if we need to. What we're trying to do is create a parallel channel here, the same width. That will help us stay parallel with our wall here.
Justin:
That's good. So, it's just keeping everything in line then.
Josh:
Yep. Keeping it all squared up and parallel.
Justin:
Well, thank you, Josh, for showing us how to attach our face frames as well as make sure everything is shimmed and level. So, if you have any questions on attaching your face frames or how we are continuing this cabinet install, you can contact your cabinet coach or call us at 888-211-6482.
Thank you for watching. Have a great day.